Leaderboard
Popular Content
Showing content with the highest reputation on 01/15/24 in all areas
-

Naughty & Nice (30 MBF21 Doommas Maps!) (RC1)
rita remton and 22 others reacted to Death Bear for a topic
Celebrate Doommas with Pineapple Under the Sea Studios! 30 MBF21 Maps for Doom 2! RC1 Download HERE (Google Drive) Happy New Year, you filthy animals! I woke up from hibernation just long enough to ship you a late Doommas gift. Created from December 21st through the 24th of 2023, PUSS XXXIV brings you 30 Doommas maps split evenly into two episodes. Santa Bear asked mappers which list they wanted to be on, and the response was this lovely little megawad that we put together. We used the Enhanced Christmas Resource with a few extras to set the tone for our first ever MBF21-format event, and each map was made in 2 hours or less. Target Port is DSDA. "The Nice List" features more easy-going maps that heavily feature our cuddly bunny friends running amok as we slay demons. Perfect for those who want to enjoy a "chill" Christmas-themed wad. We've even got a bunny race in this episode! Probably the cutest thing I've ever played in Doom. "The Naughty List" provides some intense maps that are generally more "cooked". (Scionox said "Christmas Peaks" may be the hardest PUSS map he's made. That's saying something.) Some of these have difficulty settings, so if you can't handle the UV-heat, then consider dropping down. If micro-slaughter, slaughter, lots of Cyberdemons and Archviles, and combat puzzles are your jam, this is the episode for you. If not, you've been forewarned and I'm not responsible for your tears on stream come next December. They only fuel my rage for Doommas #5. With 20 contributing mappers, we made Pineapple Under the Sea's 4th Doommas celebration an enjoyable one. We mapped fast. I know I enjoyed drinking hot coffee and mapping. A lot of you probably won't get around to this until next season, but I'll be keeping an eye out as we get there. As always, we want to thank all of our playtesters for helping us catch and fix stuff. A few of you streamed this, and we really appreciate it! I hope you all enjoyed yourself along the way! As always, I want to thank the mappers and the event staff at Pineapple Under the Sea for all of your hard work in helping this get to the finish line quickly. A particular shoutout to Peccatum, who crafted us a lovely ENDOOM. Mappers, once again, please check over your work and be the eye-in-the-sky for me as we get ready for idgames release. Anyone out there deciding to play a Christmas wad in mid-January, please report any bugs you might find. If I missed your credit, I apologize...just let me know and I'll fix it. Here's the map and track list: There were a lot of great Christmas-themed wads this year, so enthusiasts of festive doom wads that didn't get around to playing everything will be eating good next year. We're not sure when we'll be back this year, but we've got more releases coming, first of which (I believe) will be this. Stay tuned!23 points -

The DWmegawad Club plays: Eviternity II
Cutman 999 and 20 others reacted to Aurelius for a topic
Big thanks to everyone putting all the effort into writing these, it's been a joy to read and to follow your Evi2 journey. And another thanks for all your kind words on MAP14, it's great to read detailed accounts of your experiences; what you liked and what you might've not liked so much. Time for some rambling then, I guess! Which means a semi-coherent wall of text. I've divided it into sections, so you can pick the part that interest you the most. Gameplay: Visual style: Puzzles: Music: Map name:21 points -

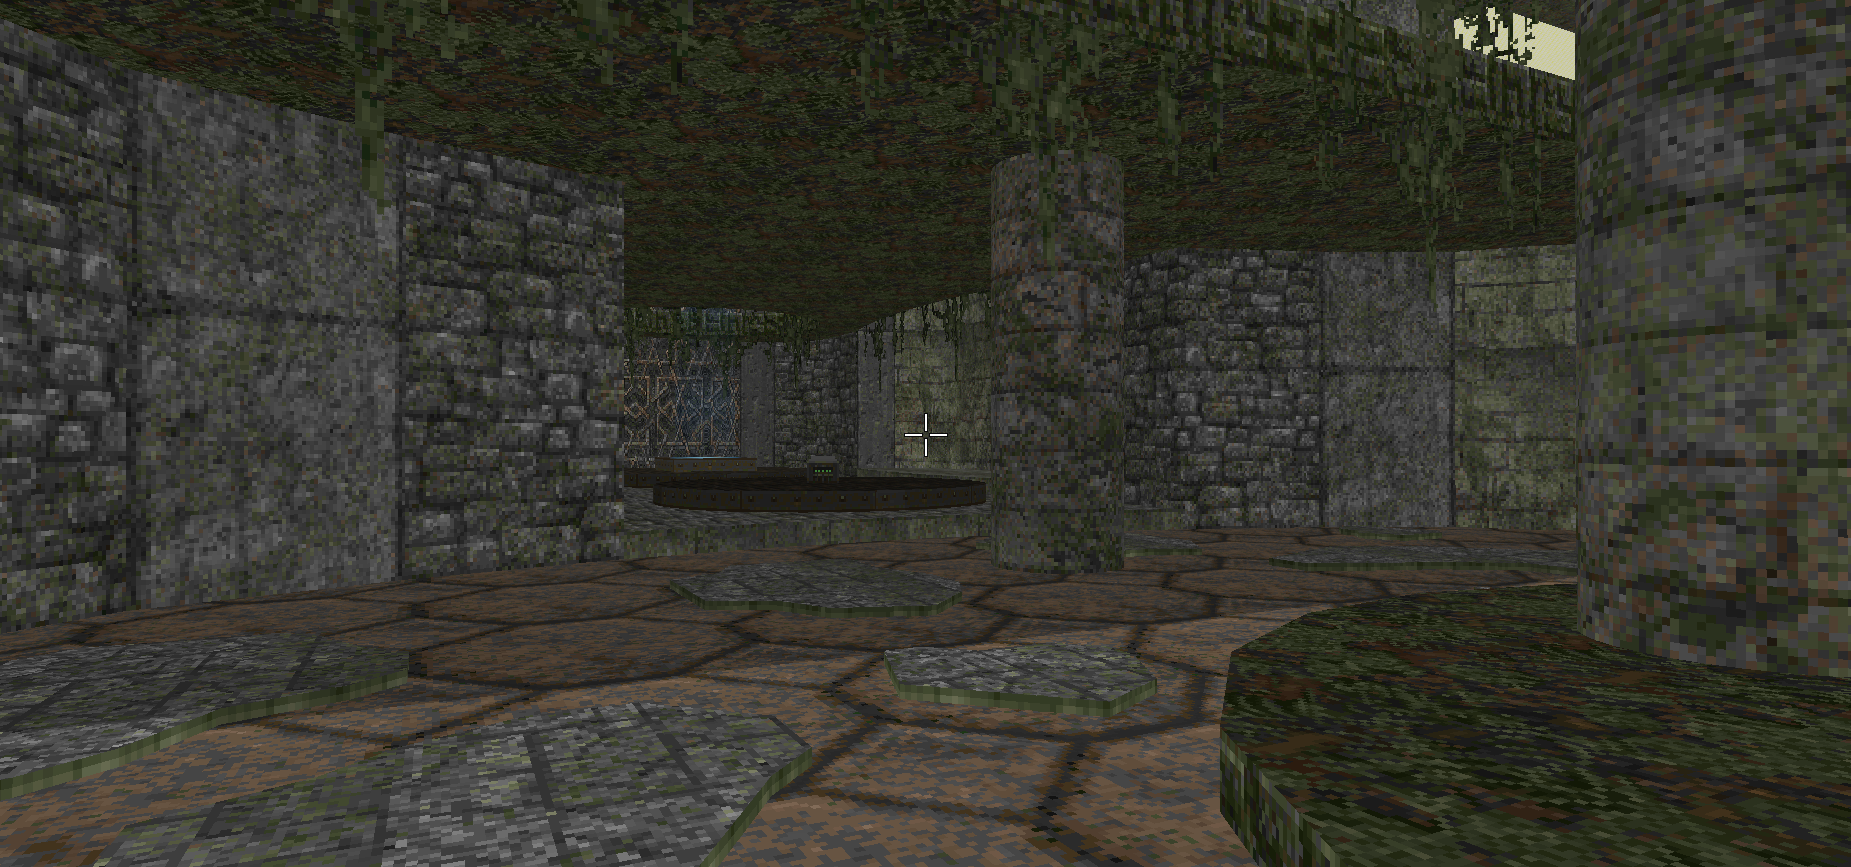
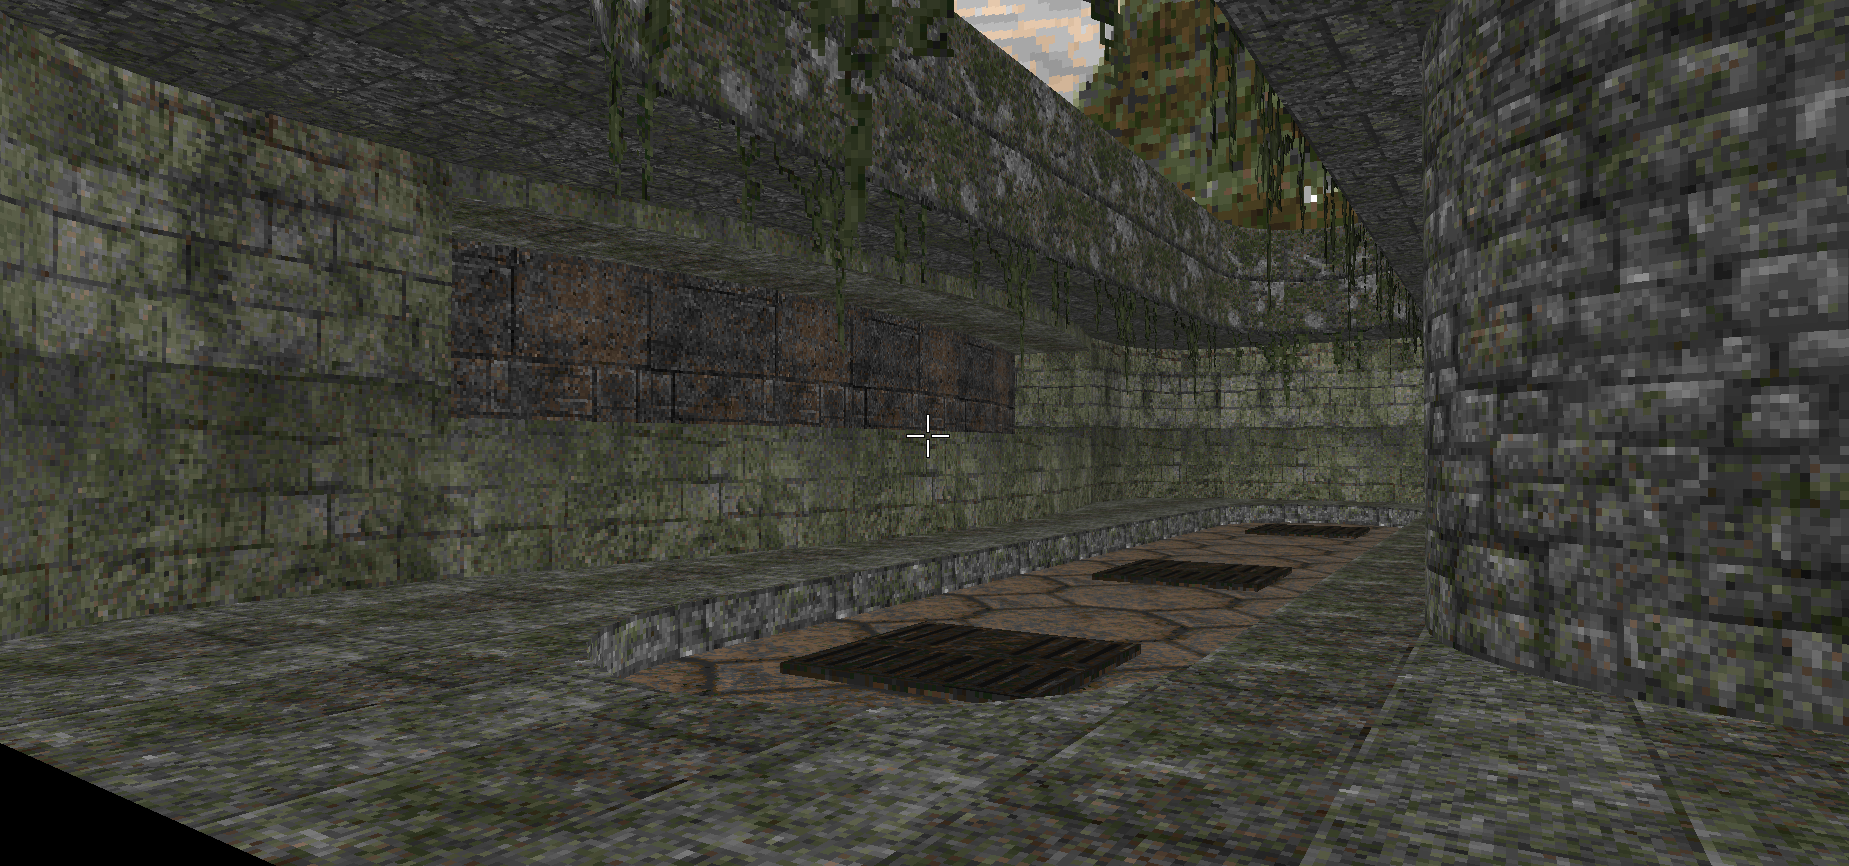
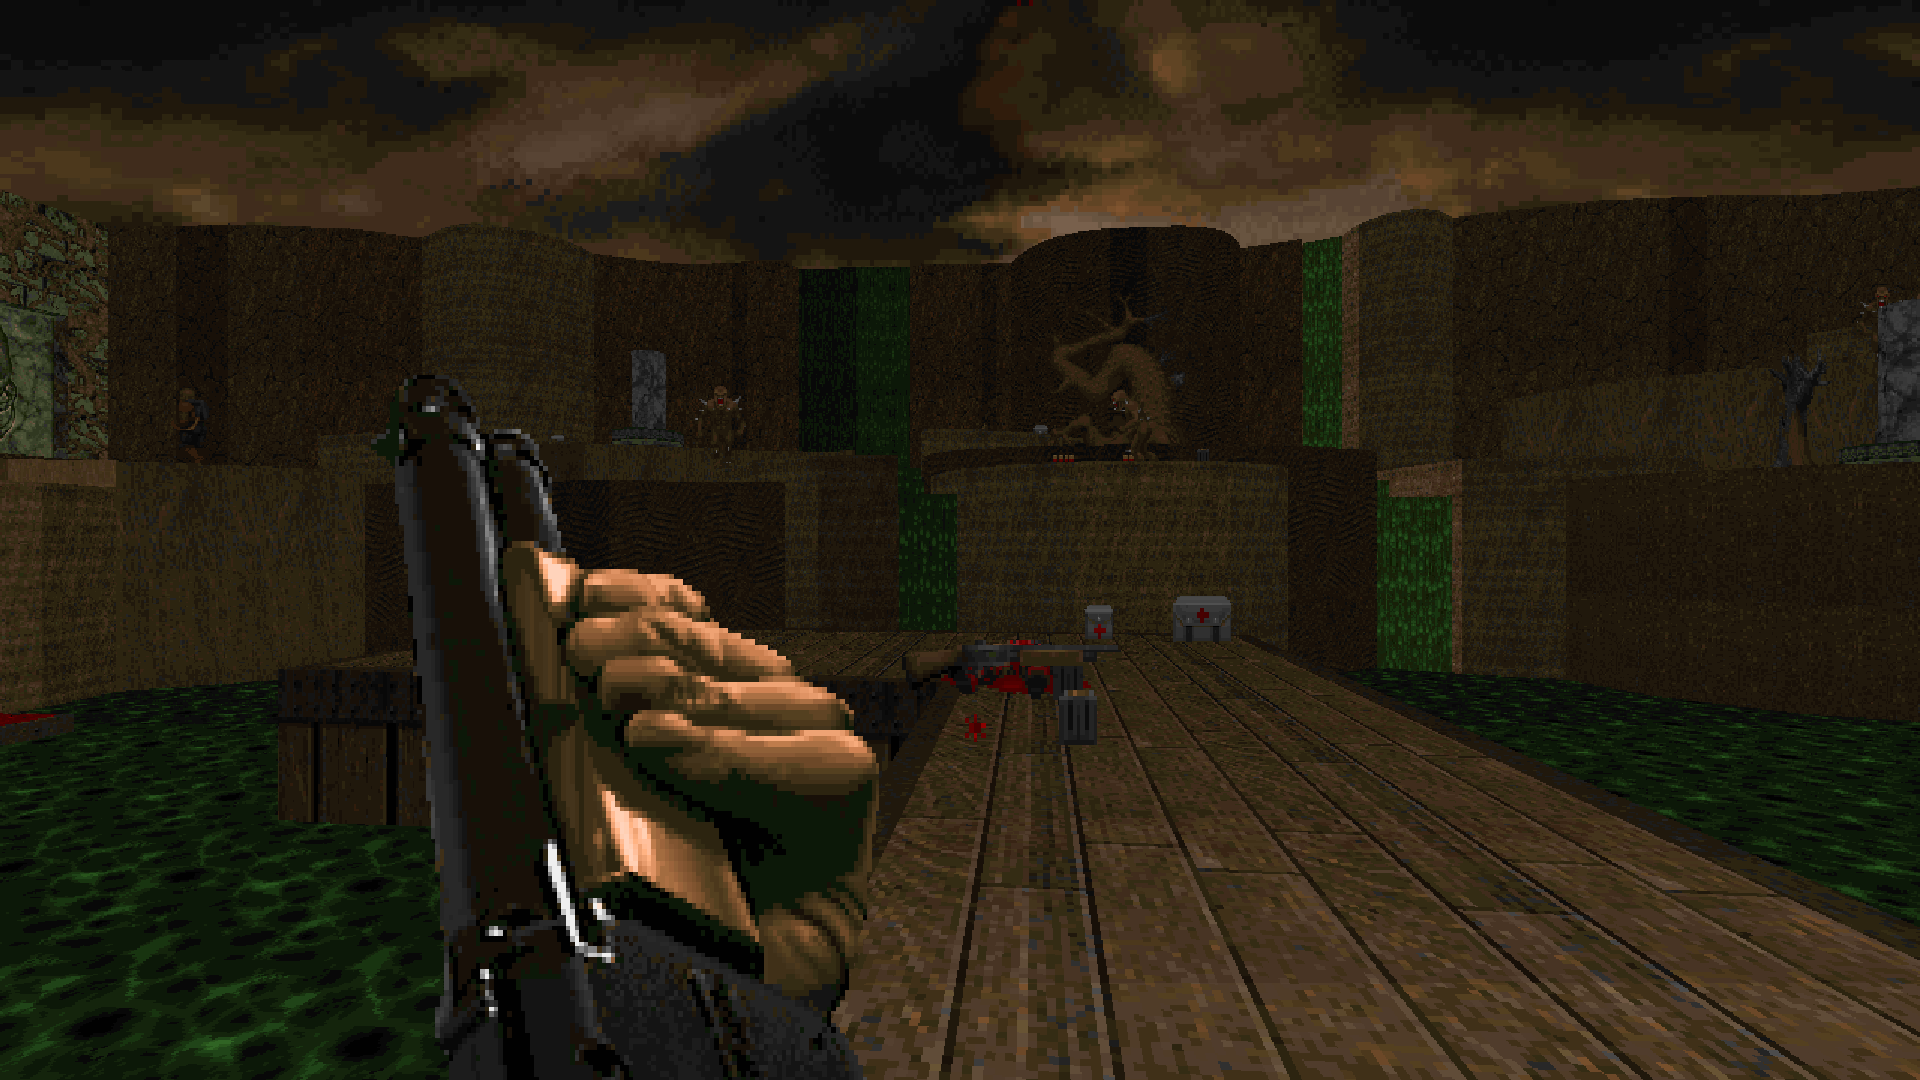
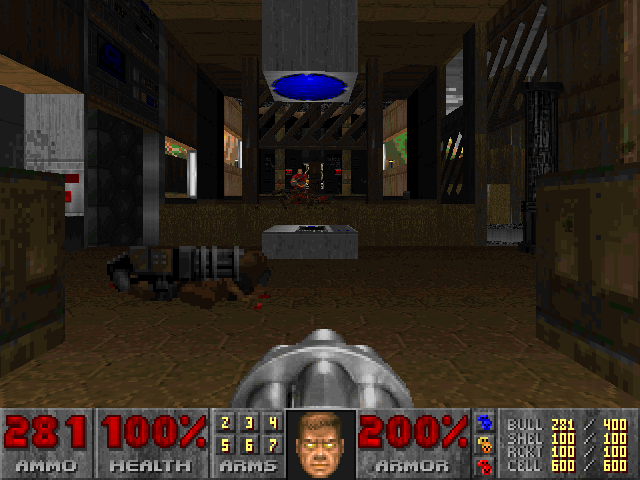
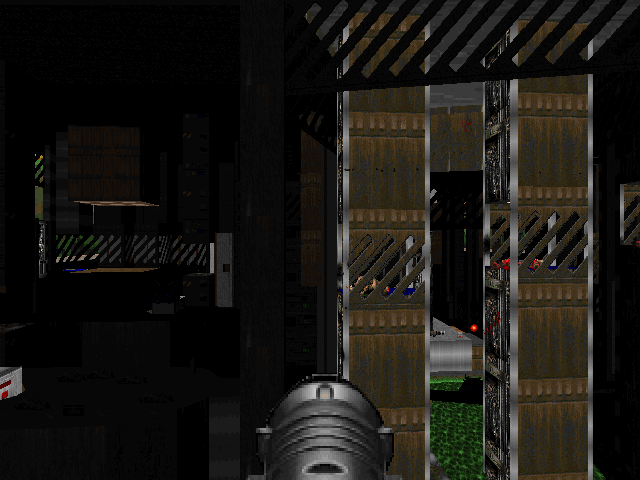
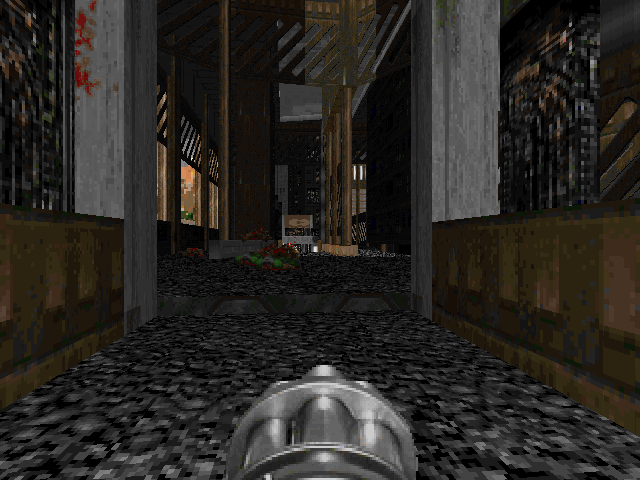
Doom Pictures Thread 2023
Chameeleoh and 18 others reacted to OniriA for a topic
19 points -

Ultimate Doom demos [-complevel 3]
Monsieur E and 17 others reacted to ZeroMaster010 for a topic
episode 2 uv-max in 23:30 yt: https://www.youtube.com/watch?v=6ZMLGjjeFHE ep2m2330.zip18 points -
Not much, but it's a start.
 15 points
 -
UDMF made-for-Zandro Deathmatch 4-pack in the works with @Arrowhead . Here's my texture work and a small bit of item placement for one of the maps so far:
 14 points
 -

AZAROTH.wad
Andromeda and 10 others reacted to genitalgrinder for a topic
DOWNLOAD LINK: https://www.mediafire.com/file/9jsbn678hp4u62e/AZAROTH.wad/file Hi Doomworld. I'm looking for opinions and any criticism on my first ever map. It's not very lengthy (only 2 keys,) and shouldn't be a challenge. For clarity, it replaces MAP01, requires Doom 2, and was made in Ultimate Doom Builder, using the Boom format. Despite that, I didn't use any Boom features. The map was successfully playtested using dsda-doom and Crispy Doom. If you're unsure, use dsda-doom. I hope you enjoy playing. I look forward to your thoughts. Story The UAC has tasked Doomguy to investigate an abandoned temple after detecting anomalous, demonic activity at an on-site computer. What awaits him is one of the last few Arch-Viles on Earth, taking refuge and attempting to revive baddies to attempt another takeover of your home world.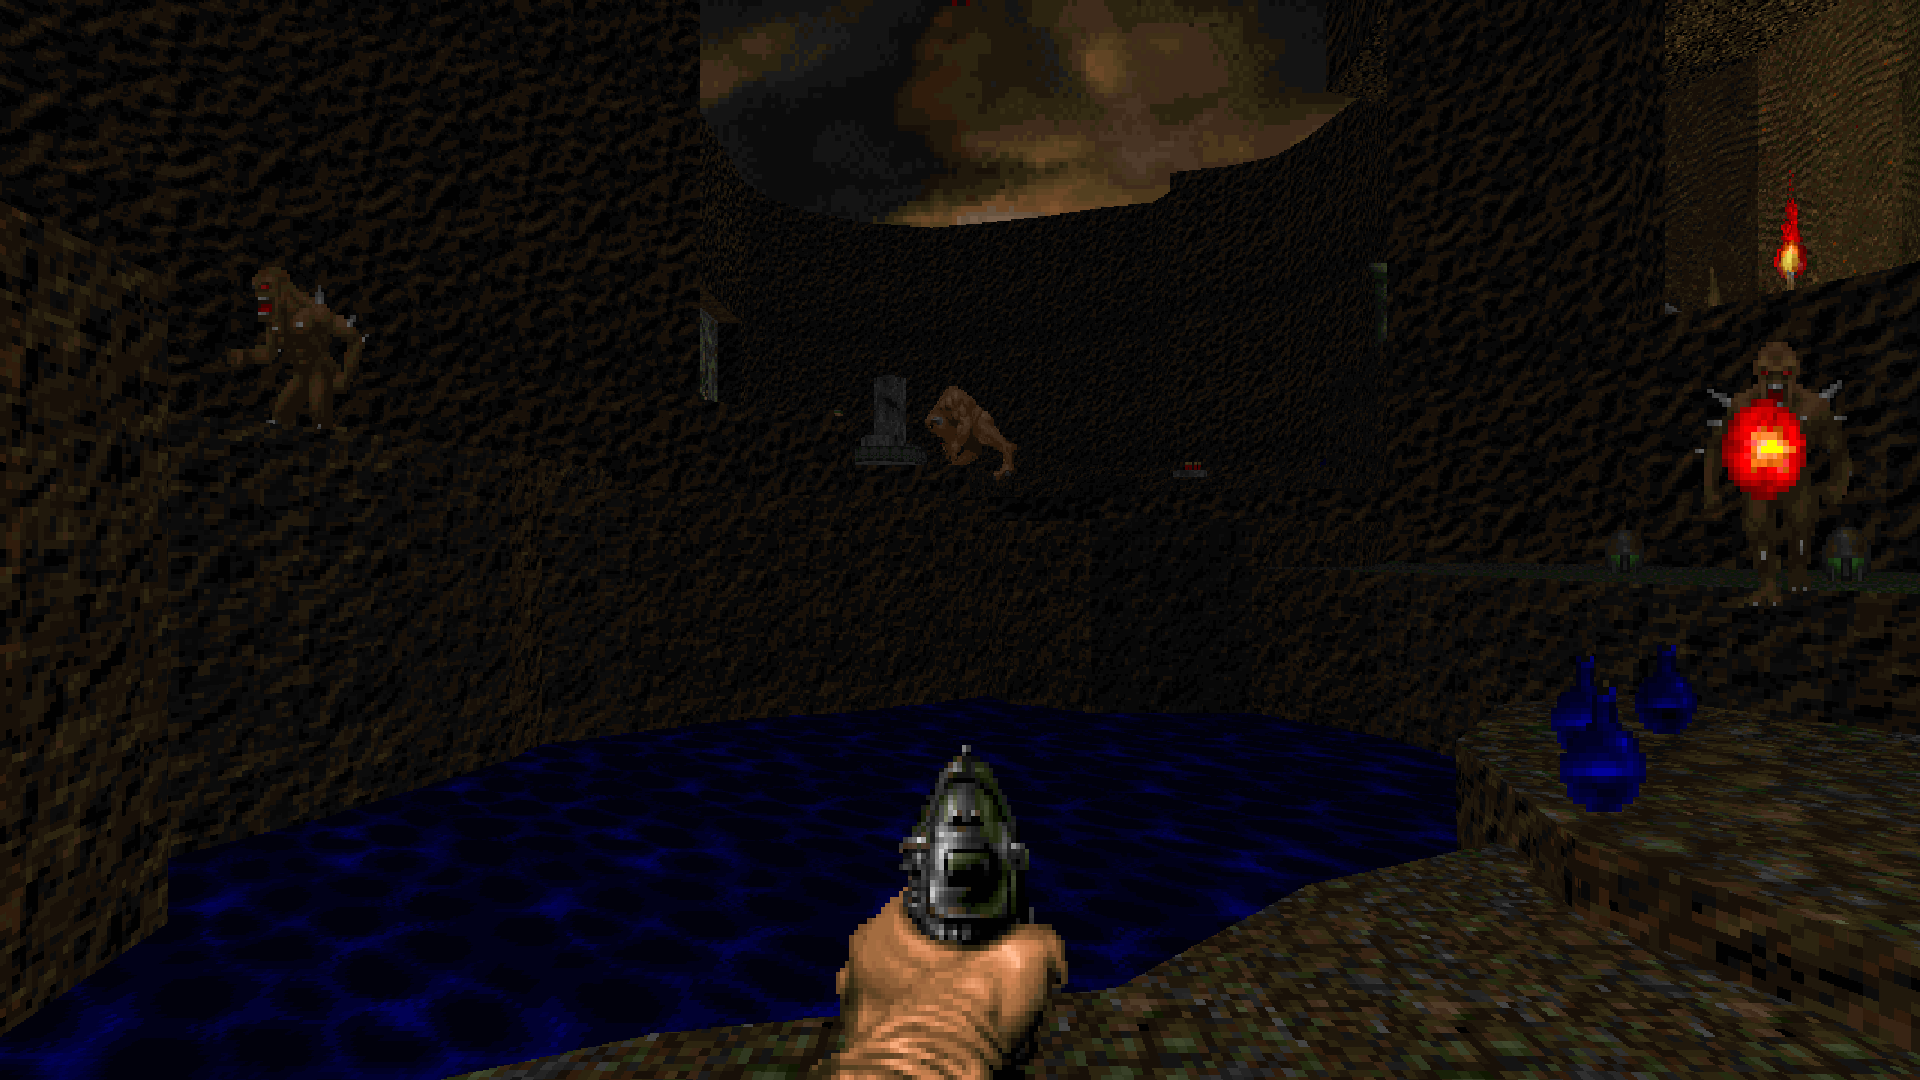
 11 points
 -

Share Your Sprites!
BMWAG65321 and 9 others reacted to Sonik.o.fan for a topic
some MP40 because why not spriteset soon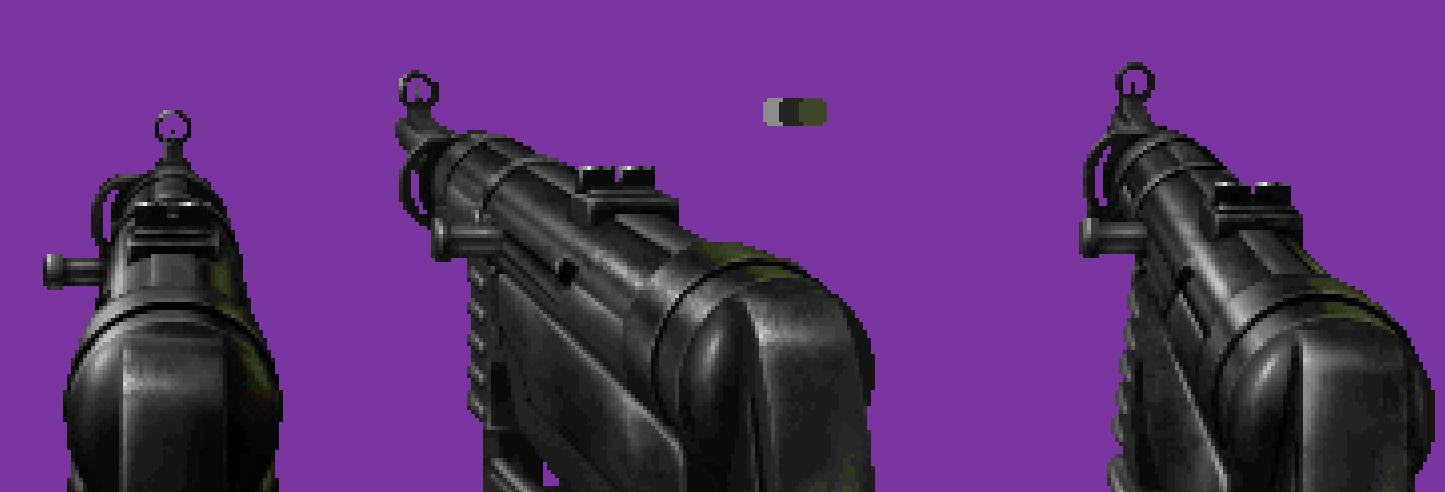 10 points
 -

UNFINISHED.wad [RC1]
Flower_XD and 9 others reacted to BluePineapple72 for a topic
Hey! Bumping for a quick update. Sorry that this has become one of those hell-dev things that I tend to make, but to make a long story short... I forgot! I also did the super "Smart Thing" and decided that with my dozen or so things To-Do that I was gonna Do Some More. Needless to say, this project has fallen by the wayside. Since the new year has come and I am a new person, I've decided that I will have this .wad ready either this week or the next. And you can count on it son! Edit: Unfinished.wad being unfinished was 100% not intended as a meta joke of the project. I literally just got swamped with stuff and thangs.10 points -
Treasure Chest Series, Vol. 4 & 5 (RC1) (cl-9 UMAPINFO)
Andromeda and 8 others reacted to Death Bear for a topic
Pineapple Under the Sea Speedmapping Presents: Treasure Chest Series! We're back again, baby! This is an ongoing quarterly project inspired by the original idea that @Steve88 had for PUSS in 2020, which was to create a dropbox for speedmaps that could be submitted on @BluePineapple72's discord server, then compiled for the masses. As we have grown beyond this original vision, I thought it would be awesome to come full circle in our second year to do something like this. So, this is not replacing our mainline series of monthly events, but is a Discord-exclusive, lowkey, speedmapping for speedmapping’s sake event where we make maps quickly then share it with the community. These are speedmaps made in 3 hours or less, compiled in order of submission, with a Credits map at the end. No themes or gimmicks, this time...(well, kinda.) If you're interested in participating in future installments, come join us at the Pineapple Under the Sea Discord, where all the wet fruit-inspired magic happens. I present to you Volume 4 and 5, covering Quarter 3 and 4 of 2023. We've now had our first full calendar year of submissions! Huzzah! Two maps (Ode to Casali and Son of Orgazmo) were made for PUSS XXX: Quick and Dirty but exceeded the time limit. Format: Boom-compatible (cl-9), uses UMAPINFO Tested with: DSDA-DOOM 0.27+, GZDOOM 4.11+ Maps: Volume 4 is 7 Maps, Volume 5 is 5 Maps Custom Assets: There are a number of custom textures. See .txt file for credits. Difficulties/Multiplayer: Various Download: Volume 4 (Google Drive) Volume 5 (Google Drive) MAP + TRACK LIST: Ordered chronologically by submission, with credits maps created by Death Bear. Vol. 4 Vol. 5 It is an honor getting to lead this ongoing series, play through, and compile everyone's work. Other than unseen bugs, we're good to go! We have our first Volume of 2024 running already, and we've opened it up to Doom 1 maps, as well. A few stragglers from our already 67-map D-30 are making their way there, as well. See you again soon! --- PUSS Treasure Chest Series Vol. 1 (Quarter 4, 2022) (Thread) (idgames) Vol. 2 (Quarter 1, 2023) (Thread) (idgames) Vol. 3 (Quarter 2, 2023) (idgames)9 points -
Ultra violence 100% kills/secrets, Pistol start, Using saves Played on DSDA Doom v0.27.5 -complevel 21 Map 15: Rubicon - 24:27 Episode 3 could not have asked for a better ending. Map 15 hosts attractive brutal-techbase visuals and excellent action, and a perfect MIDI to go with it. Rubicon introduces the mini-vile(?), a purple alien creature that teleports around and flings fire at the player. Thankfully they don't have much health - 2 single barrel shotgun blasts should kill them. Any and all of the secret & keycard battles are quite lethal and can kill you quickly even with the post red key BFG. Speaking of which, the red key ambush is pretty nasty: nightmare demons, astral mancubi, imps, sniping arachnotrons, and a cyberdemon in close quarters with not a lot of recovery items. It dealt me about 4-5 deaths during RC1. My advice is to try and get the cyber to infight the mancubi (the latter is really good at that kinda thing), and eliminate the other threats while they're distracted. The other fight in this map that killed me more than once is the secret rocket launcher fight with all the crushers. It's over pretty quickly but space management and avoiding projectile damage is fairly tricky here, and of course 4-5 annihilators cruise in at the end. Also, if you're able to find it, I highly recommend blowing up the barrels before engaging the lever in another similarly deadly secret fight - you'll know it if or when you see it. The BFG being my favorite weapon in Doom, Rubicon was always going to be a good time for me, but it's also effortlessly stylish and fun and only got better with each of my three clears. Difficulty: 7/159 points
-
Got a bit of catching up to do MAP12: Collapse by Dragonfly Probably one of the more simpler maps in Eviternity 2 on the visual side. The gameplay is also fairly simple for the most part of the map, where we start of in the central area and explore the various nooks and sides of the map which causes the walls of the map to gradually lower (or "Collapse" if we follow the map's name). Once we are done with lowering all the walls of the map, we get a rocket launcher, tons of ammo and even a megasphere. And this is where the map gets exciting. Tons (probably 150+ imps) will pour throughout the maps and 3 cyberdemons will teleport on the platforms outlooking the central area of the map. This might look hard, but I found that I was fairly safe when I stayed around the area that has the soulsphere secret. Once you are done with that area, you can telefrag the cyberdemons by going to the exit teleport, but not before having to deal with the archvile and mancubus that pop up when you get near the teleport. Not hard to deal with but just be careful to not get rear-rocketed by a cyberdemon while dealing with them. In a way, there is some minor similarity with Eviternity 1's map10 in that once we have lowered all of the walls of the map, we get to fight tons of enemies in the central area before exiting the map MAP13: Colosicus by Dragonfly I see some people mentioning that this map reminds them of map19 of Eviternity 1, but honestly this felt a bit like a successor to Map17 to me, at least in terms of progression. You start of in this central arena area to fight a battle and then you have option to go to 2 paths, which you can choose to do in any order, before finally returning to the central area to exit the map. But then again, this is where the similarity with Evit1's map17 ends. As in contrast to that map, this map is much more spacious and bigger in scale and surprisingly much more vibrant too despite the brutalism theme being ominpresent. Lot of the fights on this map are non locked-in fights and there is plenty of enemies that are more "set dressing" than anything else. This means that we can take our sweet time to slowly plow our way through each side. Each side area ends with a teleport that brings us back to the The map ends after you step on the "jump pad" and yeeted to map14's area MAP14: Equanimity by Aurelius Aurelius does it again. His only other maps I have ever played are Map32 of 1000 Lines 2 and his 3 maps of 1000 Lines 3. And they all were among the best maps of those wads with jaw dropping visuals (considering the vanilla and 1000 linedefs limitations of those wads) and unique + memorable gameplay. This map is no exception. This map is probably my favorite map in Eviternity 2 when it comes it visuals (which is a ridiculously high bar) and probably in my top 3 overall favorite maps in Evit2 (other 2 being Charge and Temeraire). This map is also the hardest map in wad till this point. We start of from the end of Map13 where we are yeeted from the exit pad and are flying our way to the center of the map before finally landing. Getting a foothold can be tricky with all the enemies, including some hitscanners and corporals (which especially blend-in well with bushes and trees due to their green uniform). That said, I would recommend to explore all the map before going into any teleports or for any of the locked-in combat fights, since we can get plenty of goodies and even a backpack if you secret hunt a bit. In order to get to the exit, we need to solve 3 different combat arenas (that you can do in any order). All 3 of the combat arenas are really good and tightly designed, though my favorite is the one that starts of with the Astral Mancubus + 2 archviles on top of stairs. That said, for all its great visuals and gameplay, the most memorable part of this map is the usage of MBF21 features to create such puzzles like a guiding a barrel to the finish line via controlling a conveyor belt, solving a 3x3 grid pillar lowering puzzle and even solving a picture puzzle. Each of these 3 puzzles will give you a key and you need all 3 keys to get the secret exit and the BFG. Even if you don't want to go to the secret exit, the BFG is atleast worth solving the puzzles. Which is why if you plan to do a UV-max run of this map, I would recommend to solve these puzzles first and then go for the combat fights. MAP33: Catalyst by Bauul Battletoads + Skyroads + Temple Run - The map. I don't have much to say about this honestly. Its fantastic showcase of what is possible with MBF21, but it's not my cup of tea. Also didn't help that I didn't had smooth framerate, which makes an already unforgiving 3-ish minutes long obstacle course even more difficult. Still I can respect it for the creativity and sheer audacity alone.9 points
-
Kreatura: New Doom2 episode: 8 maps available to play
nrofl and 6 others reacted to nicolas monti for a topic
Well, the idea is the following: 9 maps with only 30 textures and 15 flats plus the new sky, very restrictive, let's see how it goes. Textures employed: BIGDOOR1, BRNBIGC, BROWN1, BROWN144, BROWN96, BROWNWEL, COMP2, COMPOHSO, COMPTALL, COMPUTE1, CRATE2, CRATELIT, DOOR3, DOORBLU, DOORHI, DOORRED, DOORYEL, EXITDOOR, EXITSIGN, GRAY5, GRAYYALL, LITE96, LITEBLU3, METAL1, NUKEDGE1, PIPE2, SHAWN2, STONE2, SW1GRAY, TEKWALL1. Flats employed: CEIL3_1, CEIL3_4, CEIL3_5, CONS1_1, FLAT1_1, FLAT10, FLAT14, FLAT22, FLAT5, FLOOR0_2, FLOOR0_3, FLOOR5_1, FLOOR6_2, NUKAGE1, TLITE6_1 Map01-08 available: https://www.mediafire.com/file/mszr2evehjwsxka/wa08d.wad/file Map01: Fava genes Map02: Valvularia Map03: In vulnere lux Map04: Gare du nord Map05: Nimbus Map06: Ouranophoneus Map07: Bungalops Map08: Erkenta pyapyo
 7 points
 -

The DWmegawad Club plays: Eviternity II
Cutman 999 and 6 others reacted to Celestin for a topic
MAP15: Rubicon by Scotty Don't get me wrong, it's a hard map, but a conventional level is all I wanted after the secret stage. Rubicon is a straightforward concrete base with several tough fights. There's a new enemy here, I think it's called vileimp veilimp (I've checked the DeHackEd file), fires a volley of projectiles in a spread pattern or a short-range stream of flames, dies to a single SSG shot, but more importantly, he can teleport around. I don't think he can appear behind your back, but an erratic movement pattern and surprisingly tough attacks make it an unique enemy to fight. The first hard fight hits early on, it's a corridor that slowly releases monsters, including two astral mancubi and a cyberdemon. I just cut through imps once they appeared and escaped. The BFG is unlocked after this and it carried me through the rest of the map - cells are in large supply here, while the rocket launcher is only accessible later on and is pretty much only useful for a single optional fight. Speaking of which, a derelict reactor that quickly floods with rather tanky monsters (cacodemons, hell nobles, nightmare demons) while you have to look out for the crushers and surpise annihilator rockets is the fight of Rubicon that killed me the most. Most of the map isn't that tough, the BFG lowers the difficulty a lot. That is, until the final fight, which unleashes a lot of monsters on a poisonous floor. This one took me a couple of attempts, the two elevated astral mancubi are a threat here, but once this part is done, all that's left is two-shotting a cyberdemon and ending the chapter. I find the conclusion of E3 satifsying, it's a right dose of challenge for me without getting frustrated.7 points -
Decided to render a video of this: edit: not sure how I managed to set it to have a live premiere stream, not expecting live viewers to sit through this7 points
-

The DWmegawad Club plays: Eviternity II
Tango and 5 others reacted to Cutman 999 for a topic
MAP14 - “Equanimity” by Aurelius (Pistol start, used saves, 100% kills/80% items/66% secrets) WE ARE GETTING OUR ASSES KICKED WITH THIS ONE! probably the first magnum opus map in this set, definitely wants to kick things into a higher gear, and if the insane gazebo's esque monumental detailing or the tactical, punishing combat doesn't tell you enough, I don't know what will. I feel this map like much of the other ones in this style, benefits on how friendly it is on replay, with many duplicates of weapons scattered in the map to let you completely customize the way you want to deal with it, considering many fights are here to kick your ass, maybe on a saveless casual run is a good idea to mix and match approaches to get the most out of it and not feel like those 40 minutes of gameplay are too much. Fights are very, very good combat puzzles that end quickly and test your capacity to rapidly adjust to any given challenge, my favorite is definitely that rectangle arena where transforms into a plasma surfing ordeal, trying to use the enemies as cover for the astral arachnos so you don't get your ass completely handled to you, is the one with the most improvisation and the adrenaline truly increases in situations like these, only the cyber backyard is an ambush that beats itself, all the others are serious ass kickers. Altough, the aquiles heel of this one is definitely the secret exit, the puzzles aren't bad, but they are really janky, specially the yellow key one, that thanks to how the action specials work in the engine, sometimes passing a line would not do a thing thanks to how you can't have 2 actions executing on a sector consecutively. The others are finer, although that one where you have to scramble an image it doesn't tell you in what direction the grid moves, making it slightly less intuitive. If I was playing this saveless, probably it would be my most hated map, thanks to how this definitely benefits for foreknowledge the most out of the whole megawad to this point, and you know, playing it blind on saveless is like, no just grind the map xd, but still, this map is probably cacoward worthy by itself, and how it manages to execute everything it proposes, its more than exellent, at least to how I experienced the map on this ocassion. 10/10 MAP33 - “Catalyst” by Bauul (Pistol start, used saves, 100%K/I/S) You remember that infamous battletoads motorcycle section? now it's fucking possible in doom and will kick the shit out of you. Definitely the map of all time, for such an unusual gimmick map it introduces things quick, punishingly and effective as it can get, with typical easy stuff introduced, a slightly more difficult version of that at the middle, and batshit insane stuff at the end. The ending of the map is fucking nuts, just for that shit alone I stopped playing this saveless, don't be like me that tried to grind this shit for lik 2 hours to get its ego boost, and failed miserably. Btw, probably my favorite midi of the whole wad, feels extremely fitting to a map that is just pure grind and intensity. 7/106 points -
Unpopular Doom Opinions
Guff dotD and 5 others reacted to baja blast rd. for a topic
It's not overprecision that would be the problem. The way I'd put it is the fundamental assumption that averaging is the function that relates two or more subscores is already unsupported and usually wrong. It's something people roll with on autopilot without really thinking about it much, but there's nothing about "map01 = 6/10, map02 = 10/10," as an example, that directly leads to "overall = 8/10."6 points -

What is your favorite spefic detail/ room thingie in doom wads?
Dusty_Rhodes and 5 others reacted to yakfak for a topic
sincerely, multi-tier crate mazes6 points -

The DWmegawad Club plays: Eviternity II
Cutman 999 and 5 others reacted to DJVCardMaster for a topic
MAP15 - Rubicon - Alex "Scotty" Scott (99%K/100%I/60%S): It's an ok episode finisher that does not reach the level that it had when it started, it would have made more sense if MAP14 was at the 15th slot, if I'm honest. Mixed feelings with this map, as it gives you an early BFG. Considering you will need to finish the secret level on continuous to get it, it kinda makes all our journey to get it quite insignificant. OK, you also have the perforator, but it will be useless considering the low amount of ammo late in the level, and how much of a better use you could give the BFG against big hordes of enemies, specially at the fights before the keys. The map looks a bit more depressing, just like the fourth episode of the first Eviternity, more brutalism, less green, and tries to focus a little bit more in gameplay. Luckly, this is where it kinda shines, as most of the secrets here are well staged secret skirmishes that will give you a prize, but will chunk your health. That's classic Ribbiks philosophy out there, and makes sense, as the map gets a little bit slaughterish and generous towards resources from time to time, so that's why I consider it reasonable. The key aspect of this map is the first appearance of a new actor in E2's beastiary: The purple arch-vile whose name I don't know yet, let's call them vile-lings for the moment. The vile-lings can be quite scary as they usually jumpscare you, and can be painful if they attack you from close range, but they lack any significant power due to how of a glass cannon are they, getting bursted by one SSG blast with ease. Also, their attack can be awkwardly misspreaded, causing it to be easier to dodge from far away. Due to how poor are them at tanking damage, they are not even efficient at causing infights. Overall, I consider them being better at scaring you, rather than being actually dangerous. So, for the moment, I think they are a bit lame, I did not consider them a big threat. But hey, they are at least cool looking. Overall I think this was the weakest map of the episode, but I may be a bit biased because MAP14 was great, so take this with a grain of salt. Order of preference:6 points -

Doom Pictures Thread 2023
Toxisploder and 5 others reacted to Roofi for a topic
This is probably one of the most unique bridges I've ever seen in Doom. What you see here is just a lower wall texture. Very ingenious for 1994. From ROT_E2M16 points -

Naughty & Nice (30 MBF21 Doommas Maps!) (RC1)
S3M_XM and 4 others reacted to MoiraHeart for a topic
Bunny Race is an actual work of art.5 points -
.thumb.png.dff28c5031946aa30fffbb14c32bc4a5.png)
Ultimate Doom demos [-complevel 3]
Monsieur E and 4 others reacted to kuckkuck for a topic
E1M6 UV-Max in 2:43.17 E1M6m-243.zip5 points -
Easily after 2010, the amount of great stuff in the last few years is crazy, imo.5 points
-

The Hall of Bricks
ctwoafiveb and 4 others reacted to aei0u0iea for a topic
"Ugh, where the hell am I now..." Doomguy has yet again been plopped into some random location for the sole purpose of slaughtering demons. This time, he's dropped out in the open, standing before a large brick building. The front door's locked, but there's a side entrance that's not. "Guess I better go find the key and get out of here." This is my first WAD that I've released. It's for Doom 2 and is meant to be played with Boom. I haven't tested it with anything but PRBoom+, but I don't see any reason why it shouldn't work in GZDoom. There's 1 real map, about 10-15 minutes long, and a 2nd victory map. I didn't try to do anything crazy, just mostly vanilla-style stuff. I changed stuff depending on the difficulty, so there's less monsters on the easy modes and more on the hard ones. It's possible to beat this on Ultra-Violence, it's just really hard. I don't know if Nightmare is possible, but you're free to try. I made custom MIDIs for the 2 levels too. The only glitch I've encountered is near the end in the There's a blood puddle that's messed up and looks weird depending on which angle you're looking at it at. It looks fine in the editor, and it didn't do it before, so I'm not sure what caused it or how to fix it. If you find any other glitches, tell me and I'll update the WAD and try to fix it. Let me know if you like the WAD or don't like it and what you do/don't like, and I'll try to keep it in mind for the next one I make, if I do make one. TheHallOfBricks.zip


 5 points
 -

The DWmegawad Club plays: Eviternity II
arlinsae and 4 others reacted to cannonball for a topic
MAP15 - “Rubicon” by Scotty The price of progress, the lush and bright environments of the early stages of the episode are definitely gone now. Instead we have polluted waters and a grimy and rather grim atmosphere. Fair to say that on one hand the visuals don't pop as much as the other maps, on the other hand this feels truly fitting and is the perfect send off to the episode that has really seen this wad push on. The combat takes the centre stage and there are plenty of top drawer encounters, the meanest probably being the blue key room where the room is drenched in polluted waters with only two radsuits to get your through the fight. In general the map flows nicely and whilst it isn't as strong as the last map, this feels like a nice change of pace and works well as a counterweight to the otherworldly wonder of the previous map. Fair to say that this episode is by far my favourite episode so far. Oh and the new monster is introduced really well, never truly dangerous but they do have a habit of catching you off guard, not every monster needs to be ball busting, this one seems to fit nicely in the low to mid tier range.5 points -

Doom Pictures Thread 2023
Luisinho and 4 others reacted to Sneezy McGlassFace for a topic
Experimenting with alpha version of RORdoom. The first source port that allowed for room-over-room geometry. How, you ask? By overlapping sectors, of course!5 points -
Screen effects for active powerups in my project. Ring of Protection: Orb of Chaos: Elixir of Felicius: Menelkir's Nectar: Ring of Concealment: Flame Shield: Tome of Power: (You are poisoned):5 points
-

Testers needed for Forgotten Reliquary Pt. 2
DaRkWeZ and 3 others reacted to anfractu0us for a topic
Hi! Wasn't sure where to post this but I figured this was the best spot. I'm looking for a handful of players to balance test the second part/installment of my first map, Forgotten Reliquary. I've finally arrived at a point where I feel comfortable sharing what I've got so far and starting to fine tune encounters. In particular, I'm very interested in ITYTD/HMP players as I have no experience balancing for those difficulties, but UV testers are always welcome as well! As with the first, this map is designed for Boom compatibility. In terms of gameplay, it's pretty relaxed compared to the first map imo. There's still plenty of traps and tricky fights but I wanted to make something a bit shorter and slightly more focused, with multiple(and optional) paths, the usual exploration, and having encounters modify others in response (this is only somewhat implemented at the moment.) There's a bit of focus on some sort of unique mechanic in most of the encounters, and the environment is a bit more dynamic than the first map...And of course, fun stuff like a sliding door/wall or two! ;^) Finally, to help give an idea of the map size, here's monster counts for each difficulty currently: (While there are monsters and ammo placed for the final encounter, it's all placeholder stuff that's inflating monster counts currently.) ITYTD/HNTR: 396(241 excluding final area) HMP: 487(332 excluding final area) UV: 577(422 excluding final area) If you're interested feel free to PM/reply :^) Not particularly sure what else to say so here's some screenies lol (ignore ugly/missing sky textures plz :'^))4 points -

Doom Pictures Thread 2023
Chameeleoh and 3 others reacted to NeilForshaw for a topic
Still working on my map for "Doom 2 In City Only". It's surprising how adding a little bit of shadow to structures just makes them come alive. Going to do this on more. Link to project below.4 points -
GZDoom/UV/Contiuous/Saves Write-ups from memory MAP15: Rubicon - Scotty I was a little nervous about this one. Scotty is a name I associate with hard maps I wouldn't normally play. Stuff like Haste and Abandon, for example. I have played a smattering of his stuff tho, like his maps is Nova III, Cydonia, and the 1K Lines ones, and I don't recall any of them being super hard like I would expect from a Haste or Abandon, so hopefully, this won't be too bad. Thankfully, it's a very doable map. It's the hardest in the WAD so far, but it's doable. This map does take inspiration more from the challenge map design philosophy, as there's quite a few set piece fights. The first major one sics a new enemy on us. The veilimp is a glass cannon with 2 different types of attacks. Depending on your distance from it, it will either fire a volley of projectiles, or it will attempt to flambe you. These purple buggers will also turn invisible in-between attacks. Thankfully, like I said, they are glass cannons and go down super easily. Scotty gets to throwing these things in most of the major fights he spreads around, including the first really hard one that gradually deactivates lasers that unleash them along with nightmare demons, astral mancs, imps, and a cyb. I think this fight is probably the hardest in the WAD so far, and almost begs for some spray and praying with the plasma rifle (or continuous BFG/perforator). Once you get the red key, you can tackle 2 other paths to get the other keys. One path goes back into the same building and cumulates with a battle against cacos, nightmare demons, barons, annihilators, astral mancs, and a cyb in nukage. The other path goes into the adjacent building and cumulates with a fight with 2 cybs and 2 masterminds, with some perched archies and a few veilimps. Both of these final fights for their keys are tough, tho the yellow key one can cause some Gotcha!-style infighting. With the blue and yellow keys, all that's left between you and the exit portal is a surprise astral caco ambush. But we're not done. This is the first map in the WAD to feature some significant hidden battles. You can get to both of them on the blue key path. The first one is a teleport switch by some arachnotrons, that will allow you to jump to the mega armor outside, opening up an area with a lift and pain elementals. Taking the lift will reveal the first hidden fight. It's in toxic waste and teleports a buttload of demons of all varieties in. You do get a plasma rifle and ammo here, but you should also have the BFG by now, so use that. The other fight is a trek to get to. You see that RL on a pillar by the start of the map? Well, once you climb up the blue key path enough, you can jump from a manc platform to that RL, and then jump down to the armor bonuses (or you can speedrun strat it and use the steps below to skip the RL and get to the armor ledge). Follow that to get a BFG and goodies, an astral arachnotron, and a pit to the other hidden fight. This fight loads you up with rockets. In fact, it's the only rockets you will get in the map, so use them wisely. Once the fight starts, 4 crushers will gradually activate while you deal with nobles, nightmare demons, and I think cacos? Don't quote me on that last part. This fight is probably the 2nd hardest one in the map, cause the crushers force you to move, and the tight quarters means rocket use is dangerous, but it's the best method of clearing out the riff raff. The are cells, so BFG when you need a quick escape. Overall, this map is a challenge. Thankfully, the fights are fun and not too frustrating. I will say, part of me thinks this map doesn't really feel like an Eviternity map. It looks great, but the toxic sludge/grime aspect of this makes me feel like it doesn't really fit the brutalist/nature theme of the ep. The hidden fights also don't feel like Eviternity to me. Honestly tho, that's just minor nitpicking. The map is still a good map in all aspects, and if the Eviternity crew thinks is belongs, then it belongs. Very solid episode ender.4 points
-

The DWmegawad Club plays: Eviternity II
arlinsae and 3 others reacted to Veeda Vidlak for a topic
Map15 “Rubicon” by Alex Scott (Scotty) The wad is really starting to hit its stride. The entire third episode has been outstanding, and we follow Aurelius’s masterpiece with another quality entry. Rubicon is an intimidating finisher set in a dreary concrete factory compound that hits as hard as it looks. The brutalist architecture continues and here Scotty contrasts Equanimity’s idealized designs with the more cold, unfeeling rawness I always think of when someone mentions “brutalist.” Gameplay starts innocently enough, grindy but nonthreatening. Working our way southwest we see a number of archviles behind screens. I only have the SSG, surely Scotty doesn’t… wait a minute, those are some freaky looking viles… And that’s because they’re not viles, they’re this weird purple alien thing that warps around and spews either fire or a spreadshot kind of like the disciples of D’Sparil in Heretic. I agree with RHhe82’s observation that this monster has the vibe of an Ancient Aliens enemy, and as far as difficulty goes they aren’t all that dangerous, weak and slow in launching their attacks. However, I find the mechanics interesting. Novaseer says they turn invisible when moving, which is true, I can hit them in this state between attacks… but they do seem to also have some form of short-range teleport. One of them got on the raised platform when I was fighting in their reveal arena and I don’t see how that happens just by walking. Anyway, these guys aren’t much of a problem. What is a problem is the rest of the level, which features several dangerous encounters. The red key, the blue key, a pair of fights up north en route to the yellow key, and two secret arenas, one of which is my pick for hardest fight in the map. The red key fight is first and what I found works best is to kill the nm demons then just hide for a moment. None of the enemies become active until you shoot or let them see you so if you stay put until the imp fences drop then you can burn through them and fight with plenty of space. As for the rest, we have a BFG now and don’t be afraid to use it. My blind run was not smooth, and I discovered the mistake I was making was trying to conserve ammo for later. Areas like the blue key and both secret battles punish ammo scrimping, so don’t be afraid to let loose, especially in the westernmost crusher arena that demands aggression. Another thing I'll say is this map has the most nefarious annihilator use so far, there’s quite a few and Scotty is very skilled at maximizing their lethality. The pincer ambush on the way to the blue key is deceptively deadly and if you don’t want to fight in the narrow hallway you can jump off into the sludge and go back around to kill them without worry. Rubicon is a strong map and a strong finish to the best episode yet. It doesn’t reinvent the wheel, but it does deliver the right amount of punishment to let us know we’d better be ready for the second half of the megawad. I’m looking forward to it.4 points -
MAP15 - “Rubicon” by Scotty Deaths: 15 Given that this episode-ender is by Scotty, I was fully expecting some serious combat, and I got it. The map itself is ugly, but it's because we've dropped into an ugly place. It's very well realized and detailed, and so ends up looking good despite the grime. The dirty concrete walls surrounded by nukage, with flaming barrels littering the area give this map a very unkempt industrial feel. Nature is simply unwelcome here. It's a different sort of corruption than what we saw in Episode 1. This map introduces a new monster. It's an arch-vile looking thing that seemingly teleports around and shoots fire at you. They are pretty weak, but tend to appear in packs. They killed me the first time I encountered them simply because I didn't know what they were. After that they generally weren't a threat. Unlike many of the astral demons, these guys seem to be a low threat enemy. There are plenty of difficult fights in this map. The hardest is actually a secret, optional fight. It's a timed fight that starts with cacodemons, and ends with green demons and an annihilator. If that wasn't bad enough, timed crushers shrink your play area substantially. Most of my deaths in this map were here. It took me several attempts to beat this, and even then I felt like I got a bit lucky. In my successful attempt, an annihilator actually went through the exit teleport and I telefragged him on the way out. (Looking at the map in UDB, it looks like there are two of them. I never saw the second one on any of my attempts, but he died somehow.) I always started using rockets, but switched to the BFG at some point just to make space. I ended up eventually getting past this fight, but I never felt like I beat it. The rest of the fights didn't take me more than one or two deaths to complete at most. But there were enough different fights that it still ran up my death count a good bit. I can't decide whether the red or blue key fight was my favorite, so I just won't decide and call it a draw. The music was great, and gave this map an extra dose of energy. I found all of the secrets fairly easily. I didn't have to go back and look for any of them. I feel like I got a bit lucky on a couple of them though, so I'm not sure the secrets were actually easy to find. But it did seem like there were plenty of hints for them. This map is one of the few in this wad so far that I might go back and replay at some point. It's not because it's my favorite necessarily, but while I got to the end with 100% kills and secrets, I don't really feel like I beat this map. Who knows if I ever will have the time to replay it though.4 points
-
MAP15: Rubicon. Played on DSDA v0.27.4, UV, PS. 373/373 K, 5/5 S, 5/5 I. Comp. time 41:29 Ah, a map my laptop can handle. A map, that's title associates with Alien Vendetta... and nevertheless I liked this one. I didn't guess the mapper, the map just felt a bit different than what we've accustomed lately with open, majestic architecture sort of maps. Indeed, Scotty! One whose maps I've always (I think) liked. There are some hairy encounters here; difficult, if you're afraid to use BFG in order to save ammo. Personally, using the big guns without doubts was the way to go, ammo's plentiful enough, unless you get wasteful. I suppose my favourite fight would be the blue key fight with tons of cacos, astral mancubi, cyber, annihilators. It was also the hardest (the cybers and spiders -encounter was just inciting infight while taking care of riffraff); the cyber was placed quite awkwardly... I wouldn't call it a palate cleanser, because the wad is so consistently great, but I like this sort of map. I guess I could have done without spider/cyber area, which I did last and it was getting late, but no matter. Not sure what to think of the new enemy. On the other hand I feel we have a preview case of a monster that would feature prominently in Ancient Aliens 2, if there were such a thing. And on the other hand the... astral imp? Purple imp? It looks a bit goofy. Astral mancs and spideys fit right in, but this one honestly looks a bit less well done. Whether they get real annoying too or not, remains to be seen, but I'm feeling optimistic once I get used to them.4 points
-
I will join the 0 backlog people here as well. Never really had a need to keep a list of things to play be it doom wads or other games. I wouldn't claim that this approach is necessarily the best, keeping a list of noteworthy things to play later actually sounds like a pretty good idea (I'm just lazy), but I think in that case it's best to view it as "a list of potentially interesting doom wads" with some notes about them, so when you are in the mood to play a wad of certain style (let's say, I want to play easy techbases today), you always have something stored for yourself. This is different from having "a backlog of wads to play in order" - you don't _need_ to play all the wads in the list, the list is just here for your future reference (and it might so happen that i will never want to play easy techbases, for example). Also when it comes to doom maps specifically, I don't think most people only play them once? I very often replay the maps I particularly liked several times (or a thousand times in case of speedrunning but that's out of scope ofc), and I think that's common for other people in the community. I mean, why wouldn't I, if the map really stuck with me? I would want to see it in more detail, but it's more fun to do that from the start, because things may play out differently or I may do a different route through the map, or I can get the secrets earlier, etc. Well, and demo recording is a nice bonus on top.4 points
-
zero. i don't sit here going "OH MY GOD I HAVE TO PLAY ALL THE NEW RELEASES OR I'M GONNA DIIIIEEEEEEEEEEEeeee", because i see no point in playing as much as possible when i could instead just play what peaks my interest and savor those instead of diluting everything to the point where it all blends together. it's not even remotely the same thing? you only get locked out of something completely optional; unless you're gonna start hyperventilating because you don't get 100% on your first blind run, then you can just...replay the map. completionists like to take their time getting everything anyways, so why not? besides, if the mapper values replayability, then you'll likely still have fun even on your second playthrough of the map :)4 points
-
https://dsdarchive.com/wads/787 Map 01 NoMo 7.51 78701o751.zip https://dsdarchive.com/wads/aboo4 Map 01 NoMo 21.83 aboo401o2183.zip https://dsdarchive.com/wads/allempor Map 01 Pacifist 4.83 allempor01p483.zip Map 02 Pacifist 9.26 allempor02p926.zip https://dsdarchive.com/wads/area49 Map 01 UV Max 1:39.57 area4901m13957.zip Map 01 NM Speed 30.17 area4901n3017.zip https://dsdarchive.com/wads/arrival Map 09 NoMo 29.29 arrival09o2929.zip https://dsdarchive.com/wads/arrokoth E1M1 UV Speed 32.09 arrokoth11-3209.zip E1M2 UV Speed 58.63 arrokoth12-5863.zip E1M4 UV Speed 52.97 arrokoth14-5297.zip https://dsdarchive.com/wads/arx Map 03 UV Speed 25.66 arx03-2566.zip4 points
-
Today I made a 'secret map' for my megawad. It's called 'Loveletter To The Casalis'. Why you might ask? Well, it has the exact number of Chaingunners, Revenants, Archviles and Cyberdemons that appear in Plutonia all in one map. Yes it is fr*ggin' bonkers [had to save scum, but it is doable]. It's likely the last map I'll make and publish for Doom so I wanted to go out on a high:D


 4 points
 -
Unpopular Doom Opinions
97th Century Fox and 3 others reacted to baja blast rd. for a topic
If you're doing a review format that involves both an overall rating and individual subscore ratings, the best way to do it is to come up with the overall rating and the subscore ratings separately by yourself*. For example: attribute A = 10/10, attribute B = 4/10, overall: 8.5/10 What you don't want to do come up with subscores and then average them out into the overall rating. While that might seem like a completely natural thing to do, it's fake math that will spit out nonsensical output and buries a lot of unchecked assumptions. A lot of review sites have done that, and I have seen the "average subscores out" approach in Doom reviews too. *(The Dean of Doom series is a good example of doing this well, because the overall megawad grades are not an average of the individual map grades, which would have been pretty silly.)4 points -
Share Your Sprites!
Lizardcommando and 3 others reacted to Sonik.o.fan for a topic
Hellknight mugshot sheet maybe you feel like you want to play as Knight of Heck, who knows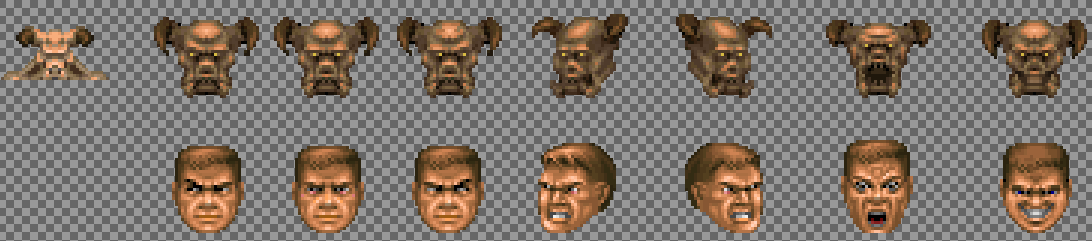 4 points
 -

Kama Sutra demos [-complevel 2]
kmc and 2 others reacted to Dogmachine for a topic
Map 13 UV-tyson in 1:32:48 ks13t9248.zip3 points -
.thumb.gif.6993971a6f12e722db1b8f0e06a3ecd5.gif)
[GEC] Master Edition PSX Doom for the PlayStation. Beta 4 Released [11/16/2022]
BlueThunder and 2 others reacted to tony_mke for a topic
I've never actually participated on this site, but I just wanted to say thanks to everyone who did this. This is a gamechanger for playing my favorite version of the game. Firm handshakes all around.3 points -

what was doomworld like in the early 2000s and early 2010s?
Fonze and 2 others reacted to Koko Ricky for a topic
This is simply not true as I recall being picked on by a very prominent and respected mod for being sexually odd, as well as my ickyness toward much of sexuality being treated negatively by others. I was also given shit for having unorthodox views on futurism, and for my interest in psychedelics, AND for having learning comprehension issues (that was especially hurtful). Nowadays no one hassles me because I've learned to shut my mouth when it comes to certain subjects.3 points -

zekhmet project - calling bugtesters and FDA folks! (NINE maps done)
rehelekretep and 2 others reacted to dobu gabu maru for a topic
Ah yeah I just tested in DSDA Doom and I see the problem. Those visual artifacts are lowered ceilings that display the midtex texts (midtexts?). Gonna take some time to rework since the entire map works on these goofball ceiling triggers. For what it's worth, I still haven't forgotten about this project! Just been working on smaller maps before I get to the last map I have promised for Zekhmet (which I hope won't be stupid-big but will likely be.) Due to the way it's constructed it takes a lot of time to put single rooms together, so it might be a while, but the set should be ready for release once that is finished.3 points -

Some new images from 2 new layouts that I've made for @spwnSH4Rk and I's new joint pr
The BMFG and 2 others reacted to Arrowhead for a status update
Some new images from 2 new layouts that I've made for @spwnSH4Rk and I's new joint project: Things are going pretty well so far! We're working at a brisk pace. :)3 points -
The DWmegawad Club plays: Eviternity II
Tango and 2 others reacted to cannonball for a topic
MAP14 - “Equanimity” by Aurelius Okay this map is really something else. You fly towards the centre of the map and from there you are free to explore the majority of it. Your objective is the find three switches that turn the grey liquid pipes into gold that all trace back to the exit area, this is a really clever way of doing progression because once you complete the objectives you have an easy way of getting to the exit by following the pipes. Now the visuals, well this is one of the best looking mpas I have ever seen and takes the strengths of the brutalist theme and marries them with elements from the heaven episode of Eviternity. Within the cold heart of the brutalist scene you have this palace of enlightenment that is a really joy to explore. Now each switch requires you to go through a series of tricky fights, every one of these hits the spot nicely and at this point I am completely sold on this being one of the best maps I have ever experienced, but then to unlock the secret exit, you have three separate puzzles/minigames to unlock the three skull keys you need to lower the portal in the centre of the map. The barrel one was pretty easy to do, the 9 block puzzle I managed eventually, however I got frustrated by the picture puzzle and given limited time I simply decided to skip this one. However that it definitely a me problem. Overall this is truly a masterpiece of a map, it surpasses everything else both visually and from a gameplay perspective. Aurelius, you have truly outdone yourself. MAP33 - “Catalyst” by Bauul On one hand I want to hate this, but actually I can see this being doable with practice eventually, getting acquainted to the soft handedness required to navigate the obstacles in front of you. Overall this is a pretty controversial map to throw at the player, but it is a secret map, it is truly one of a kind for the doom engine and in the end it adds an extra layer to a megawad that is probably going to be one of the most memorable releases of all time.3 points -
GZDoom/UV/Contiuous/Saves Write-ups from memory MAP14: Equanimity - Aurelius This was one of the maps I was most excited to get to. Aurelius has a few of the most interesting maps I've ever played under his belt. His gigantic collab map with Kaito, Ar Luminae is one of the biggest and most grand maps I've ever played. I spent like 4 hours on it and only got halfway through. I got stuck at a part that seems to have gotten a little easier since I played it, so I'll have to go back and finally finish it, cause what I played was great. Despite its size, it flowed very well, looked incredible, and used Supercharge very well. His other memorable map is from 1K Lines 2, as that was a straight-up puzzle map. That was another one that was impressive on multiple levels, from it puzzly nature to how its elements were implemented. So I was very excited to see what he would do in this WAD, and it turns out, he kinda did both of those maps here. First off, this is easily one of the best looking maps in the WAD, and that's saying something given the visual quality of the WAD so far. It's like a mix of this episode and Eviternity 1's episode 6. Lots of the heavenly textures mix in with the brutalist/nature theme here. The linework is insanely impressive, providing really cool designs in the floor and ceilings. The general architecture and detailing is just amazing! Pair it with the understated MIDI here, and the map just has this sense of being a location with a past glory that is no more. You kinda feel a little sad wandering around it, seeing it overrun with demons. Combat is pretty tough throughout, even the incidental stuff. Most of the map takes place in a giant outdoor area, and most of the enemies in it will be alerted to you as soon as you fire your gun. So as you explore, you'll keep running into monsters who have been advancing toward your location, or you'll get shot at by a few snipers. I actually hit low health pretty quickly in my first playthrough just because monsters just kept showing up! You really need to explore to find health and ammo, and not stay put to try to have everything come to you. The main gist of this map is similar to previous maps like maps 3 and 9. Go off to 3 side areas and complete their challenges. Doing so will open the exit. These are some of the hardest fights in the WAD so far. I ended up doing them in what I would say was hardest to easiest. First was the area to the south with multi-stage ambushes in a small compound. It's the one you teleport into after killing a baron. Lots of deaths here, especially with the first fight since there were 2 archies and an astral manc to worry about. The rest of the inside wasn't as bad, but there were a lot of tight encounters that make using rockets dangerous. The next one is off to the east and starts with a teleport ambush in a courtyard before moving inside for a major multi-stage ambush that ends with an imp fiesta with 2 astral spiders. That also got me a few times, but the sides with revs have some power ups if you need them. The final one is at the north west, and that's just a simple single teleport ambush that has lots of room to move. Do all that, and you can exit. But what's with that area in the center of the map that needs the keys? Here's where the 1K Lines 2 map comes in. In order to get the keys, you have to complete a few puzzles! These puzzles can be tricky, and some might find them annoying, but I'm just impressed they're made in Doom. The first one I did is one where you step on arrows to guide a barrel on a track. There's a slight delay in when the barrel will change direction, so it takes a minute to get the feel down, but once you do, this is the easiest of the 3. The next one tasks you with getting a series of blocks to disappear, with 4 switches that show which blocks they will change. Each use will move those blocks up a notch, until they go back down. IDK if there's a good way to do this that isn't trial and error, but with enough switches hit, I got them all down. The last one is a sliding tile puzzle. This took a few reloads, but it doesn't take that many moves from the outset to complete. I still don't know how this one was done. I tried looking at it in UDB and didn't understand what I was seeing. With all 3 keys, you can use the teleporter in the center to take you to the secret exit with a BFG to boot! I guess I should have done this first, since that BFG is about to be taken away from me. Oh well, still a nice reward for people who don't want to do map 33. Overall, this is an insanely impressive map on pretty much every front. Amazing visuals, somber atmosphere, tough fights, and inventive puzzles. A true tour-de-force! MAP33: Catalyst - Bauul Judging from the intermission text and the fact there was only 2 enemies, I kinda had a feeling what was going on here. And I was right. This map is all about movement. You're stuck on a conveyor belt, trying to escape an exploding building, while trying to avoid insta-death lasers and gold liquid. This is the map I died the most to in my playthrough, but I wasn't frustrated by it. I saved every time I got a break, and just kept at at. The 3rd to last passage got the most, when lasers and thin rails were combined. Getting to the end nabs you the perforator (and now the BFG too), so it's worth it for continuous players! Overall, I really like this type of map. It's pretty unique. You don't get to appreciate the visuals while playing, but man this map looks good! And Jimmy's MIDI is one of his best.3 points
-
Share Your Sprites!
Shawn and 2 others reacted to Sonik.o.fan for a topic
Full sheet https://imgur.com/mSkDGL8 Ingame test Hknight_green_red_mugshot.zip EDIT: added some Doom 2016 sounds to replace Doomguy voice should work on every source port, since it's just a simple sprite reskin and sound edit Hknight_red_green_mugshot2.zip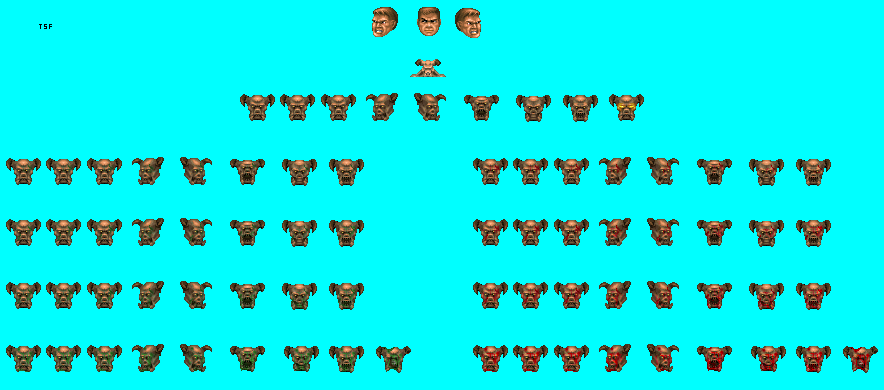
 3 points
 -

what are you working on? I wanna see your wads.
Arrowhead and 2 others reacted to eharper256 for a topic
All the upgrades and mutations for the Crusader's upcoming new Arming Sword, Heavensever, in Walpurgis!!3 points -
Random Image Thread
Dusty_Rhodes and 2 others reacted to Mad Butcher for a topic
I finally found the original GIF. I saw this on Twitter the other day, but Twitter converts GIFs to a shitty MP4 format. GIF source 3 points
 -
Post your Doom textures!
Dusty_Rhodes and 2 others reacted to AconyX for a topic
Alternate variations of crates. And some other misc textures.3 points
.thumb.png.a392eb487d0100cce0fc2adf04cca056.png)