Leaderboard


Popular Content
Showing content with the highest reputation on 01/29/24 in all areas
-
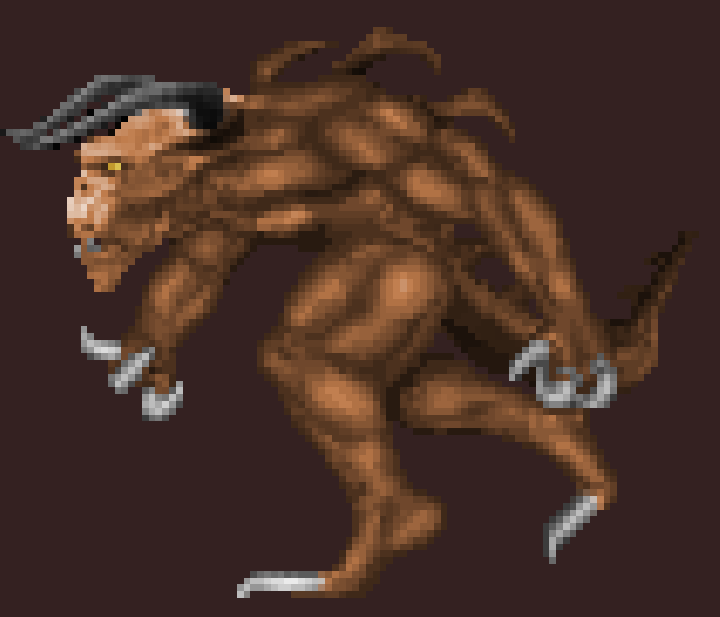
making some garbage for chocolate doom i also bopped this squad of angry goat men17 points
-

Share Your Sprites!
BMWAG65321 and 14 others reacted to Sonik.o.fan for a topic
Taurus Judge shotgun revolver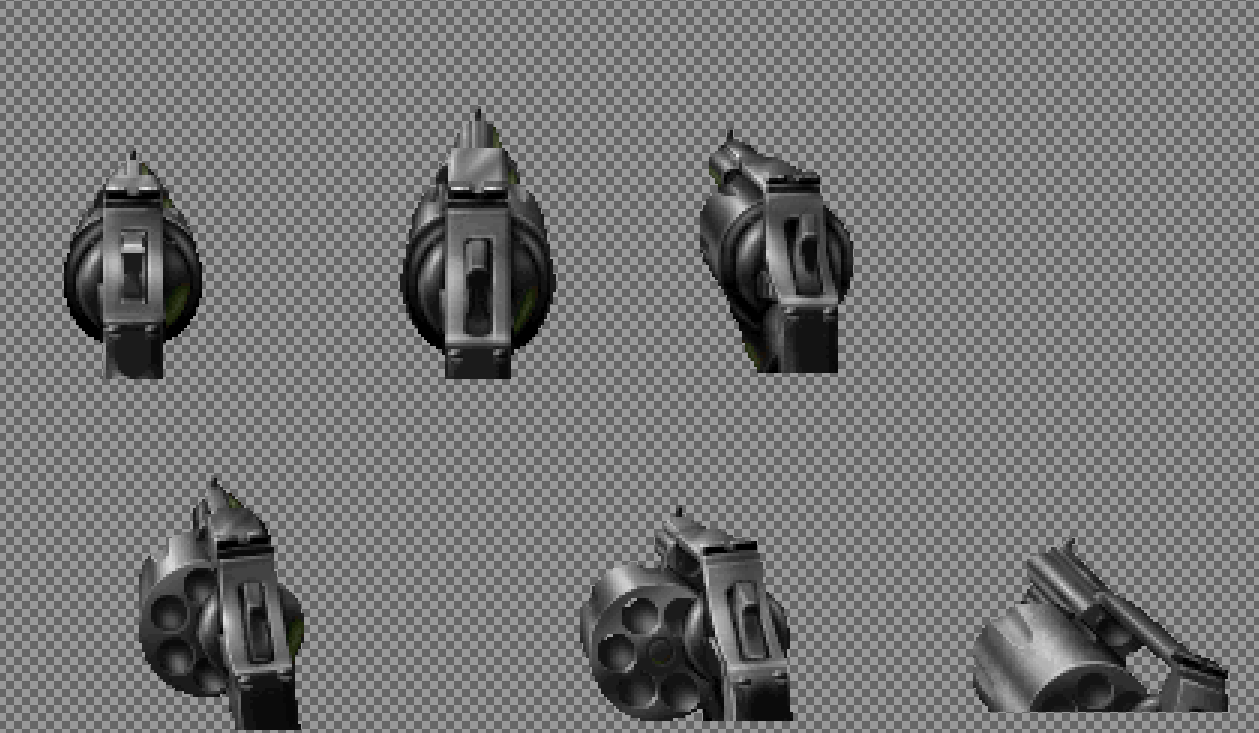 15 points
 -
In case you'd rather read about mapping instead of actually playing the game, I wrote way too much about map36 here: https://doom.ukiro.com/2024/01/29/the-making-of-eviternity-ii-map-36-kenosis/14 points
-
I started writing down some thoughts about my map but it ballooned to ridiculous proportions so I won't post it in here. Instead, anyone with an unhealthy interest in why/how I built map36 can spend the next half hour or so here: https://doom.ukiro.com/2024/01/29/the-making-of-eviternity-ii-map-36-kenosis/13 points
-
The DWmegawad Club plays: Eviternity II
Veeda Vidlak and 9 others reacted to Azure_Horror for a topic
Map 27 - "Empyreal" by @DMPhobos & @Dragonfly UV, pistol start, saves, DSDA The grand battle of Myriad may have been won, but the Celestial Episode has many challenges still. The very first fight of Empyreal unleashes 2 Nightmare cacos, 2 Astral Mancubi, and 2 turret Archviles! After some time, a bunch of Revenants and some Astral Cacos join the fight. This battle includes a ‘free’ megashpere for a reason... This fight has not many monsters, but it is still a tough challenge, if one comes unprepared. Compared to the initial fight, the blue and red skulls can be obtained realtively easily. But the finale of Empyreal is a hard battle once again. Finale works as follows: (for reference - I came here without the secret BFG) First wave is roaming Hell Knights + Hell Dukes and entrenched Energy Riflemen. Soon after, Cacos of normal and astral variety begin to appear. Then an Astral Mancubus gets unleashed. This all happens on a pretty small arena, and very quickly the battlefield gets filled with monsters and projectiles alike. But the final wave is even crazier: This wave includes both an Archvile and a Necromenace. By this stage, they have so many potential targets to resurrect... Personally speaking, I think that the archvile is more deadly at this stage. First, the cover is premium in that stage of the fight; Second, all kind of monsters will do their best to chase the player right into the archvile zaps. That said, a tanky Necromenace is a scary monster too. Focusing him down in the chaotic fight is hard, and also requires some time. All this time the Necro does its best to keep resurrecting stuff - and the fight situation changes constantly. The finale showcases two things: - the full potential of Necromenace in serious battles. - the sheer explosive potential of minislaughter battles on small arenas. After the macroslaughter of Myriad, it reminds us that monster numbers alone do not mean everything... Aside from the main progression, Empyreal also has two optional (Secret) fights. Both deploy considerable numbers of Annihilators. 1) The first bonus fight is hidden in Red key subsection. This battle can be accessed by either shooting a particular switch, or by running on top of the wall after the hexagonal section. This fight awards the BFG-9000 and uses Pain Elementals to support the annihilators. 2) The second secret fight happens right after the final battle of Empyreal. Here, the bonus fight itself is its own reward. This time Annihilators appear together with Hell Dukes. The infight potential between those demons is high, so that’s a plus. However, the battle is not an autowin by any means: both Hell Dukes and Annihilators have powerful attacks, and catching one salvo too many can mean death. Compared to Myriad, Empyreal is an easier level. But compared to other 200-300 monster maps in Eviternity 2, Empyreal seems to be among the harder ones. And there is also the whole "secret fights" angle. Episode 6 seems to be related to the modern "challenge-focused combat" map genres. Gamplay-wise, we have grand slaughter, we have dedicated test-of-ability challenges, and we also have smaller-scale hardcore setpieces. Aesthetics-wise, Episode 6 does look related to the "Cosmic & Void" visual themes, which are very prominent in many challenge-focused pWADs. Map 28 - "Afterimage" by @Velvetic UV, Continuous, saves, DSDA replayed on UV, pistol start, saves, DSDA In my case, there were lots of dying in this level, even on Continuous with saves. And even more dying on pistol start replay of this map. I fully expect Afterimage single segment to be much more difficult for me, than Myriad single segment was. At first, Afterimage looked like an easier map. However there are so many things, that can go wrong… The gloves are fully off by now: there are Astral and even Nightmare cacodemons attacking from high above, there are archviles trying to resurrect everything back, there are many revenants in hard to dodge spaces. Yellow key section was really nasty on a pistol start... Rev seeker missiles, Hell Duke salvos, High-Flying Astral Cacos and Nightmare Demons – this is terrifying combination! Such different threats are very hard to track at the same time. The arena is small, the healing is limited, and there is also that one archvile which can light its flame from nearby room (Hey, sometimes that Vile comes out and joins the fight! Things can go very wrong indeed...) Final area, with the Necromenace hiding on top of a cliff, was also quite hard (even on continuous, this battle required a lot of care. Nightmare cacos getting resurrected is a terryfiyng turn of events...). In the end, this map feels like a smaller @dannebubinga & @Ribbiks map from Sunlust. Technically, there is nothing really devastating here. However, there is endless opportunity for disaster. And thus, the map requires both high performance and an ability to quickly re-improvise, in case the things start going out of control in some novel way... In the end, Afterimage is a very appropriate map for slot 28. The map frustrated me at times, but this far into the final episode nobody should expect much mercy. Episode 6 began with Myriad, after all! Map 29 - "Maelstrom" by @Dragonfly UV, pistol start, saves, DSDA replayed on UV, Continuous, saves, DSDA Compared to previous maps of Episode 6, Maelstrom has two notable traits: 1) Very non-linear structure (despite the map being rather small) 2) Heavy focus on stock Doom 2 monsters. Point 1) is self-explanatory. Maps 27 and 28 each had 2 separate key areas and one final fight in the end. Map 29 has more keys, and the respective colored key sections are often connected in unexpected ways. Point 2) works as follows: there are still many Eviternity 2 demons on Maelstrom. However all the crucial fights (both secret and non-secret ones) deploy a considerable number of Doom 2 foes. Hell knights are especially easy to note, but there are also many old-school cacos (newfanged cscodemons are still there, don't worry), nefarious reverenants, a dedicated cyberdemon setpiece, and other beasties. Specters and pinkies felt pretty underwhelming in their respectable fights: - pinkies of Maelstrom get overshadowed by both the astral caco strike team and the huuuuge pinkie flood of map 32. - specters are just SSG-yes / Rockets-no checklist. IMO, the specters would be better replaced by some mix of nightmare demons and, say, vileimps or other in-your-face threats... But other classic monster played their respective roles very well. Even on continuoius playthrough, situation did go south a few times. Revenants once again demonstrared their inherently Plutonian nature, Hell Knights marched around menacingly, and did their best to limit combat space, and clouds of old-fashioned cacodemons showed that non-mutant tomatoes also know a few tricks. In conclusion, gameplay of Maelstrom is, once again, pretty good. The map feels distinct from maps 27 and 28 due to a unique monster composition and thanks to different progression structure. But my favorite part of map 29 is the MIDI. "A Dremaless Eternity" is a very catchy and memorable tune on its own. And it also perfectly captures the feel of both the map 29 itself, and the episode 6 as the whole. Moreover, for me personally, this MIDI feels almost like the musical theme for the whole second half of Eviternity 2. Map 36 - "Kenosis" by @ukiro I played Kenosis once in rc2 version. Sadly, I don't have the time to replay it again right now. And even if I would replay it - I would require just as much time to make a proper detailed review. So I'll be super short: 1) My favorite gameplay sequence of Kenosis - the final fight. Thanks to its absolutely METAL intro sequence, that fight is another super memorable moment of Eviternity 2, not far behind the Battleship sequence from map 24, or the Grand Battle of Myriad. 2) I also really like the astral Caco+Rev+PE rocket brawl (Edit: NE rocket launcher area), and the battle against Vileimps on narrow castle wall in the Red Key section. 3) I think that Kenosis is a successful continuation of Eviternity 1 Anagnorisis. @ukiro wrote once, that idea of Anagnorisis was to make the player experience the same feeling that someone playing Doom in 1993 for the first time did experience. Kenosis, with its marble-brimstone-and-blood aesthetics, nefarious challenging setups and overwhelming scale, seems to invoke a somehat similar type of experience (Edit: for me personally, ofc): To me, playing Kenosis felt pretty close to playing those old-school grand-scale challenge maps for the first time (be it Go2it, Lake Poison, Punishr2, Fire and Ice, or Mucus Flow). So yes, Kenosis is a worthy successor to Anognorisis. BTW, Anognorisis is so grand, that there are multiple ways to develop its ideas further. For example, Eviternuty 2 Charge also feels like a successor to Anagnorisis. And I think that Kenosis ideas can also be developed in multiple unexpected directions.10 points -

what are you working on? I wanna see your wads.
Xyzzу and 9 others reacted to knifeworld for a topic
Falling in love with otex ice WIP for Doomium 210 points -
MAP01 UV Max in 0:17 - d5da201m017.zip MAP06 UV Max in 0:27 - d5da206m027.zip MAP08 UV Max in 1:04 - d5da208m104.zip MAP13 UV Max in 0:49 - d5da213m049.zip MAP14 UV Max in 1:16 - d5da214m116.zip MAP16 UV Max in 0:40 - d5da216m040.zip MAP17 UV Max in 0:31 - d5da217m031.zip MAP20 UV Max in 0:48 - d5da220m048.zip MAP23 UV Max in 1:04 - d5da223m104.zip MAP24 UV Max in 0:45 - d5da224m045.zip MAP26 UV Max in 0:20 - d5da226m020.zip MAP27 UV Max in 1:50 - d5da227m150.zip MAP29 UV Max in 1:56 - d5da229m156.zip MAP31 UV Max in 3:23 - d5da231m323.zip MAP32 UV Max in 0:35 - d5da232m035.zip MAP35 UV Max in 1:26 - d5da235m126.zip MAP36 UV Max in 0:41 - d5da236m041.zip MAP38 UV Max in 3:36 - d5da238m336.zip MAP41 UV Max in 3:02 - d5da241m302.zip MAP42 UV Max in 0:46 - d5da242m046.zip MAP43 UV Max in 0:30 - d5da243m030.zip MAP44 UV Max in 0:18 - d5da244m018.zip MAP45 UV Max in 0:54 - d5da245m054.zip MAP46 UV Max in 2:19 - d5da246m219.zip MAP47 UV Max in 0:19 - d5da247m019.zip MAP49 UV Max in 0:22 - d5da249m022.zip MAP51 UV Max in 0:48 - d5da251m048.zip MAP52 UV Max in 1:59 - d5da252m159.zip MAP53 UV Max in 1:04 - d5da253m104.zip MAP57 UV Max in 0:16 - d5da257m016.zip MAP58 UV Max in 1:39 - d5da258m139.zip9 points
-
MAP29: Maelstrom by Dragonfly The penultimate map of the regular progression is an open field that sends you to look for three keys. The order of operation is up to you, there are multiple copies of plasma rifles that the map relies on. I started with the red key, which assaults you with cacodemons - red, gray and black, the last one are complete bastards with their high speed and hard-hitting attacks. Yellow key came second, at first it squeezes you between two groups of revenants and hell knights that emerge from towers, then throws more cacodemons. The last one to grab was the blue key, which tasks you with fighting two cyberdemons in a pit of damaging liquid. This was the easiest one, though I must say, dancing between tiny patches of rock, avoiding rockets and spraying plasma was an interesting scenario. Those three big fights are linked by incidental combat, so there is little dead time here. With all three keys you can exit to the final map, but there's also MAP36. I wondered if I would be able to find it and uncover all secret stages of Eviternity II by myself. And I succeeded. There are two additional fights containing switches that open an additional exit. The first one can be seen on the way to the yellow key and I'd say it was the hardest fight of the map. You have a necromenece, imps and hell knights in a rather tight place and my usual strategy of BFG rush was out of question, since Maelstrom has no BFG. The second secret can be found east from the MAP36 portal, just follow a trail of candles. This one also features a necromenece, but isn't that bad - the hell nobles are all above the arena, so it's easy to just circle-strafe around the sorcerer until he dies. Maelstrom is an okay map, but so far Episode 6 has been a bit underwhelming. MAP26 aside, the artstyle feels a bit too similiar - rocks, teal liquid and dark marble. I don't think I've felt this is any other episode. As such, I fear maps 27, 28 and 29 will blend into one another when thinking about Eviternity II. MAP36: Kenosis by ukiro Kenosis is the biggest, longest and hardest map of Eviternity II and the ultimate challenge the wad presents to anyone who seeks it. To be fair, I expected Anagnorisis part 2, but Kenosis is a whole different kind of map. It's a series of discrete fight that are among the toughest in the whole wad, connected by platforming over a lake of lava. What is this place, anyway? There are trails of rocks shaped like a seven-point star with demonic buildings in the corners and a celestial temple in the middle. The very first fight has you avoiding the gaze of archviles and pressing switches until you can exit and the meat of the map begins. As I've said earlier, you have six buildings to choose from - three of them hold the keys, the rest is optional, but lets you arm yourself properly. You have the yellow key, which starts with two archviles in a maze of columns while corporals fire from the sides. I went there first, with only a shotgun and a chaingun. Not a great idea, especially since the SSG fight isn't that tough to survive (nightmare demons, astral cacodemons, revenants and turret annihilator in an arena). It is followed by a lot of lost souls, zombies and several cacodemons, which aren't that hard to take out. When playing the map blind, you have no idea what you'll encounter when investigating. After the yellow key I obtained the super shotgun and rocket launcher. The latter is probably one of the more forgettable encounters. The archvile trio that rides up and down is a pain to take out without proper guns and the rest is just a lot of revenants. My next step was the red key building, which is where I hit a wall. This bloody thing locks you in a room with a ton of lost souls. Better make a good use of invuln and rockets to eliminate as much as possible, so you can at least move around. Then two pairs of revenants and archviles appear in corners, guarding switches that lets you escape. That's not the end, as you escape from the frying pan straight into a fire - a narrow ring around the building with veilimps. After a couple of tries, I gave up and left this fight for later, crossing my fingers there is a plasma rifle somewhere. Indeed, the next building I've entered had a plasma rifle, but also a really nasty fight. See, there is this small circular room, with a cyberdemon in the middle and crushers travelling around. This one also took me a while, the blast damage and peripheral mancubi will chip away at your health and once you've survived this, you have to eliminate dukes of hell in tight spaces. Blue key was next and I'd say this was the most tense part of the map. A column in the centre is topped with a cyberdemon, who is great at taking out astral mancubi, but also is a hazard when you need to jump from one window to another through said column. You have to do it a couple of times, always risking catching a rocket up-close. Also, don't try killing the cyber, I'm sure he has several back-ups. Only the red key was left, but now I had a plasma gun with a hefty supply of cells, so once I grabbed the key and escaped outside, I could just spray plasma in front of me and running in circles until all veilimps were dead. There is one more think I want to talk about before entering the temple and that's the presence of evil eyes. I've noticed a couple of them hidden around the map, they teleport away if you press use on them, I think they trigger a rather silly easter egg when you find all of them end return to the start. With all keys you can enter the temple, I think the map eases up here somewhat. You don't have to platform when moving from place to place, that's always a positive, but the fights here are much more managable. The corrupted pit with an archvile tower in the centre, where you have to battle various monsters while avoiding being seen by a dozen of viles is another tense section, but not as hard as the blue key part. The two fights that unlock the finale boil down to running laps around the room while firing rockets and plasma - you know, a basic crowd control. The last fight, however, makes up for it with probably the second most cinematic moment in the wad. When you pick up the perforator, the cross in front of you turns upside-down, blood fills the place and a thousand or so gibbed zombie corpses are being thrown through the windows. First time I saw it, I was speechless. Then several archviles and necromeneces get released, immediately begining to revive the bodies. This is followed by more archviles, two masterminds and a cyberdemon. The perforator really shines here, being able to shoot through crowds and quickly eliminate even the bosses. I wish I was able to use this gun more, pistol-starting each map really screwed me in this regard. Once they are all dead, I was able to jump through the cross and after 3 hours of play complete Kenosis. I'm not afraid to call this one "a magnum opus", ukiro outdid himself with grand scale, creative fights and detailed visuals. The minimalistic midi does a great job building the uneasy atmosphere of a corrupted sanctuary. At the same time though, you spend a lot of time moving from place to place, it's easy to fall down and waste time trying to get back up. In the end, I think I still prefer Anagnorisis, but Kenosis is a worthy conclusion to the secret maps and the second best behind Charge.9 points
-

The DWmegawad Club plays: Eviternity II
Ralgor and 7 others reacted to DJVCardMaster for a topic
MAP29 - Maelstrom - Dragonfly (100%K/I/S): A really cool penultimate map before the end. You are quickly introduced to the secret exit, but to access it, you will need to win two secret fights, so let's talk about them later. There are two ways to tackle this map at first, by choosing the red or the blue key path. Getting one of both will reveal the main hub where there is an exit teleporter that will require you to get the three keys. Each part of the map that is holding a key, will naturally reveal a massive fight. The hardest one was the one at the red key, for sure, given the openness of the arena, combined with the stupid amount of flying tomatos and low tier enemies blocking your way will make your life pretty miserable. I tried to escape this area, but flying enemies can easily get you from anywhere at this big complex. I did it anyways. The other two arenas where: a small grotto, around two towers, with a lot of hell knights and revenants trying to hold you from getting the keys, and the blue key arena, which was a small area with flying enemies and two cyberdemons. A fun thing to do is to lure some enemies from the red key area to the blue key one, so they infight with the cybers. This will reduce a lot of enemies without wasting too much ammo. The yellow key area with the towers was a bit meh for me. You have two secret fights, those are required for you to access the secret exit. Both of them will hold some necromenaces with some hell bruisers guarding him. Both arenas are pretty similar, and not that hard, specially the one hidden at the site where you need to do some parkour over the little bumps at the terrain. (It's marked with candles). The other secret fight is a bit trickier as you may access it by jumping from the ramparts next to the yellow key towers. It's a small sector marked with a candle aswell, but you may even see the secret arena from far away if you are gliding on top of said ramparts. It is a really nice 29th map, but if I have to be honest here, I think MAP26 would have served as a better MAP29, in my opinion. MAP36 will be our last secret map before the final fight, and I hope it will give us our last Perforator. Order of preference: Kenosis review is a bit longer, so it will be written separately from MAP29's just not to overwhelm the reader.8 points -

How does Doom sound to you?
No-Man Baugh and 6 others reacted to esselfortium for a topic
Yeah, people definitely used to be more set in their ways about what Doom music could be. When BTSX first came out in the early 2010s, someone on here described its soundtrack as "Mexican soap opera music" and asked if the composers were in a competition to see "who could be the most homosexual"(???). Nowadays it seems more accepted to have a variety of sounds and moods in a WAD soundtrack instead of just cheesy general-midi representations of "rawr rawr rip and tear ur guts" etc.7 points -

what are you working on? I wanna see your wads.
Xyzzу and 6 others reacted to Async Unicorn for a topic
7 points -

The DWmegawad Club plays: Eviternity II
RHhe82 and 6 others reacted to Cutman 999 for a topic
MAP29 - “Maelstrom” by Dragonfly (Pistol star, used saves, 100%K/I/S) Penultimate map to the bone, atmosphere and music play in tandem to try and make this map as ballbusting and epic as possible, altough I may say, the gameplay compared to the juggernauts of the set is a lot more suppressed, trying to trick your brain with large scale fights and limited resources for most of the map to make you think it is difficult. This is actually a good thing from a megawad pacing standpoint, sense the player not only tackled another 30 maps earlier, but what's coming next is the sequel to Anagnorisis. For example, the red key fight can destroy you if you are unprepared for it and just keep waiting until the astral cacos come around and corner you, also that there isn't much room for error with the ammo lacking unless you fight more ambushes like the astral manc/imp one. But when you actually do it, you'll notice is basic crowd control stuff, and you can comfortably go around the large arena to dismantle it. The 2 cyber demon surprise in the Blue key is also like this, and like a not good Romero map would do, the damaging floor is more threatening than the cybers themselves, just plasma them. Not to count, the real hard hitters like the necromenace ambushes give you a megasphere for free, so there isn't much to fear playing this map. The secret ambushes are also not a big deal, especially the candle trail one, but the second one after you open the yellow key path is possibly my favorite use of the necromenace in the wad, just being around suppressing your space as much as possible, not relying in killing its hellknight army or he'll just mess you up badtime. Better than just summoning him where he has a big pile of monsters or threating him like a cyber sniper. At least for what it is, enjoyable as an penultimate challenge, and a good way to ease your way into 3 hours of misery. 8/107 points -

Share Your Sprites!
Walter confetti and 6 others reacted to Desfar for a topic
Another passive project while I avoid trying to make maps. Attempts to make a skeletal version of NMN's Blademonkey This would be aimed at being an Bone Guardian from Icewindale 7 points
 -

[25 Slots Left] Doom II Extended: Community Project
Stupid Bunny and 6 others reacted to Pistoolkip for a topic
Please tell me this is a satire post. This can't be a real CP.7 points -

Share Your Sprites!
WorldMachine and 6 others reacted to ShallowB for a topic
I don't really have time to properly split these up and wadify them right now, but here's sprite sheets for a Doom 2 style Doom 64 marine. First one should convert to Doom pallet without issue. Second one is a little more faithful I think, but the purple visor isn't going to play nice with Doom 2. Last one retains classic Doom's light helmet because I've always liked that detail, and so should again work perfectly with Doom pallet. I grabbed the sleeves off the Sniper skin from 150skins.wad, and the blue visor is based on one from Craneo (thanks! I was stuck on just the purple visor for too long before I saw that blue one!)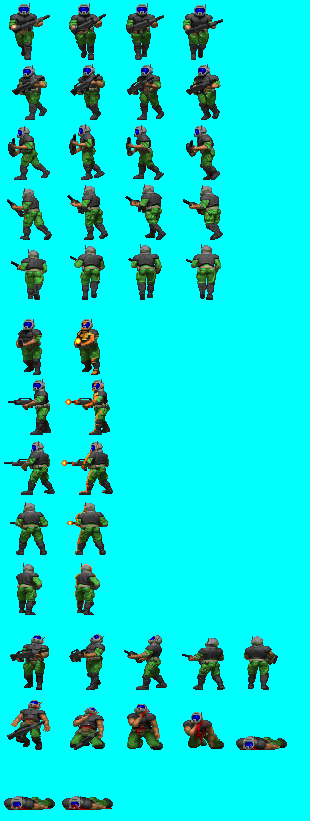

 7 points
 -

How does Doom sound to you?
No-Man Baugh and 5 others reacted to Novaseer for a topic
fellas is it gay to like music6 points -
MAP29: Maelstrom. Played on DSDA v0.27.4, UV, PS. 264/264 K, 2/2 S, 8/8 I. Comp. time 38:52 You know, I *am* glad that this few last maps weren't all striving to be magnum opuses in the sense they'd all be trying to out-do one another in scale. Maelstrom as a name already invokes certain expectations to anyone who's played Sunlust, they almost share the same mapslot... come to think of it, they both involve getting three keys in separate paths (much like the last few maps), so there's that. But, I think Dragonfly stated somewhere that Eviternity II is made for normal people, and while I love Sunlust, I also love the fact that this second-to-last map (excluding the secret map, whose entry portal lying here is is apparent from the get-go) lies difficulty somewhere around my comfort zone - also much like the last few maps - that I'm not frustrated, but not having it so easy as to just go in and be done with it. I like the skull key fights here -- except for the BSK, that's just an very unexciting affair -- especially the one preceding YSK. The one where fight hordes on giant opposing staircases, and then release a cacocloud and HK horde... It's simple, but somehow I like it very much. Nothing wrong with RSK hordes either. This time I also enjoyed the Necromenace fights more than in previous maps. I don't know why, since the secret arenas are cramped and simple. I guess it's just that this I could focus on the bastards and their surrounding court of hell nobles. * MAP36: Kenosis. Played on DSDA v0.27.4, UV, PS. 2777/2777 K, 0/0 S, 29/34 I. Comp. time 94:23 At first, I thought I wasn't going to play this one - upon entering the level, the frame rate would already dip somewhere around 20, even with no enemies in sight, no nothing except a pathway forward. But then I figured to switch to software rendering, see how it would impact the situation - and to my surprise, frame rate jumped to 35? I always thought hardware rendering would be the faster option, and that software rendering would sacrifice the performance for mapping tricks and "just the right" graphical outlook? Anyway... Wow. Ukiro and friends must have worked real hard on this one. It's enormous, it's beautiful, it's got some very cool visual effects, especially and specifically in the final fight. That cathedral transforming, windows breaking... Close to 2000 enemies gibbing through the infernal portals... Wow. That said, I have mixed feelings on Kenosis. I was constantly feeling overwhelmed, not knowing where to go. It's a bit too big for my tastes, I suppose. Some of the fights didn't feel that fun. The Lost Soul Deluge was hysterical, but mostly I was exhausted until the cathedral part (and even there the archvile watchtower section was more like tedious), which housed some fun fights leading up to the Perforator Murder Fest. That was glorious. Or would have been, if I hadn't ended up with 2776/2777 kills :P Had to hunt quite some time for the final one, a lone corporal that had gotten stuck in the corporal shooting gallery arena. I don't mean to sound negative. It's still a great map, it's only brought down (and I can't stress enough this is a personal preference) by the sheer monstrous scale, and in such a big space not every fight is as fun as others. The ending is a very memorable scene. I found two sigil eyes; one in a red brick shack somewhere, and one near the corporal gauntlet with the YSK; and I pressed the eyes, and they'd teleport away. What was the point of that? Did I miss any? They felt so remote and easy to miss that I almost think they might have hidden some sort of easter egg that I missed now :P * - - * - - * Added two hours later: Watching Vytaan playthrough convinced to go back and look for more :P Worth a couple of cute sights :D Also watching ad-ridden Vytaan playthrough made me realize how silly tactics I used in some of the encounters to make them worse on me. Like the corporal arena: I would go on about unleashing everything, thinking I had to do that to deal with the archviles. End results was me savescumming for realzies, in low health situation hoping for benevolent RNG. Or: with the inverted Sunlust-carousel, I would keep the Cyberdemon alive, trying desperately to avoid splash damage. Should have shot the bastard down with plasma right away, instead. I'm fairly certain I'd have a much better time the second time around, roughly knowing how the map is structured.6 points
-

what are you working on? I wanna see your wads.
horselessheadsman and 5 others reacted to Clippy for a topic
6 points -

The DWmegawad Club plays: Eviternity II
Celestin and 4 others reacted to Veeda Vidlak for a topic
I’ll post Kenosis tomorrow, I’ll need to get to bed before that behemoth is finished. Map29 “Maelstrom” by Dragonfly Sunlust veterans will no doubt bristle upon loading the penultimate map but have no fear. Maelstrom is in line with the design philosophy of the rest of Eviternity II and with the exception of a secret fight doesn’t present an inordinate challenge. First things first, there is a blue armor behind the SSG shrine, I’ll throw that one out for free. After a handful of troublesome but singular monsters we get the first and in my opinion toughest non-optional encounter of the map. Upon grabbing the RL all three passages open with each one containing a pair of revs and four hell knights. You want to quickly blow through one of the packs to duck into a passage, and while the barred secret exit works, I would not pick the northern one, you draw out more trouble than you want. After this you have the usual incidental fighting and a few key fights that aren’t any harder than what we’ve generally been getting. The red key lets loose copious amounts of caco and astralcaco fun so make sure you’re well stocked before you trigger it. The yellow key gives the enemy the high ground but unlike Anakin we all know how to handle that. The secret necromenace arena to the west is a kid’s glove fight for sure, you’re given plenty of time to down him before reinforcements arrive. The cyberdemon tag team for the blue key would have been challenging if you had to ride lifts or something to get out of there. Instead, it’s a timed arena before stairs rise, so you don’t actually have to kill them before the damaging floor does you in. And we can leave now but… oh… right there’s a secret exit on this map. To reach it we have a second secret necromenace fight to the east and this one is the real deal. Not a lot of space, many hell knights, imps, and we’re stuck with the rocket launcher and plasma. This is one of the hardest single arenas we’ve had in the entire megawad, it’s tough to get prolonged damage on the necromenace and easy to get cornered by hell knights. I find a bit of patience goes a long way; everything is getting revived anyway so instead of trying to brute force it try to move around until the nobles are all on one side… then move to the other so the faster necromenace advances alone. Maelstrom is a good semifinal but the restrained combat and presence of the secret exit make things clear. Map36 is going to be the big boy challenge of Eviternity II and Dragonfly is telling us to only advance that way if we dare. The nasty necromenace secret is his way of giving us fair warning.5 points -
One of the advices people often gave to beginners to the world of Doom was "prioritize certain monsters, like pain elementals and arch-viles". For the context of most vanilla style levels it seems like sound advice. However, it has been torn apart by some of the more knowledgeable members of the community, because it doesn't apply to every single encounter you might come across playing a user-made map. Over the years, as the players gained more and more skill and level design knowledge, many mapping styles such as slaughter and combat-puzzle started to develop and mature, and with those kinds of wads also came new design philosophies. Many of the fights common to those genres employ very strict set-ups that often require some very specific ways of playing in order to conquer. And this is where my question comes up: what are your favorite examples of fights with such an unusual progression? I personally am not an highly-skilled player, so I can't really commentate on detail about most ultra-hard wads and their intricacies, but I believe I still can contribute with an example easy enough to understand for everybody. In the circular room of Sunlust MAP29, according to the monster prioritization strategy, attacking the arch-viles first would be the path to follow, however in practice it's a terrible idea. There's just too many of them and you would get fried instantly. Plus, the only cover you can take from them is constantly moving around, and the only way to get to that cover is clogged up by imps. What you are supposed to do instead is to focus on the imps, killing them to open a path to safety from the viles. After you are done with the fodder, you can press a switch in order to activate a crusher and effortlessly kill the AVs.5 points
-
Examples Of Unusual Monster Prioritization?
rita remton and 4 others reacted to baja blast rd. for a topic
Yeah this might be counter-orthodoxy, but I don't use target prioritization as a concept at all while playing hard wads. I find it is better to think of what I want to accomplish in a broader way. The answer might be killing something specific (which is what target prioritization does, so I don't lose out on that) but it might also be something really specific/arbitrary (and tunnel-visioning on target prioritization would cause you to miss out on those strategies more often). Target prioritization is more useful for regular difficulty wads. In those wads, decisiveness counts for a lot, and if you shoot at the right thing and do an okay job of avoiding damage, you'll beat most encounters. And playing around with different combinations of what to shoot at might get you past an impasse. In hard wads, though, it's not uncommon that every combination of priorities fails if you're missing some nuance or not good enough at some required tactic. So I've found it's not the best way of thinking.5 points -

The DWmegawad Club plays: Eviternity II
RHhe82 and 4 others reacted to cannonball for a topic
MAP29 - “Maelstrom” by Dragonfly The monster count suggests another fairly short map, however despite how far we have gone, I still think this draws a lot from the likes of Plutonia, the map might have a fairly modest monster count but every monster makes its mark here and the astral cacodemons really run havoc at times here. The blue key was by far the easiest to grab, two cybers aren't that much of a bother, especially if you can draw a couple of other monsters to where you drop in and distract one of the goats. The other keys involve a lot of flyers and they can cause real havoc as there is nowhere to hide. Once the keys are grabbed, reach the central building and exit, no questions asked. The secret exit involves finding two secret fights, one that is pretty darn perilous is found on the yellow key path, it involves a necromenace, imps and hell knights that will be repeatedly revived to the point where you wonder whether you will make it out with any ammo. Target that menace like your life depends on it, the other fight accessed by doing some island hoping was nowhere near as stressful, you have another necromenace but this time the other monsters are perched and easily avoidable. Overall despite my initial fears, this one delivers a pretty impressive penultimate map experience, it is tough and probably tougher than the other maps in this episode (By a small margin), the scenery is imposing and foreboding and the midi just reeks of that penultimate map essence. I will play Map36 tomorrow.5 points -
I'm part of the "always give a weapon at the start" crowd, but one minor under-appreciated thing about starting with the pistol (as opposed to beginning with the shotgun straight away) is that I can make that first weapon pickup a chaingun or a rocket launcher instead. ;) Maybe the ideal starting loadout would've been nothing but the fist. A la carte, all the way.5 points
-
It's honestly very weird seeing a WIP map of mine listed in this thread (this is at least twice now) -- this thread is supposed to be for posting things that are lost to time, and I'm very much still an active member of the community. If you're interested in someone's WIP, its better to reach out directly, that way they know someone's looking forward to it. I do still have this map, there's a fancy mini-project I'm spinning it into, but it's been very low priority lately.5 points
-
Dragonfly did put in the description of the YouTube upload that, since Maelstrom's music was done relatively early, he'd IDMUS29 while testing maps that didn't have a MIDI yet so this checks out surprisingly well.5 points
-

Endless Random /idgames WAD Adventures #077
LadyMistDragon and 4 others reacted to brick for a topic
Brick | 1 wad | 12 maps Adventure | 9 wads | 68 maps Chris K (1995) by Chris Klie. 12 SP maps for vanilla Doom. Played with GZDoom on UV. There's something about Chris Klie that I've always liked. Maybe that his maps follow a similar style as id's, with a similar balance between puzzle-solving and combat but with his own unique style, maybe that I find almost every one has a memorable trick or gimmick, or maybe just that they're easy enough that I can actually complete them on UV. He initially released his first maps as individual wads, though I don't think it's possible to find them in this form any more. When he had enough for a full episode replacement he compiled them into Chris_E1. Then he made a few more maps into a partial E2 replacement and released the full package as ChrisK. All the maps here would eventually end up in The Lost Episodes of Doom, with Bob Carter filling the other half. Chris didn't stop here though, he converted a handful of these maps to Doom II and they ended up in his megawad BF_THUD. I've played these before as part of the Lost Episodes, but it was fun to replay them here. As far ChrisK goes, the first maps feel primitive, but part of it can be blamed on the early tools, he has explained that some oddities in the architecture (like the weirdly angular hallway in E1M1) were because this was the only way he could get the nodebuilder to not create HOMs everywhere. Other cases are just because he did not care much for detailing, his level design is pure abstraction with a focus on puzzles more than anything (though they are not as taxing as say Jim Flynn's). Still there are some really original setpieces for the time, like the bridge with the pit full of Cyberdemons in E1M4, the switch puzzle box with the dozen Supercharges and later the complex web of teleports in E1M5, the crusher in E1M6. E1M7 has what must have been the craziest hot start at the time, the map opens with a Mastermind staring us down, and making even the smallest movement opens up a whole bunch of enemies attacking from all directions. The trio of E2 maps have some differences in their design, eschewing the more hub-like approach of E1 and going for more interconnectedness (though E2M3 goes for a combination of both), some simple but effective lighting to establish a darker mood, and in E2M3 quite a lot of fun with exploding barrels. If you dislike Chris because of his Master Levels contributions I don't think this wad will change your mind, but I really like those and enjoyed revisiting these early levels, they're short and lighthearted fun.5 points -
The DWmegawad Club plays: Eviternity II
DJVCardMaster and 4 others reacted to Veeda Vidlak for a topic
Map28 “Afterimage” by Velvetic Everyone calling this a breather level is very interesting to me. It took eight attempts to single-segment Afterimage while the last map didn’t kill me at all. The core of the map is similar to many of Dragonfly’s, we have two keys that may be acquired in any order, a secret BFG, and mostly incidental combat. It doesn’t look particularly hard at first glance, pretty much the entirety of the map remains accessible for all but a couple (sedate) encounters. However, the incidental combat is far nastier than anything we’ve gotten so far. Astralcacos and dukes of hell everywhere, viles backing them up, low-lit irregular terrain… Without a surplus of healing artifacts a bad break like getting caught under an astralcaco likely ends the run. And I wasn’t even having ammo issues, I never found it scarce on any attempt. Then we have the necromenace at the end which I found to be a major roadblock. Rush him and a good number of astral and nightmare cacos home in and pulverize you while killing him. Take your time and his ghosts whittle you down. Ultimately, I found the best plan is to save that secret soulsphere for this part so you can run up there with 200/200. That was enough to survive the cacos and clean up the rest. Afterimage is well made and seems calibrated in its recovery and combat (and ammo apparently). It is, for me at least, the most difficult map so far this episode and a fearsome setup for the penultimate level.5 points -

Endless Random /idgames WAD Adventures #077
LadyMistDragon and 4 others reacted to ICID for a topic
Wet Work (1994) by Zen Psychosis Play Settings Difficulty: Ultra-Violence Source Port: dsda-doom, complevel 2 A mostly competent but needlessly confusing 90s techbase with optional keys, mandatory secrets and combat that will keep your heart rate safely in the mid-60s. Some interesting attempts at architecture but terrible lighting - always too bright or too dark, never drawing the eye to what's really important. St. Hangar (2023) by DiR Play Settings Difficulty: Ultra-Violence Source Port: dsda-doom, complevel 2 A nasty little Tyson fight staged on the St. Anger album cover where the only winning move is not to shoot, at least until you've taken out a couple of revenants with infighting. Shoutout to Walter for actually tracking down the meme thread that spawned this. For a 30-minute joke, not bad! The Pits of Doom (1996) by Peter Anchondo Play Settings Difficulty: Ultra-Violence Source Port: dsda-doom, complevel 2 An extremely amateurish Wolfenstein-ass 90s map that gives you thousands of cells and 15 megaspheres to deal with fewer than 80 monsters, most of whom are imps and zombies. The SS guys make an appearance because of course they do. Made me realize I was probably a little too hard on Wet Work. Castle of the Far Island (2014) by Aleks "Plut" Shahov Play Settings Difficulty: Ultra-Violence Source Port: dsda-doom, complevel 9 This is my first introduction to the works of mapper/speedrunner Plut and it left me extremely impressed. The "castle" is achieved with sprites from a bunch of different sources but it all feels cohesive and finds ways to make the ever-challenging brown-on-brown Quake-y castle layout eye-catching and memorable. But what really makes this a gem is the combat, which takes place over a series of tight, clockwork-calibrated combat puzzles where every hitpoint and every shell matters. "Cramped combat" is usually a criticism in the ER/iWA but here the space is used brilliantly to make fights thrilling even with low monster counts - most of the fights require some infighting on UV because the alternative is to get point-blanked by a revenant missile, but infighting is always easy to consistently set up. This is the kind of smart, careful mapping that you often find with great speedrunners and a true delight to discover. THE UNDERHALLS 1.0 (1995) by John Walker IV Play Settings Difficulty: Ultra-Violence Source Port: dsda-doom, complevel 2 A mashup of Underhalls, The Inmost Dens, and a really annoying crate maze which is actually really good for 1995 if you ignore the latter. Like a lot of early Doom II maps challenge is over once you get the SSG but everything else is well-placed, with some sneaky teleporting-monster traps and good use of space to keep things interesting. Visually the map is mostly just looking at the IWADs and taking ideas that worked from that, but fuck man, that's more than most 90s mappers seemed to manage. This is one of those WADs where the textfile is more interesting than the map itself (even though I did enjoy the map in this case) - Unit Supply Specialist John Walker was a newly-married Doom fan who was hoping to do a remake of the entirety of Doom II (here's Entryway) but had to stop after this because he was joining the "Primary Leadership Development Course" - essentially the first step of officer training. He was never heard from again by the Doom community after this, which is a shame because both of his maps show a ton of promise for their time. I spent an embarrassing amount of time trying to track down what happened to him, hoping to learn for sure that he simply got tired of Doom rather than coming to harm, but unfortunately there are far too many John Walkers in the US military (with his same rank, even) to possibly know for sure. My best guess is that he might be the man in this picture (left), a Sergeant (which Walker would likely have become if he graduated PLDC) in a resupply brigade who joined the military in 1993. In addition to everything else he did in Doom, Specialist Walker reviewed WADs in his textfiles - in a way a distant ancestor of what we do here in these adventures. In fact, I was struck by how similar the writing is. I'd like to copy the review that's included with Underhalls 1.0 here as an item of interest. Here's hoping that wherever John is, he's doing well. The Church of Doom II (CHURCH.WAD) (1995) by Virgil Itliong "I'm not quite sure why this was called church.wad and not grave.wad, it's more of a cemetary than anything else. Great construction in this wad, including features such as a musoleum <?> with a chaingunner...somewhere, people burning at the stake, a church (small), and the most awesome exit I've ever seen. This wad is simply great. Oh, BTW, as soon as I contact the author, don't be surprised if you see that same sky texture in one of my future levels."5 points -
Doom Pictures Thread 2024
Dreemurr Deceevurr and 4 others reacted to plums for a topic
It is! Vanilla Heretic only visually scrolls moving floors when they go east, because its scrolling code was bad. (*and couldn't easily accommodate other directions, not "bad" as in they intended to have it scroll other directions but it didn't work. See this post I made!) No source port changed this, not even ZDoom which is surprising given all the other changes early ZDoom made. But now Crispy Heretic does (as well as inter-heretic), because I wanted it to, and some of the already-present code needed for uncapped framerates made it easy to do.5 points -

[Boom (-cl 9)+Extras, on IDgames!] Headless Chicken: Delicious 33 Map Boom Megawad
mancubian_candidate and 4 others reacted to Chookum for a topic
If you hit the switch before the elevator raised, it may have prevented it from rising correctly with the voodoo that makes the map work in the background. Meanwhile I can confirm IDGames have received RC9. All's well there. This is where I'll hang my hat up - on Headless Chicken's Boom maps. Keep an eye out for One Bite More in the future, a GZDoom Expansion. When it's ready to play, it'll have its own thread. 5 points
 -
I'm afraid I can't let you do that, Doomguy.
 5 points
 -

Share Your Sprites!
Martin Howe and 4 others reacted to TommyGalano5 for a topic
 5 points
 -
A dear THANK YOU to the doom community
RataUnderground and 3 others reacted to The Bug for a topic
Hello, I am making this post as a way to thank this community and the way it shaped me and my future hobbies almost 4 years later. I was only 11 years old when I made this account, asking for help and posting my silly mods I made using Decorate and Photoshop. Going back - I'm so glad I started my modding journey here. The support, friendliness and general warthm of this community gave me lots of motivation to go further with mods, which makes it even more sad knowing how I treated the community back (being young, immature and all). I started making mods for other games (old Need for Speed games), I improved my photoshop skills, learned to 3d model and really without the support this community gave me - I would have given up a long time ago... So from the bottom of my heart - THANK YOU. You are an amazing community and I appreciate everything you people do to help:)4 points -
The DWmegawad Club plays: Eviternity II
Veeda Vidlak and 3 others reacted to DJVCardMaster for a topic
MAP36 - Kenosis - Ola Björling (100%K/I/S): Phew, almost two hours of gameplay. One of the longest behemoths I've ever played in my Dooming career. For sure. What a map, WHAT A MAP. This is clearly an spiritual successor to Anagnorisis. And in Anagnorisis fashion, Ukiro will showcase everything in his texture arsenal to make another one of those magnum opuses of Dooming history. I will anticipate and say I prefer the First Eviternity's counterpart a bit more, but this one does not leave anything to desire from said map, maybe a little bit of color. But let's be honest here, we are not here because we want color, as we are deep in the nest of some hellish entity. I don't think there is something as big as this in modern Doom mapping, not in length nor playtime, I'm talking about size. In fact, I'm sure we are right at the limits of the possible size of a Doom map right here. Going from point A to point B feels like an eternity, like going for a walk to your friends house that lives 10 squares from home. This is a good way to actually start talking about this secret level. The map wants you to go to six places, marked in different spots in the map. Those are separated with long distances, and you will have to carefully cross over some tight catwalks over the eye of the volcano to reach each desired place. Most of the time at the first half of the map you will be wandering around this humongous landscape. Each of the buildings have different fights and things to do. And you will recieve most of your arsenal here. Most tasks are really fun and creative. Others are just fighting and surviving as much as possible. The one that I did last (the furthest one from the starting area) was the least interesting for me, as it involved some pillar-raising in order to escape a maze, with a cyberdemon at the middle of the pillar making things difficult. I do remember another one in particular which I've really liked, with a circular arena, a cyberdemon at the middle, and a lot of crushers that follow the circular shape of the room. Each of those buildings, have some hearts like the ones seen at MAP03 that you will have to break in order to reveal more paths to other buildings. I'll be honest with you all here, not sure how was progression intended to be here. I was just lost in immersion, so I just grabbed the keys, broke the hearts, and proceed. In fact, I don't remember using the keys apart from the blue key at the cyberdemon maze (When grabbing them, you will trigger a lowering wall). After a while cleaning each building, you gain access to the great building at the middle. This one appears to be a MASSIVE church, in the middle of hell, and this will be the breakpoint between the first half of the map, and the second one. The second part of the map is not as long, but forces you to complete three more fights, one at each end of what appears to be a cross-shapped complex. Some fights later and FINALLY, your reward, a new Perforator for your troubles. But it's not over, you will have to use it at the proving grounds. What a magnificent sequence we see after getting the Perforator. Slowly, the stained glasses at the walls will break, and de columns will turn into meat. The holy cross will now turn into a bloody, inverted, hellish one. From the broken windows a pile of dead, splattered zombiemen will be vomited, giving you ammo for the perforator. This is where half of the +2700 enemies will come from. The last fight has a lot of liches and arch-viles trying to resurrect those zombies to use them as fodder, and you will have to quickly mow everything down with your practically unlimited perforator ammo. Hey, am I wrong or those are the only two spiderdemons in the entire mapset? I must be wrong, but I don't even remember them being used. After all that carnage, the hellish cross will turn into a giant portal for you to finally exit this hour-long map and beat the final boss of Eviternity. What an epic level, it really deserves a playthrough, and is clearly THE highlight of Eviternity II. One of the greatest maps out there. Again, I do prefer Anagnorisis over this, but I can really see that people could prefer this one over it. Ukiro did an amazing job, and I suspect it should have been painful to make every single sector that composes the catwalks and the rocky landscapes themselves. What an astonishing work, Ukiro did his job yet again to leave the mapset at the highest spot. It's difficult to find any more words for Kenosis. Anagnorisis is for me the best map in Doom's history, but this one comes as a really close second (At least, talking about the maps I've played so far). Order of preference:4 points -

Share Your Sprites!
Chameeleoh and 3 others reacted to Ganbare-Lucifer for a topic
Nitori edit Credits to the unknown person who made the original sprites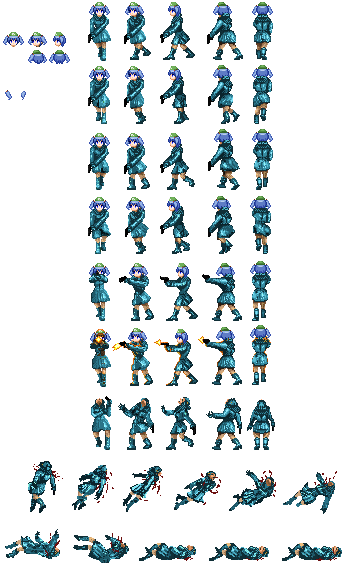 4 points
 -

How does Doom sound to you?
No-Man Baugh and 3 others reacted to TheMagicMushroomMan for a topic
It should be the aural equivalent of Hulk Hogan with a boner wrestling Thanos on top of a volcano while nukes fly overhead as Russian mobsters kill each other with monster trucks and helicopters. Either that or it should sound gay, same difference.4 points -
The DWmegawad Club plays: Eviternity II
Veeda Vidlak and 3 others reacted to Cutman 999 for a topic
MAP36 - “Kenosis” by ukiro (Pistol start, used A LOT of saves, 99% kills, 76% Items, 100% secrets) Oh boy, the big man. Funnily enough, I've never actually completed anagnorisis before, so yesterday I played a bit of it to have a taste of what was coming now in its spiritual sequel, and after enduring a long hour of punishment, I may say it differentiates a lot from its gargantuan brother, and its more akin to other brutal slaughtermaps like post 2009 sunder, obviously in difficulty gazebo's maps are in a whole new level, in sheer scale it appears to be in that league, come on, the layout is literally a satanic sigil. If anagnorisis is the critical discovery of out there being levels that greatly surpasses your level of tolerance, kenosis like its meaning suggests, it will empty your spirit, it will grind you down until your will is pulverized. To start the map, a berserk ambush opens it, with a lot of archviles watching over you in a rotating faction, similar to the infamous ambush in sunlust map29. After you clear the switches and survive that, possible ways present to you, some blocked by meat structures you open after dealing with certain wings containing especific ambushes. Just start with the ssg one, It is basically the best, since it dismantles itself with some infighting, altough it takes a bit of time. The alternative, which is the corporal ring, has 4 archviles you have to berserk punch or chip with the chaingun if you don't have it. The reward, appart from the ssg, is opening the way to the paths blocked by the meat structures, in which you unlock a way to either the red key or to unlock the other meat structure. The red key fight is actually a good breather, basically you have an invulm, a rocket launcher and a hundred lost souls. Just kill the ones at the sides and you win, so you can press the switches and get out of that room. If you are considering 100% this, cleanup the last remaining goons. The alternative was a deadly arena with 4 archvile snipers, 2 pain elementals, and way more after that, including a horde of revenants. Not to talk about after you deal with that, astral cacos and specters are coming at you to ruin your day, if you don't have much health left after that fight, yeah you are gonna die a plenty. The 2 areas left that open actually are some of my favorites, the circle strafing crusher obviously is the more direct reference to sunlust map29, kill the cyber with plasma while you can't comfortably dodge mancubus fireballs, then press switches and summon the pyro knight reskins to try and surround you. Very interesting ambush applying a lot of advantages and disadvantages of its gimmick. The other one is a place with a cybersniper and a lot of astral enemies, the neat things is that you actually don't depend on combat since there's very little ammo in the structure, so you need to make some infighting, and oh boy that's easy to do considering how there are the best in the game, you know cybers and the astral variants of the arachno and mancubi. And then, with the keys assembled, you go to the final area, sporting 3 brutal ambushes before the final fight. 2 of them are in very different ways, approaches to crowd control, in one you bait enemies in one spot to not get surrounded, in the other you try to concentrate them in the center so they can be rocket food. Really good and intense, then it follows a breather about maintaining archvile cover while you eliminate quickly certain demons like pinkies, hell knights or revs with plasma, or whatever you have, there are 3 megaspheres, so use them cautiously. Then the final fight start, more than 2000 enemies are killed, you have a perforator, and you have to quickly take advantage of how good the perforator is at instakilling almost everything in the game, just make sure to not choke or get many zappings, and then you can rest after an hour-long abuse. Idk where to put this map in my humble opinion, despite the fact is a technical achievement by itself and has many positive qualities, maybe i would never play it again, I just don't like these levels of abuse and patience you must have to enjoy something like this. Nevertheless, good thing to leave this in the end. ???/104 points -
The DWmegawad Club plays: Eviternity II
Veeda Vidlak and 3 others reacted to TJG1289 for a topic
GZDoom/UV/Contiuous/Saves Write-ups from memory MAP29: Maelstrom - Dragonfly This penultimate map surprised me, mainly since I'm so used to penultimate maps being the toughest map in the WAD before the final boss. I don't think that is the case here, but it's for sure not easy. First off, this map gets the feel of being a penultimate map at least! The giant main structure you see from the start just looks imposing and mysterious. While not really the same architecturally or graphically, it invokes the same feeling I get when I see big structures in void-scapes like Lullaby or even Struggle MAP28. Maybe it's all the purple towers. Once you grab the rocket launcher and deal with the revs and hell knights, the map opens up. I took the path directly across from the secret exit and delt with the veilimps in the damaging floor. This path isn't too bad, tho the ambush that happens shortly after dealing with an explody noble involving mancs and lost souls did somehow kill me. It's the only death I recall getting, but there was probably more. You'll find the plasma shortly after along with the first key. Granted, going to grab said key sends pinkies, cacos, and their astral versions after you. I then continued around through the long rocky ravine with damaging floor. Nothing too exciting here, but it leads to one of the more unique fights. Grabbing the plasma here lowers a few columns with enemies at the top of opposing staircases. Looks like height differences are playing a factor in this fight! It's an interesting one that you'll want to cause infighting with, and to try not to fall off the stairs too much as it is kinda annoying have to climb back up. Hitting the switches behind the columns opens a path to the yellow key. The blue key is in the center of the big tower. It's a duel against 2 cybs in a circular arena filled with damaging floor. It's pretty tough since there's not a lot of safe ground. Once you have all 3 keys, you can head back into the tower in exit through the portal. If this was where it ended, I would say this was a solid map with fun fights and fantastic visuals, but not as much bite as I was expecting from a penultimate map. But this isn't the penultimate map. Like I mentioned earlier, there's a secret exit, so MAP36 is actually the penultimate map. Accessing the secret exit is simple. There's 2 secret paths in the map that lead to some small arena fights. They aren't too hard to find as long as you keep an eye out for candles and item bonuses that seem to lead to new areas. The fight accessed from the staircase fight is possibly the toughest fight in the map. Now, I'm watching a playthrough of this, but I don't recall there being a necromenace in this fight back in RC2. There could have been, and I just perforated it before it could cause havok. Because if you don't take that thing out ASAP, the hell knights and imps that surround it will just keep getting resurrected. And that is no good. The other secret arena has a similar setup, but the menace is on the ground with you and the nobles are on the surrounding walls. Those walls will lower eventually allowing them to get on your level and attack, but at least until that happens, you can just focus on the necro and take him out quickly. With those done, now we can go to the final secret map. And boy oh boy is it a doozy. MAP36: Kinosis - ukiro This map may have been the one I was the most scared going in to. I didn't know what ukrio was going to throw at us this time. Was it going to be another multi-hour, non-linear, very open magnum opus like Anagnorisis? Or was it going to be something completely different? Turns out, it's pretty different. While it is still non-linear and long, this map is all about set-pieces. It's not a giant exploratory map in that regard. First off, this map takes place in a giant rocky outpost filled with lava. You won't see much of this at first, as the path only shows up to the first building. There's 8 buildings, and this first one is a Tyson one. There's a carousel of rising and lowering archies around the arena that can zap you, so you'll have to use the center pillar and the lower switch areas as cover from them, all while dealing with a few enemies on your level. Once you hit all the switches, the archies will die, and the path forward will reveal itself. Step out to find a shotgun and one of the most grand views in the WAD. You'll see a heavenly cathedral in the center of a heptagram. This entire area is over lava, with the heptagram being made from rocky paths. Each point of the heptagram has a building at the end of it. Combine this view with the dark ambient MIDI, and this is one of the more unsettling vistas I can think of in Doom. I don't remember the exact order I did the buildings outside of the first one after the initial one, so I'll just describe my experiences based off the order in ukiro's blog post. The first building I did was the SSG arena. This was kinda tedious, as SSGing revs, astral cacos, and nightmare demons takes forever. The annihilators didn't seem to do much in my fight. Getting out of this arena has you shoot a gore nest, making their first appearance since their introduction in MAP03. I'm surprised they haven't shown up since then. I think I did the chaingun one next. Using the SSG to take out the archies was easy, and then chaingun the corporals, and all of the enemies that show up after. Nothing bad here at all The northeastern rocket launcher area killed me the most I think. At first it's a little doable, just take your time to not get zapped by the archies. But once the walls lower and all the revs appeared, that's when things got dicey for me. It took me a lot of attempts to get out of there and outside, and once that happened I was able to finally stand my ground. It was still tough since there's a bunch of demons outside too, but being able to get more movement options makes it more doable. The western RL area is an invul-fueled lost soul ambush, where you just rocket the crap out of them as quickly as you can before the invul runs out. It's not hard, but it's fun! You have some other enemies to deal with behind bars by the switches, but that's not bad. I think the northern plasma area is where I went to after the chaingun arena, and it's probably my favorite building outside of the center. This has a center cyb putting pressure on you as you raise its platform to do some platforming to ascend the building, all while using the cyb to infight the astral mancs. There's some astral spiders inside too. It's a fun arena I think! Finally we have the southern plasma, which has you take out a cyb in a circular wave crusher. You want to keep moving anyway, so the crushers aren't too bad, but you don't have a lot of leeway in terms of space. Finally we have the center cathedral. There's 3 fights in the southern wings, followed by the final fight. I think I did the western side first, which is the least gimmicky fight in the map, and is just all about movement. The eastern one is another stair fight with some inconvenient archies. The southern one has a center filled with archies and an arena with a layout that gets altered. I think the staircase one was the only one I died on. Now we have the final fight. You climb some stairs over the main hall of the cathedral and find the perforator. You grab it and hit the switch. What unfolds is one of the more horrifying scenes in a non-horror map. The cross across from you inverts and turns red. Blood oozes onto the floor. The stained glass windows explode revealing flesh portals. Thousands of gibbed former humans will spurt from these windows, just littering the floor with disembodied gore and bullets. That's when the archies and necromenaces show up. This is the perfect perforator fight! You want to take out the medics ASAP, but all of the zombies they revive will act as meat shields. And once the menaces die, EVEN MORE archies appear, along with 2 spider masterminds and a cyb. Once all the enemies are dead, climb back up to where the perforator is, platform across the new flesh pillars, and jump into the now golden cross to end the map. Overall, this is a fantastic penultimate map. Each set piece was different and offered a unique challenge. The atmosphere is foreboding as all hell, and the map design on the automap looks demonic AF. And the intro to the final fight is straight up cinematic. Outstanding work all-around! Idk if I like it more than Anagnorisis, but I do appreciate it's not as long. It took me probably around an hour and half? It was definitely less than 2 hours. I do want to replay this one, as I hear that the fights are different depending on the order you take them on. That's a cool touch.4 points -

A new Doom player's WAD reviews
LadyMistDragon and 3 others reacted to Explorer of Time for a topic
Back to Saturn X Episode 1: Get Out Of My Stations Map 01: Back to Saturn X Radio Report* by Sarah Mancuso and Richard Frei *BTSX Contractual Obligation in the Unity add-on version Map 02: Postal Blowfish* by Kim Bach and Sarah Mancuso *Mortar Cavalry in the Unity add-on version Map 03: The Room Taking Shape* by Paul DeBruyne *Drilling By Night in the Unity add-on version Map 04: A Good Flying Bird* by Sarah Mancuso *Conceptual Birdbath in the Unity add-on version4 points -
The brief summary is that any competently-run websites do not store passwords, only a big random number that is generated using your password (called a hash). It's why you always have "password reset" rather than something like a "show me the password I forgot" option - the website is literally incapable of telling you what your password is. If the hashes are leaked, an attacker can try running millions of guesses against them to see if they can discover any passwords. But it's slow and requires a lot of computing power. If you use a weak password it's easier to crack.4 points
-

Endless Random /idgames WAD Adventures #077
Walter confetti and 3 others reacted to Roofi for a topic
Year 2 Month 10 Day 11 I play until I die or intentionally stop. I don't comment the wad where I died/stopped. [1] AGONISM4.WAD by Guy Shelton (1996) I'll join the comment written by Doomkid on idgames : it looks like a nice duel map with a small couryard and several buildings. This map is also pretty spicy on single player because it's populated with several monsters, revenants and chainies included, and contains lot of explosive barrels. [2] E2M1ER.WAD by Espi (2001) For some reasons, Crispy Doom didn't save my screens. Here is a playthrough from "DOOM Wad World" I found on YT instead. One of the first releases from Esa Repo, according to his Doom Wiki page. This a vanilla-compatible Ultimate Doom map which uses the slot E2M1. I launched crispy-doom because this map uses some custom flats, which actually are stock wall textures converted into flats, and I felt a bit lazy to execute DEUSF in order to merge the wads. This map takes place in an overgrown base made of beige and brick textures, under the orange sky from Episode 4. This map has a bit the allure of a jungle-themed base from Scythe 2 which came out 4-5 years later. The detailing and architecture remain boxy and minimalistic but the careful usage of texture and light effects from Espi do wonders and make this map pleasing for the eyes. However, The level of perfection doesn't yet match that of Back to Basics or Suspended in Dusk. The combats are tame for the most part, but the strict ammo and health balance makes map spicier than it looks. I would probably be dead if haven't found the secret berserk and box of shotgun shells. Most of the ammo come from the zombies and killing them can be a bit risky in such restrained spaces. Moreover, the yellow key's section test your platforming skills. Fortunately, you can escape from the damaging liquid and the challenge isn't as demanding as Sunder or even Sigil, but you can lose precious health. Be careful. Overall, this map looks standard compared to more modern Espi's releases but E2M1ER.WAD is undeniably a good UD map for its time with a nice portion of challenge and simple but clean visuals. Grade : B+ (15/20) [3] OMG!!!! WHY is PuMpKiNsMaShEr still Mapping? (OMGPump2) by PumpkinSmasher @PumpkinSmasher (2006) According to my wads folder, I already played the first "OMGPump" but I lost all memories about it. The present sequel globally takes place in a castle with some incorporated hi-tech computers. This is a boom-compatible map featuring quite a lot of detailing and occasional boom effects such as transparent glasses. Despite I still manage to capture the main theme of this map, OMGPump2 first and foremost plays like a sandbox of random ideas to me. It seems like Pumpkinsmasher tried to use the most Doom 2 textures possible and each room looks really different. It's hard to complain about variety. but in the end I think the map lacked cohesion and the author lacked planning. I really like how Pumpkinsmasher merged the medieval theme with hi-tech elements but some parts resemble more like a christmas tree than else. Combat design is rather basic, but pleasant overall. Like many maps of the 2000s, the layout is rather corridor-like, and there are quite a lot of keys to find for a map of this size (150 monsters and 4 secrets, more or less). "OMGPump2" makes me think of a decent Community Chest 1 or 2 map. The battles are decent but not exceptional, there's quite a lot of detailing and architectural ideas for a map made with stock textures, but it's all arranged quite randomly in the end, which makes the adventure rather mundane. Grade : B- (12/20) [4] Marble 1 by @AconyX (2011) The design of this hellish temple of marbre is simple and efficient. You have to find three keys in the order you want and AconyX didn't aim for something complicated. The three sections are small and distinct enough so this map includes less than 100 monsters and can be completed in less than 10 minutes. The highly refined, rectangular architecture would qualify this map as "amateur" but like the map from Espi I played just before, the detailed light gradiants and careful usage of marble and red textures make this haunted domain beautiful. The combats turn out to be dull at times. For instance, some monsters pop up from the ground for no real reason or another exemple, you're locked in a room against a single mancubus. However, some parts were as fun as they were explosive, notably when you have to kill the gang of teleporting monsters after defeating the cyberdemon. In any case, the gameplay is fine. Ammunition is limited at times, but secrets are easy to find, especially the BFG. Finally, this map uses a remix of Silentzorah from map 30 of Doom 2. While I greatly appreciate the ominous quietness of the original version, this more "metal" version works well with the different combats scenario. Grade : B (13,5/20) [5] Chris4 by Christopher 'RaIDeN' Lemare (2005) Honestly, when I noticed that the wad only weighs 8kb, I already knew that the map will not be that great, but I had fun blasting all the enemies crowded near the stairs. However, all my hopes vanished when I opened the second door. The author didn't put the efforts to create them properly so opening it breaks the map and stuck you in the void. The map is unbeatable without idclip and by the way, the next rooms leading to the exit are almost empty. So, I've no doubt that "Chris4" is just an attempt to pollute the idgames archive with a poor unfunny jokemap. Grade : F (2/20) A cyberdemon appeared just behind me in the third map from Fall of Society v1.1 and turned me into gibs.4 points -
 started work on a map for this called "paint theft is a serious crime". :)
 4 points
 -

Doom's design "language" trends
Cacodemon187 and 3 others reacted to kwc for a topic
Ooh yeah, A pair of Medikits placed prominently inside the exit room. Skillsaw does it pretty consistently and it appears to support/signify continuous play. Almost feels like a calling card.4 points -
Atomic [Limit Removing] - Development thread
DaRkWeZ and 3 others reacted to cannonball for a topic
I thought I would give a brief update into this; Not a lot has gone on in the mapping department (As such there are 12 maps in total). The reasons for this are mostly being distracted by other projects and general confidence in the direction of this project and what I wanted to achieve. In the end the aim was for something that bridged the more classic stuff of Plutonia/AV and more modern design ideas. As such a bit of fiddling has gone on in the background to try and give this wad a bit of personality before ploughing on with a Hell episode that will focus more on traversing a hellish city before the latter sections descend into some kind of abstract nonsense. So I thought I would leave the latest version here with a changelog mostly consisting on background features. Essentially this is a proof of concept before hopefully moving forward with this, wherever the end destination will be. https://www.dropbox.com/scl/fi/pc7x01y6d80tedr7y4ub3/atomic28124.wad?rlkey=awqhla8tdp2jluunlmzj49wku&dl=0 Changes; Lost soul - health dropped to 50hp Cacodemon - Uses the toxic cacodemon sprites, is faster and more dangerous than your garden variety cacodemon. As a trade off the health has been lowered a touched to make this a guaranteed kill with 2 rockets/SSG shots. Hellknight - Replaced by dark imp (As in Almistice, or Uprising or any others that make this trade). Essentially faster but has lower health. Baron Of Hell - Uses some redundant SS Nazi frames to deliver a double attack. Arachnorb - Replaces the commander keen (Essentially uses the same frames as the iteration in Hardfest 2). The cyberdemon and chaingunners have green colourations but are unchanged in all other factors. As a placeholder there is a recoloured version of the Speed of Doom status bar, I will whip up something original at some point that doesn’t suck like the effort I made for Concerned/Return to hadron. The maps themselves have been tweaked here and there based on feedback and general personal feelings, not to mention the later incorporation of the arachnorb into the maps.4 points -

Doom's design "language" trends
Cacodemon187 and 3 others reacted to Jayextee for a topic
I'm a big fan of the Plutonia exit/entrance teleporters, as evidenced by almost all the maps I make for my own projects having them (exceptions really being just the 100-line stuff). There's something quite satisfying to me about an absolutely-unmistakable structure that communicates to the player "yep, you're done here".4 points -

Examples Of Unusual Monster Prioritization?
Nefelibeta and 3 others reacted to Orii for a topic
My favourite examples of unusual monster prioritization has got to be fights where actually you need to prioritize gaining space back instead of targetting a specific type of monster, and a great example of this is the RSK fight from 1x1 Map17. With 4 cyberdemons on one side of a spiral staircase, archviles and revenants at the other end, and then lower tier monsters arriving through teleporters behind you, the fight is incredibly cramped. In terms of prioritization, you can't focus on getting to one of the corners and focusing down either the cybers or the archviles, and its also not as simple as keeping the cybers alive to infight and killing everything else, you need to fight for your space and show some love (BFG) to both the cybers and the archviles, all while keeping the space behind you clear too. (Video linked at the fight im talking about) I adore this level and how uncomfortable it makes you feel in every fight, always needing to fight to keep your space which often leads to typical monster prioritization taking a backseat. :)4 points -
Doom Pictures Thread 2024
Dusty_Rhodes and 3 others reacted to plums for a topic
Only true Heretic fans* will know what's special about this image *or people who remember things well, have done a lot of editing, or are moderately good at guessing4 points -
Doom Pictures Thread 2024
Scorcher and 3 others reacted to DevilMyEyes for a topic
I really like Sigil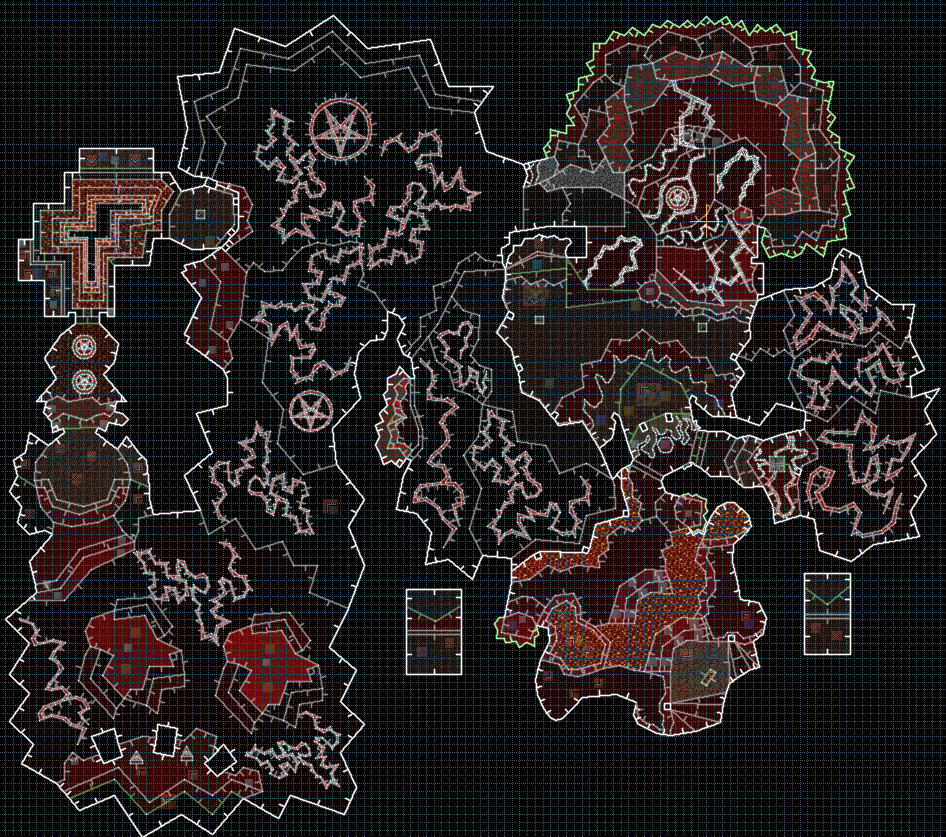
 4 points
 -
Download Originally this began as part of the DW Dating Simulator project, but due to my map requiring jump for progression I decided to release it standalone. The map combines platforming gameplay with some puzzle elements alongside combat. Exploration is rewarded as there are many secrets and alternative paths towards the exit (some hidden behind secrets), intending to stimulate multiple playthroughs (inspired by Resident Evil). Will you be able to make it to the hidden Palace of Desires unscathed? The demons are also lurking and waiting.. Tested with: DSDA Doom & Gzdoom Recommended port: Preferably Gzdoom, but will also run on DSDA Doom. Just make shure to have mouselook and jump on. Important note: Jumping and Freelook required. Coop starts and monsters: Included. Difficulty levels: Included. Resources: Textures from Makkon, Otex and PUSS XXIV. Only textures, no custom sprites (see txt. file for full credits). Releasedate: 14th February. Screenshots:3 points
-
Category 1 Difficulty: UV Kill count on death: 38/38 Time of death: 55:46 Time upon entering map of death: 52:54 This wad is hilarious. Died on E3M9 due to an inescapable pit. Really thought the map had no exit for a while there, but uh, you have to stand on the awkward ledge on the very edge of the map apparently... I checked it after my death :P Played some of E3M8 too out of curiosity, but didn't make it to the end. Too many things appeared to be breaking and I couldn't handle it anymore. ^ me checking out E3M8 and dying to a 20 damaging floor that is only indicated by a small brightness change????????????????? same texture and all Pleasantly surprised I made it past the massive zero tag issue on E3M4 though! The map is still completable. :D VytaanIronEagleJan2024.zip
 3 points