

cannonball
-
Posts
4295 -
Joined
-
Last visited
Content Type
Profiles
Forums
Downloads
News
Everything posted by cannonball
-

The DWmegawad Club plays: Doom 2 in City Only [vote now]
cannonball replied to dobu gabu maru's topic in WAD Discussion
MAP01 - "Hellions on Parade" by myolden A surprisingly fleshed out opening map that surpasses anything in Nostalgia in terms of size. The map on the whole play well too and again I am surprised to see everything up to weapon 6 being given out. That also means you will face mid tiers in a rather sizeable number as well. This map was probably a little on the large size for an opening map, but it offers enough thrills and good visuals to set the tone nicely. I could not find out how to get one secret (The one near the soulsphere), but hey ho. MAP02 - "Simple Complex" by thiccyosh I really struggled with the rooftop section and even after exploring and finding the plasma gun and the SSG I totally missed at the beginning, this section was still no fun to play, the pop-up baron by the switch is just a terrible idea. That is a shame because actually the rest of the map moves along fine and that one section feels at odds with the rest of the map that feels quite easy-going (The zombieman splatterfest being a casing point). The trouble is finding the hardest part of the map early can really leave a sour taste. In the end this was an okay map but I struggled to get into the groove with this one, especially compared to the first map. -
Forgot to take my laptop down for the weekend, so a little late with these. MAP29 - “Chambers of Dis” This does enough to not feel like a flop in the Map29 slot. There is an element of swagger about these fight and the heavier monsters involved. That said the blue key fight kind of sorts itself out by default and the final fight again can be dealt with by making the cybers fight with the nobles. Only the pain elementals offer much of a threat in this final arena. Ironically the smaller fights are more likely to catch you out, the archvile can be easily missed early on as you deal with the seemingly weak drop ambush and the chaingunners behind the blue door really did a number on me. This was fine, a middle of the road map by Nostalgia's standards. MAP30 - “Nostalgia” Well that first cyber was a real pain to get rid off, but in fairness the map is slot has a small stress inducing element becuase the monsters flood in quickly, but once you have the red key you can simply stand and kill the ICON of sin and leave. A perfectly serviceable map that does the job it needs to do and the execution here is pretty decent. Overall; Nostalgia is a very consistent and competently put together megawad, however at times this almost felt like more of a flaw than a positive. Maybe it is just me but I do yearn for something that has a little more character, I will add a caveat that I have never really been one for lots of Doomcute and as such meant that the second episode lost the pull that many others would have got from this. It is no surprise that my favourite maps ended up being the ones where Myolden pushed a little bit more on either the difficulty level or indeed making something a little more quirky. In the end Nostalgia is a very solid map set and definitely good for those who are new to playing PWads due to being approachable and having short maps and indeed for speedrunning. In the end I think this wad wasn't quite my cup of tea. Overall score - 3.5/5 Favourite Map - Map26 Honorable mentions - Maps 11, 31, 32 and 24
-
For all the talk of x-rated difficulty maps, no one has mentioned that there is another wad that requires beating where some maps are quite literally impossible. Mock 2….
-
MAP28 - “Seasons in the Abyss” Seeing some comments on here and then playing this one left me scratching my head because honestly I didn't use the SSG that much, especially as I found out how to access the secret SSG after I had already grabbed the one later on. Ammo is on the tight side, but a lot of the ammo management issues will come from poor outcomes with the double archvile ambush when you open up the second half of the level. This is a map that clearly relies on the player being able to push onwards whilst keeping some heavy hitters alive, for example releasing the cyberdemon is useful for clearing some of the mid-tiers, but of course you need to squeeze past them to make this happen. In all this was sufficiently tough compared to the other maps to feel at home in this slot and the visuals are some of the best in the wad. This is a map where you do have to work for the rewards and satisfaction of beating this without SSG grind, but it is worth it in my opinion and is a much better map than the previous one, for a start this map is centred around a wide open area where infighting is encouraged and achievable, as opposed to the corridor-heavy set ups in Map27. This isn't my favourite map, but it is a solid and tough effort.
-
MAP27 - “Whargoul” Well placing that pain elemental at the start like that is a real pain, and not fun. The rest of the opening area is fine. The trouble is the map varies between being too easy or just annoying. Too many times the archvile in there gets shielded by the Barons, in the end the slow approach was the one that worked. The rest of the map is simple corridor shooting. Unfortunately after the highlight of the last map, this is near to the opposite end of the ranking list.
-
MAP26 - “Sepulchural Slaughter” An open-plan flesh filled monstrosity that hits hard from the start. This isn't overly sophisticated but the adrenaline rush that you get here is unparalleled with anything else in this wad. It plays pretty well and rewards an aggressive mindset. This is definitely one of, if not the highlight of nostalgia.
-
Doom 2 In City Only [Now on idgames]
cannonball replied to myolden's topic in WAD Releases & Development
Hmm, I have made some changes that were implemented into RC4 I believe, however I am not sure whether this will fix the issue. I certainly didn’t have issues with those spiders when I tested in DSDA, though the closets are a little snug so depending on what source port you are using then it might simply be a case of me giving them a little more room in their closet. Either that or something happened by accident to mechanically prevent their release or stops them waking up. -
MAP25 - “DDevil” In the end a persons opinion of this map will depend on how big you think the payoff is after you handled the rather nonchalant start. In my opinion the map wasn't too bad but it felt a little too easy to dismantle. You get plenty of rockets and plasma and every weapon is handed to you eventually. Oddly it was the start where I made a few mistakes that killed me, the two archvile quartets were no issue at all. Overall, not bad but the map felt like a little bit of a throwaway that really needed a little more zing, another aspect could have been to be a little more inventive with the layout, the ring-like structure isn't best suited to this kind of design, it needed a little more inter-connectivity to allow the monsters to catch the player off guard.
-
MAP24 - “Flesh and the Power It Holds” The map is split into three individual sengments, all three contain some quite spicy encounters. The first area is solved best by getting behind the mancubi as these are excellent meat shields against the small monsters. The second section is the most substantial mosh pit that is best dealt with by hitting the switches and getting everything to pour into the centre. The final area was the nastiest, despite being essentially a monster closet of revenants and a pair of archviles, the position of the archviles means that you can't simply pump rockets into them and deal with the rest and this turns into a dangerous dance of avoiding line of sight with the archviles and the revenant missiles that will quickly swarm the area. Overall this was a fun and punchy map, no real complaints.
-
MAP23 - “Blood Red” This was pretty neat on the whole, the start can cause problems, especially as a pair of cacodemons have the advantage of being free to roam around and ruin your day. Unlike the last map, this one manages to keep the pace on the whole from start to finish, I will say that the blue key ambush was essentially pointless, as were the mancubi behind the blue door. The return leg to the exit includes a tricky cyber that you would prefer to be distracted, he is dangerous and has good sight lines and direct engagement is risky given the cramped nature of the open area. I think I liked this more than the previous hell themed maps, purely because it seemed to be a little more on point combat wise.
-
MAP22 - “Absolute Hatred” A nasty start where foreknowledge is required to deconstruct the monster-filled jungle gym you are in. It is a shame that the map tapers off dramatically after grabbing the red key. Essentially the final stretch is a drip feed of monsters that offer significantly less threat than the start did. Overall another solid map but one that lets the player off the hook once they have gained control of the start/central area.
-
MAP21 - “South of Heaven” Not a bad map, though it is a little baron-heavy and unfortunately this leads to a couple of slow points right before picking up both keys. The start and the red key area offer some stern resistance, though the start of the map can be made a lot easier by finding the plasma gun secret, which isn't hard to spot when you finally realise where the switch for it is. In the end this was a decent opener, but those barons by the blue key really should have been hell knights.
-
MAP20 - “Hell Awaits” This one wasn't too bad, though ammo felt pretty tight, especially if archviles behave badly. There are lots of neat little details dotted around and the combat was on the whole fairly solid. I liked the introduction purely because that level of area denial has been rare so far in this wad, it was a nuanced piece of work and whilst the action tends to be more on brand for the rest of the map, there is enough interest too keep things going at a solid pace.
-
MAP19 - “Times of Grace” The start is hot and fun, but there are some questionable design decisions beyond the early stages. The yellow key is one of those obvious traps that I have seen by a couple of authors and was a little disappointed that Myolden made a trap like this. Then there is the cyber that is more awkward than a real threat. Not much else to say, this one could have turned out better.
-
MAP18 - “The Fault of the Flesh” I liked this one, this presents some tricky and quite cramped situations, but it also presents a much larger piece of real estate that feels grander than most of the maps so far. This one has a little more character in terms of macroscale design and more plutonia-esque encounters. A solid map overall.
-
MAP17 - “Ars Moriendi” The boss monsters felt more obligatory than actual threats, though I prefer the Mastermind's placement on the boat that blocks an easy escape. Otherwise the map is fine offering a more corrupt vision on the city theme compare to the rest of the episode so far. Again not too bad but one I will tend to remember more for the negatives than positives.
-
Most interesting enemy encounters in Doom 1 WADs?
cannonball replied to Plerb's topic in WAD Discussion
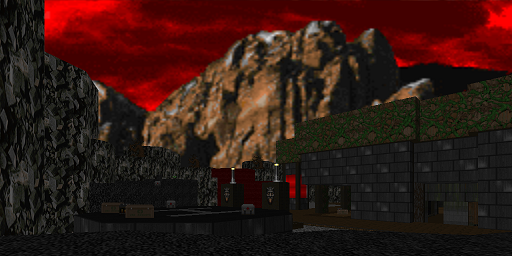
Hmm… this is a tough one and one I would struggle on because I have made so many maps under this IWad. So perhaps not the answer you really want, but I will pitch Solar Struggle’s final map E4M8 by Pinkflamingo, purely because in my opinion it is the best iteration of using the Mastermind as a solo boss where the player has to traverse a crater with partial cover where they will face a series of smallish combat puzzles where you have sufficient ammo to kill the smaller monsters and have to avoid the sight lines of the Mastermind until you are given the resources to kill the spider. Even better is that after the mastermind dies you get a solid mosh pit of a final fight where monsters you may have left get dragged into the mess and as such maxing the map is hassle free. About as good a final map for UDoom that you can get. pic (I think I grabbed this from Adam Windsor’s playthrough but might be wrong) -
MAP16 - “Fear of the Dark” Lots of neat details, however the gameplay was rather ho-hum here. Again like with Map15 the map falls short of the combat displayed earlier in the wad, which feels a tad odd in terms of a difficulty curve. The double baron ending felt a little tiresome, especially as I accidentally weapon-switched earlier on in the map in front of a single imp to the BFG (In fact the BFG sole use really is to dispose of a couple of bruiser brother encounters that would otherwise be slow and not overly engaging. The rest of the map is fine, the pop up monsters from the graves are a neat touch and the catacomb fight isn't too bad. Overall a pretty average map in terms of this mapset, though I guess one cannot hate on the impressive level of Doom cute on display here.
-
Doom 2 In City Only [Now on idgames]
cannonball replied to myolden's topic in WAD Releases & Development
-
Doom 2 In City Only [Now on idgames]
cannonball replied to myolden's topic in WAD Releases & Development
It was great fun making a couple of maps for this, and a good exercise for making a map style that I am not usually comfortable in making. Congratulations to all and there are some really awesome maps in there. -
MAP15 - “The Lotus Eaters” The biggest complaint about this map is that it felt too easy, almost heading towards IWad (Not plutonia) level difficulty. That said the map deviates enough from the previous maps to feel distinct and the more open plan layout is welcome. The map moves along nicely and is fun to play and explore. The secret exit requires finding a secret switch next to a computer monitor but requires getting the final quarter of the kills to actually reach the exit. This is probably my favourite city map so far, though again it could have offered a little more bite. MAP31 - “Powerslave” Well whilst we have a compact Egyptian homage, this one is probably the most fun I have had playing this wad, aggressive from start to finish with good incidental combat and a couple of nasty barbs to keep you on your toes. Finding the secret blue key isn't too difficult if you are used how most secrets are obtained in this wad. Overall this was a fun map to play with very few compaints. MAP32 - “Retrovertigo” This map is very blunt, in a good way. The mass of SS is a good chuckle and actually good fun to mow down, the rest of the map reverts more to the traditional Doom 2 beastiary, but the action keeps pace throughout. Like Map31 this is a very fun map with a welcome uptick in difficulty (Though nowhere near being truly tough as you get a couple of megaspheres to buffer the damage you might sustain). Fair to say that the secret maps are worth visiting and actually keep to the spec of the megwad as a whole.
-
MAP14 - “Beneath” A little subway station breaks up the dominant visual motif of Maps12-14, it is a nice little station but because of this you are a lot more restricted in terms of combat. There is one really nasty gotcha moment when you open the blue key door, otherwise the map isn't too difficult to beat and a couple of monsters that are more of a chore to kill than being an actual threat. The other side of the tracks offers the rocket launcher and a secret you don't want to miss out on. Overall another map that isn't too bad with lots of nice details.
-
MAP13 - “Sludge Factory” The visuals are nice, the combat is okay but for me this was a pretty unremarkable map. There are a couple of fun moments like the crowd of hitscanners/barrels room, but most of the traps are quickly trivialised by either light footwork or easy to find secrets. There really isn't a lot left to say, it passes in a couple of minutes without any major gripes.
-
MAP12 - “The Lion’s Den” The map is surprisingly comfy for a city map and that works to its advantage somewhat, the layout is a three key hunt affair to open up the exit, the map moves forwards well enough, though a couple of little oddities include those metal doors that are quite easy to miss as doors and that picking up the blue armour is actually mandatory for progression (Monster closest houses the lift to the yellow key). Overall though this was a solid start to the city episode, though the baron in the exit is a point lost, sorry.
-
MAP11 - “Rapture” The first map so far to really grab me, okay the visuals are still at the level of solid but the combat feels much more on point and is able to sustain itself throughout the entire run time of the map. The start is chaotic, but there is enough recovery items to allow for aggressive play, there are also a cluster of secrets that are not too difficult to find. After grabbing the blue key we have the red key/BFG room, which again feels nicely calibrated, head on isn't wise so be light on your feet and find the switch to lower the BFG and toast everything in this room, the yellow key/final fight also feels nice to play with a high level of aggression, infighting should be fairly reliable and once it starts, simply nuke everything into oblivion and leave. Overall and short and frenetic map that is really fun to play. Good stuff and offers hope that the second episode should deliver.