


finnks13
-
Posts
545 -
Joined
-
Last visited
Content Type
Profiles
Forums
Downloads
News
Everything posted by finnks13
-

The DWmegawad Club plays: Community Chest
finnks13 replied to dobu gabu maru's topic in WAD Discussion
MAP04 - Outer Base by Bad Bob: Another short map, though this one has much more of a focus on combat than the previous ones. The outside areas look pretty bad, BROWN144 really does not tile vertically well at all and it's used everywhere on the surrounding parts of the techbase - it looked awful in TNT map12, and it looks awful here too. The indoor areas look pretty decent, if incredibly brown. That being said, the fights in this level are actually pretty decent - the first little ambush where you're sandwiched between a hell knight and zombies is fairly tense, and the chaingunner trap is actually quite mean when you've only got a shotgun to your name. The main event here is the canyon fight, which spawns in the majority of the monsters that make up this map's opposition. It's a fun fight, though without a rocket launcher the obvious strat (apart from running away of course) is to start a massive fight between all of the mancubi and everything else, which I had thankfully left alive since I didn't fancy single shotgunning them. I had a good time here, and I appreciate that this wad starts off with short, punchy maps. Rankings: -
The DWmegawad Club plays: Community Chest
finnks13 replied to dobu gabu maru's topic in WAD Discussion
MAP03 - Ground Floor by Alex Parsons: Wow, that was certainly a map - it was so short and so bland I have barely anything to say about it. I'd be surprised if a map like this was ever submitted to a contemporary Community Chest-esque wad because it would seem so bizarrely out of place. This map itself is very cramped and dark and lasts about 3 minutes. For being so short, I did get quite annoyed about how there's always a pillar or something in my way, I'm never able to get around easily, it's so cramped. To be honest though, the only thing I actually didn't like about the level was the baron next to the yellow key - it's an ammo sink and not a very interesting one at that. Apart from that, this map is staggeringly OK. RANKINGS: -
The DWmegawad Club plays: Community Chest
finnks13 replied to dobu gabu maru's topic in WAD Discussion
Oh boy, I have heard very mixed things about this wad. I'm interested to see if my experiences will match what I've heard or if I'll have a better time, knowing where the rough parts are going in. In any case, I'll be playing with dsda-doom v0.21.0 -complevel 9, on Ultra-Violence, with pistol starts. I'm going for 100% kills, but if I miss a couple in a random secret, I'm not too worried. I'm also perfectly happy to look up a walkthrough for these maps but I'll only resort to that when I'm stuck. MAP01 - Pistol Panic by The Ultimate Doomer: This is a weird opener - it resembles a very cramped re-imagining of Underhalls for the majority of it's run time with the ending being quite similar to the final room of Entryway. I don't really understand why there's voodoo dolls everywhere in the central part of the map, I suppose they're there to stop you going completely nuts with spraying ammo everywhere but this doesn't make much sense when you're limited to the pistol which is not the weapon I tend to do that with. I did like the more elaborate secret moat, and outside area - even if the ultimate reward is a blursphere which was more funny to find than anything else. After finding the berserk pack in the red key room, I basically stopped using the pistol for the rest of the map, save for one tedious arachnotron encounter. The progression in the final room is really weird and I got confused since I didn't spot the door to the outside area for a while. The use of the fake 3d floors here is pretty ugly and seems unnecessary when instantly raising and lowering sectors could have been used instead. Overall, it's alright, I wish the map was a bit shorter but it's not the worst opener I've played. MAP02 - Nullth Precinct by Thomas Van der Velden: This map is absolutely adorable, I love all of the doomcute here - from the Police sign, to the flipped over tables and doors, it's just great. Starting off by jumping on some lights to get to the roof and crawling through an air vent to get past a locked door is a really cool opening to the level, and the progression continues this way. The shooting range leading to a small storage area was incredibly neat, and I really liked that the hole blown through the wall in one of the rooms near the start of the map functions as a handy shortcut from the final area to here. I will admit that the fights aren't anything special, the cacodemon duet followed by a hell knight after the blue key door was probably the best "fight" this map had, and I also liked the demons being released from the cells. I expect that being an incredible combat showcase wasn't this map's focus, as armour and health pickups are abundant throughout the level (well, that and the whole doomcute police station thing). I really enjoyed this map, it reminded me of the most fun parts of Thomas Van der Velden's "Revolution!" which I also really like. Rankings: -
E4M7 - Hand of the Heathen by Alfonzo: Not sure what to think about this map to be honest, partially because John Anderson is the mapper that I am the least familiar with, from the available TFC choices. The main things I remember about the original E4M7 is that it's key doors aren't marked - and they're not marked here either so I guess it nails the impression! I think this map looks very nice, obvious effort was put into the lighting and texturing here - it's definitely a step above the other maps (and I think that's accurate to Dr Sleep's work). I don't have too much to say gameplay wise, there's a lot of lava and fairly mean ambushes here, but none of them are that difficult (I did die a few times here, but I wasn't playing well at all) and there's enough rad-suits so I only had to jump in once without one. I do think the cyberdemon and final areas would be incredibly painful were it not for the secret BFG, though it's not that hard to find. Nothing offensive here, just nothing that stands out either. E4M8 - An End to Darkness by Xaser: I feel conflicted here, on one hand, the first ~20 minutes of my 25 minute playthrough were tedious, confusing and not very fun, but the other 5 minutes were excellent. I started off the map by picking the direction that led into a very dark death trap and immediately died, so I decided to go the other way. The other way is much more manageable, giving out a plasma gun, rocket launcher and chaingun. There were lots of moments in this first section that felt like it contributed nothing to actually progressing to complete the map, and I thought the small hallways were quite annoying to get through. Eventually, and after tussling with a very mean close-quarters cyberdemon, I found the spiderdemon arena, which was incredibly easy as getting them to infight with each other was no issue for me. The large fight that follows this was very cool, and I think it ended the set on a pretty good note. I think the map looks great, and manages to get quite a lot of atmosphere out of the Doom 1 textures and "Demons on the Prey". That being said, I feel like I won't be the only person to say that this fight feels very out of place and not like anything that I would expect from a mapset trying to be like Thy Flesh Consumed, and that makes this map feel like it doesn't belong in this set. If this was being marketed as a standard episode 4 replacement, then this wouldn't be an issue, but it's not! Overall, an interesting finale, and one that was better than I was expecting. Thoughts on Ultimate Doom the Way id Did: I was surprised by this episode, as I went into it assuming that it'd be a set on a similar scale to the other three episodes of Doom the way id Did, but slightly more refined with a greater focus on emulating the original mappers. This is not what this episode is. E4M1, E4M2, E4M9 and E4M3 do a pretty good job of at least evoking the original episode's scale and design, but after this the episode goes in a completely different direction. This left the episode feeling, to me, like a modern episode 4 replacement that didn't really live up to my expectations, as I don't think that Doom 1 is suited to fun, challenging maps - they tend to be either tedious, or just frustrating for me. Unfortunately, I'd have to say that this is my least favourite of the 4 episodes we've played this month. My favourite maps in the episode were E4M6 and E4M3, with E4M6 standing out pretty well above the rest. Overall Rankings (including Doom the Way id Did):
-
Made an update to my submission "Slime Infestation", to swap the midtextures used out for the 16 unit tall ones in the newer texture wads. I've not made any gameplay changes, but I've ran around in -nomonsters in chocorenderlimits with 1ManV6.wad and it seems to be working perfectly, though Ultimate Doom Builder was complaining about missing sprites when it was the only resource loaded. 1man_finnks_v2.zip
-
E4M6 - Molten Gods by Tarnsman: A mapslot I was dreading, considering the inevitable forced cyberdemon fight. Contrary to my expectations though, I thoroughly enjoyed myself here. The map has a really good balance of meanness with restraint, as it never becomes annoying or frustrating. I think the layout is very good here, with the "Molten God" himself able to splatter you from most angles (unless you manage to get him to go back to sleep like I did!) If anything, the layout feels a bit too modern and refined to be something that I would expect to turn up in Thy Flesh Consumed, but I mean this as a compliment to the map, as it works very well. The secrets are pretty easy to find here, though since the only way to get a rocket launcher and BFG is through them, I don't mind this. I think the BFG might be a bit too easy to find with how it trivialises the rest of the map, but I suppose the fight to get it is enough of a death trap that the player deserves a break afterwards! The map looks great, the marble fortress is interwoven well with the wooden textures. Don't have much else to say, other than I wish more of this episode was like this map - short, fun and a decent challenge.
-
E4M5 - Doctrines of Devils by Gifty: An interesting "What If?", this map imagines an alternate reality in which Sandy Petersen ended up making a map for Thy Flesh Consumed. I think this map actually feels pretty similar to what a Petersen TFC would have been like - experimental, with some interesting ideas that don't all work but are memorable if nothing else. I think the map looks far too nice to be a Petersen map but this isn't a unique problem that this map has, and it does reflect the slightly more refined texturing that was present in his Doom 2 maps. I thought there were a few really cool fights here - the red key fight reminds me of (I think) the red key fight in Monster Condo, and the BFG ambush is pretty spicy and fun to tackle. My favourite moment is the finale, where the lights suddenly go out and you're forced to deal with a few spectres and barons - it's not particularly challenging, but it's definitely fun. I'd say barons are actually used pretty well here, for how common they are because of all the powerful weapons you're given. I didn't like the platforming section much, but it does seem like something that Sandy would do. Fun map overall. ~~~ Didn't do my votes yesterday so... (EDIT: Changed my votes slightly, I meant to vote for Haste) +++ Community Chest +++ Haste +++ Uprising
-
E4M4 - Unclean Spirits by Marcaek: This was the map I was dreading when starting off this wad, and while it's for different reasons than before, I really do not like this map. I don't think it does well at emulating Shawn Green's style because I actually have fun with Green's maps and I don't think it does well at being a Thy Flesh Consumed map because it's so much longer and more monster dense than anything there. 215 monsters (on dsda-doom at least, so not counting any lost souls) is wayyyyy too much - there are 2 maps in Thy Flesh Consumed that have more than 100 monsters, one of them having 106, so why does this map have over double that. I understand that Shawn Green's TFC maps tend to be more monster dense than the others but this works against the whole "the way id did" thing because it's obviously trying to be different to that. The start of the map is well designed but not fun in the slightest, damaging floor combined with almost no cover and hitscanners everywhere, and only the shotgun to deal with them is something that started the map off on a terrible note. I'm kept with berserk being my best weapon for far too long, I was 140 of 220 monsters in before getting the plasma gun, so I guess I managed to choose the "not fun" route through the map. The spiderdemon area seems completely pointless, it's a decent idea for an area, but as far as I can tell it's not required for progression and adds another 5 minutes onto this map's runtime - I'd have preferred if the teleporter that took you there, just took you back to the starting platform instead. I did like the rocket launcher area, it's the most fun part of the map, it reminded me of the rocket launcher ambush in E4M3 - sort of wish I hadn't found this area after the exit switch but that goes back to me choosing the "not fun" route I suppose. A large difficulty spike makes sense for Episode 4 (and I generally enjoy challenging maps), but I find the way the difficulty is implemented here incredibly annoying to play. Overall, I can't deny that this is a well constructed map, but it's the least fun I've had playing Doom the Way Id did.
-
E4M3 - Earth, Blood & Fire by purist: This American McGee inspired map is significantly better than it's counterpart. Admittedly it doesn't look very good visually, the central area is almost entirely textured using grey, mossy bricks and it looks just terrible, though pretty accurate to McGee's entries to Thy Flesh Consumed. The gameplay and layout of this map, however, are very good - the opening is pretty tense with a rush for guns, armour and rad-suits against a not trivial amount of shotgunners and spectres. The 4 barons in the centre of the map is a fun gimmick, though I wish I wasted less time trying to get them the infight with cacodemons and less rockets killing them myself before telefragging became an option. I do find the progression in this map a bit off in places, since it all looks pretty similar I've forgotten when I've been a fair few times, and I always lose the trail of progression after the first baron telefrag as I never think to walk backwards afterwards, since the teleport faces you away from it. I did like the 4 miniature fights in these wings, they're fun little ambushes. I'm also very glad I found the 4 medikit secret, this map seems incredibly tight on health without it. Pretty fun map overall.
-
E4M2 - Vile Affections by RottKing: I'm sorry to report that the map replacing my favourite Ultimate Doom map kind of sucks. Maybe I'm being harsh, but I found this map to be flat out boring - I can best compare it to E4M4 from the original Thy Flesh Consumed, which is a slightly browner, equally boring map. Fittingly this map is emulating American McGee, and it definitely does a decent job of capturing his texturing style, and general feel of the map. The layout is decent, and if any of the ambushes had any punch to them, it would have worked very well for the map. I didn't like the secrets much, I thought they were a bit too cryptic (and come on, you've got so many torches here, why do you subvert the classic American McGee torch secret with a straferunning secret) and just ended up warping to the secret map. The only part of the map I can say I liked was the small series of ambushes leading up to the blue key, they're decently snappy and fun. The combat in this map definitely suffers from the player being limited to the shotgun throughout - you do get a chaingun, but there's almost no bullets in the map, and I never found the secret rocket launcher. I think giving out a rocket launcher could have helped this map to give out some more punchy ambushes. Donna to the Rescue also feels very odd here, it's fast paced and slightly silly tone doesn't really fit the slow-paced, dull map at all. Bit of a shame this. E4M9 - Terror by Use3D: The map seems to be an homage to Tim Willits' Thy Flesh Consumed secret map, down to the title. Unfortunately, I really don't like Fear - it's a really boring, symmetrical, brown map that outside of the opening, I find entirely uncompelling. Thankfully, Use3D only imitates some of the less annoying things and generally improves on them by only being, for example, a bit symmetrical - while the central areas of the map do mirror each other, the rest is much different. The high monster count (and vague memories of this wad) made me expect a slog, though in actuality since most of the monsters are fodder, the map actually plays pretty well with most of the downtime coming from me getting a bit lost. While the texturing is still pretty brown, the red marble bricks are thrown in to the mix as well, and they do a lot to help with the texture variety and I actually really like how this map looks. I'd say this is a pretty well done imitation of Willits' style, and even though it doesn't stand out much to me, it's certainly my favourite map in the episode so far.
-
I have turned off fast monsters for this episode, after reading the text file and @Book Lord's post, it seems like it'd be needlessly frustrating and I don't really fancy that. I probably could have managed up to E4M4 before throwing in the towel, but I think that changing mid-episode would be weird. ~~~ E4M1 - Into the Grave by Pavera: A rather tame start to the episode (though that may just be the lack of fast monsters talking), this map definitely feels a bit too fair to be a Romero E4 map. The start is probably the hardest part, with only a chaingun to kill two cacodemons, you have to run past them into a load of imps and shotgunners to grab more ammo and a shotgun. After that, there are a few mean shotgunner ambushes that would have been rather mean, were it not very easy to grab a rad-suit and jump into the lava, grabbing loads of goodies and being able to exploit the auto-aim to kill them very easily. I didn't like the cyberdemon at the end very much, you've got plenty of rockets to kill him with, and since you're fighting him in a very long corridor, he poses very little threat unless you stop paying attention. I suppose a cyberdemon encounter does make sense to end a Romero-inspired E4 map, so I won't hold it against the map. I think it looks great, the orange sky goes very well with the white caverns and lava, and the wooden buildings are very well done too. Overall, a decent opener, probably the 2nd best of the 4 I've played this month.
-
E3M7 - Inner Sanctum by ellmo: A bit of a let down here I think, I remember finding this map incredibly frustrating to navigate and play from my first playthrough, but I don't know what I was thinking to be honest - the map is pretty easy to get around, and pretty easy in general. The start, as it opens up into this "what if Mt. Erebus but cave" section, is best handled by picking up the rad-suit and then running around all the blood picking up all of the supplies. Since there's not many high-tier enemies in this map at all, the shotgun being basically the only weapon you have (there is a rocket launcher too, but very little ammo for it, so I just saved it for cacos) wasn't a slog like it normally is, however this exposed a bigger problem. This map doesn't really feel like a penultimate map, it's not that hard at all, the cell weapons are really hidden and the map has barely any cacodemons or barons in at all. This made the map feel like it'd fit much better in an early E3 slot. While Inferno itself went for an atmospheric penultimate map, the overwhelming opinion (as far as I can tell) of Limbo is that it's not very good so I think a more hectic map wouldn't have been particularly out of place here. I don't have much else to say about this map, it's not boring and certainly a better penultimate level than Limbo, but this could have been so much more. E3M8 - Core by Processing Control: Much like Doom itself, this megawad ends on pretty much the worst note possible. There's not much to say here - the map looks pretty cool at the beginning, but after you teleport into the middle, it reveals itself to be pretty ugly. After killing the barons, you're left waiting for walls to lower so you can then hope that auto-aim co-operates to let you hit the spiderdemon with enough plasma to kill it quickly. This map seems to have been designed to perfectly counter all the problems that people tend to have with Dis - make the Spiderdemon out of the way so it can't be killed by continuous players with a BFG easily and is not very likely to infight, and remove a lot of cover so it can be a threat. In theory this is a good idea, in practice, I think this is a worse final level than Dis, and I don't say that lightly because Dis is not a good level. This map is easier than Dis because there is far more health around, and while there isn't much solid cover, you can generally run into a corner to make the spider's autoaim miss you every time. This map is incredibly tedious because when a wall raises to stop you from shooting the spiderdemon, there's often not enough time to run to the other side of the arena and bait the spiderdemon into a position where you can hit it before those walls raise too! I was left waiting for walls to lower because I was incredibly well equipped and moving made the fight more tedious. I know boss arena levels are hard to make, especially ones with a spiderdemon in, but this map feels rushed and is worse than the map it replaces. Overall Thoughts on Episode 3: In spite of my negativity in this post, I really liked episode 3. I think it's pretty inconsistent with 3 of my favourite maps in the entire wad, and also 2 of my least favourite, but I prefer that to the consistent but boring Episode 1. The maps that tended to do well here, were the ones that emulated Mt. Erebus' sandboxy style as that's my favourite map in Doom (if we're ignoring Thy Flesh Consumed), and they tended to go for the same aspects that I like about it. The main complaint I have about this episode is that the map ordering is bizarre. It seems that the music order informed the map placement more than anything else here, because you have maps like E3M3 which give out almost every weapon on the main route and were a decent challenge which set similar expectations for the later maps, but the later maps were easier and had less powerful weapons contained within. Overall Thoughts on Doom the Way id Did: This wad is quite interesting to talk about, because as esselfortium has said in the first page of this thread, because there wasn't a very intensive study of each mapper's quirks and tendancies for their maps, the maps here are less imitations of Romero, Hall and Petersen's works but more inspired by the themes they set out and memories people have of them. I think that if you look at the wad under this light, being a throwback episode inspired by Doom, I think it's a huge success. Sure there's maps I don't like, but that's accurate to the original - overall, I definitely think I had more fun playing through this than I would have playing through Doom for the 100th time. I think the Romero-inspired maps were closer to his style than the others were to theirs, but I think that comes down to familiarity with Knee Deep in the Dead, and the fact that Romero's levels are very consistent in Doom, whereas Hall and Petersen's maps have a much less set style, being far more experimental, and I'm not surprised that this was much harder to do well. I think the boss levels were a bit of a let down overall, but I don't know how I'd personally make better ones because the concept of "make a fight against a single cyberdemon, both not very difficult and interesting" seems basically impossible to me. I had a good time here, and I'm glad I played it again as this was the first PWAD I played and it was fun to revisit it. My 5 favourite maps were (in order): 1. E3M9 - Lake of Fire by Lutz 2. E3M6 - Depths by Phobus 3. E1M6 - Reactor Complex by hobomaster22 4. E3M2 - City of Corpses by Walter confetti, ellmo 5. E2M9 - Nebulous Origins by iori Overall Rankings:
-
E3M6 - Depths by Phobus: A fantastic rebound for the episode, this map is fantastic - it's one of two maps I remember from my first playthrough of this wad nearly 4 years ago (the other is E3M7). I'm not sure what I like so much about it, from the absurd start which can only be described as a mean-spirited death trap to the claustrophobic, weirdly shaped corridors, there's lots about this map that I would normally complain about and say is poor design, and yet here it just works for some reason. Resembling Pandemonium most in that it sort of looks like a techbase, this map captures the bizarre, abstract hell that Petersen does is his maps and it does it very well. The combat is pretty good here, the opening ambush is tense and has you open to fire from all sides and the rocket launcher and plasma gun fights are pretty tough due to the lack of space. Most importantly, this map is very generous with weapons and I think after the previous two, a map that hands me a rocket launcher within the first minute automatically gets an A from me! The secrets are fun to find, and not that difficult. I thought the blur sphere secret was pretty unsettling with all the gargoyle faces around in the darkness, which reminded me of a similarly unsettling scene in House of Pain. The red key section is probably my least favourite bit, being a fairly dull series of very unthreatening ambushes compared to the rest of the map. Other than that, I can't really think of anything I don't like here, it's a perfect example of a map being worth more than the sum of it's parts and I'm not surprised that upon seeing the barrels at the start with the baron crusher next to them, I almost immediately remembered this map with a "Oh shit, it's this map!". Really good stuff here. E3M9 - Lake of Fire by Lutz: I can see why this is the secret map, being the most direct homage to an IWAD level (that being Mt. Erebus) and also being by far the hardest map in the set for my money. Maybe it's because fast monsters makes this map unsually challenging for this megawad, but I was really struggling the whole way through here - attempting to get any sort of foothold at the start was difficult enough, as the only weapon that's possible to get is the rocket launcher, and the shotgun and chaingun are protected by a massive group of hitscanners. It's not the bad kind of challenge, where I'm bored and save-scumming my way through the level though, I was very engaged throughout. Unusually for me, I didn't mind the tight ammo constraints that this map puts you on - though I am very thankful you don't have to actually pick up the chainsaw to trigger a trap as I don't think I'd have been able to beat the level without easy access to berserk. I think the map looks great, and very much like an Inferno map, though it does feel rather derivative - the outside area being very similar to Mt. Erebus and the inside area looks like a mix between Pandemonium and Limbo. I did get a bit frustrated by the amount of lost souls in the level, as closets with them inside seem to open up with every move you make in the level and these went from "oh no, lost souls!" to "ugh more of those" quite quickly. That being said, I am a sucker for a challenge and I thoroughly enjoyed this map, it captures a hostile vision of hell that feels very appropriate.
-
E3M5 - Chapel of Scorn by pcorf: I really didn't enjoy this one. This map takes on the mapslot of my least favourite Doom 1 map, and has continued the tradition, by being my least favourite map in Doom the Way id Did. A lot of areas in the map imitate parts of Inferno but overall it just doesn't work for me. The imp teleporter trap at the start of the map is something that I'm surprised slipped through the cracks, as it feels completely out of place in a map imitating Inferno - it would be a pretty standard trap in a modern mapset, but Doom, outside of Thy Flesh Consumed which has a different feeling to the other 3 episodes, doesn't have anything like this that I can remember, as they tend to heavily favour using monster closets (correct me if I'm wrong here). The weaponry provided does make the map a reasonable challenge, though I think when you have an Inferno-inspired map that takes around 10 minutes to complete, you should give a non-secret weapon that isn't the shotgun before the 7 minute mark as it just makes this first half of the map a slog. Even then, after the chaingun's given out you have so many bullets stockpiled from all the former humans that the rest of the map is a complete breeze. This is the only map that has made me quit in frustration after I died to some turbo-spectres in the chaingun room and lost all my progress up until that point - I had to give myself a day to play other stuff because I was really dreading finishing this map off. I did like the small Slough of Despair section right at the start, it's pretty well paced and the lava surrounding the area is a good hazard that forced me to take risks in how I approached the area. Overall, this is probably some people's kind of map and I probably would have had a better time with it had I been playing continuously, but I just did not have fun here.
-
E3M4 - Torture Chambers by Captain Toenail and Hellbent: The mapname is accurate, if nothing else. Probably my least favourite of Episode 3 so far, parts of this map just felt like the parts of Inferno I don't like - seemingly designed to frustrate and with a lack of ammo and munitions that is pretty unnecessary. As far as I can tell, the only way to get the rocket launcher and plasma gun is through two secrets, and while the rocket launcher isn't too hard to find - you'll probably activate it by accident shooting some imps - the plasma gun requires you to jump into damaging blood and walk through a random wall and I'm really not sure if it's possible to get 100% kills without these (there is a berserk, but that doesn't really help me much on fast monsters!) The high amount of high-HP monsters also made this map a bit of a drag as rockets are pretty scarce for the majority of the map. There were some cool fights here though, the outside blue key area took me a couple of tries to figure out and eventually I managed to lower the soulsphere which along with giving me 140 health to work with, lowered a pillar I kept getting blocked on. I did also like the little lava filled room with the barons on lowering pillars - though I did find the invulnerability secret and punched everything to death which was quite satisfying after being effectively berserkless for 22 maps at this point. The layout of the map is actually fairly straight forward, it seems whenever you would need to backtrack, you're teleported to the right place and the map has a pretty small blueprint so it's hard to get lost. My favourite bit of the map was the crusher at the start, which I managed to just avoid at first and then backpedalled into it trying to avoid some imps - it got a laugh out of me! Not a bad map by any means though, there's some good stuff here, I just wish the map was a bit less focused on being frustrating.
-
E3M3 - Malebolge by Icytux: Another very fun E3 map, this map starts off very mean (the second hardest start after E1M9 so far), with a cacodemon immediately shooting me (I think damage is almost unavoidable here), with a turbo pinky guarding the shotgun - I died a few times here trying to get past everything. After that, this map becomes pretty doable as higher tier weapons are very available, the rocket launcher and plasma gun are accessible in the cave area and help stop the higher health enemies becoming a slog. The secrets in this map were fun to find, the blue armour requires finding three secrets to become accessible and even though I had killed everything by that point, it was a nice capstone to the rest of the level. I think the map, again, looks too nice to be a Sandy map but the outside area looks quite a lot like the cave areas in Slough of Despair so it's a solid attempt. There's a couple of mean traps, the cacodemon that appears behind you from the yellow key completely took me off guard. There's a lot of damaging floors everywhere, but there's enough rad-suits that traversing them doesn't become irritating. I'm intrigued why this map was placed here specifically, in terms of the weaponry it gives out compared to the next couple of maps and due to how mean it is in places, I would expect it to appear later in the episode - though I think Deep into the Code really fits this map, and it'd be a shame to not have it paired with the map if it were on the E3M5 slot. I liked this one, it was fun.
-
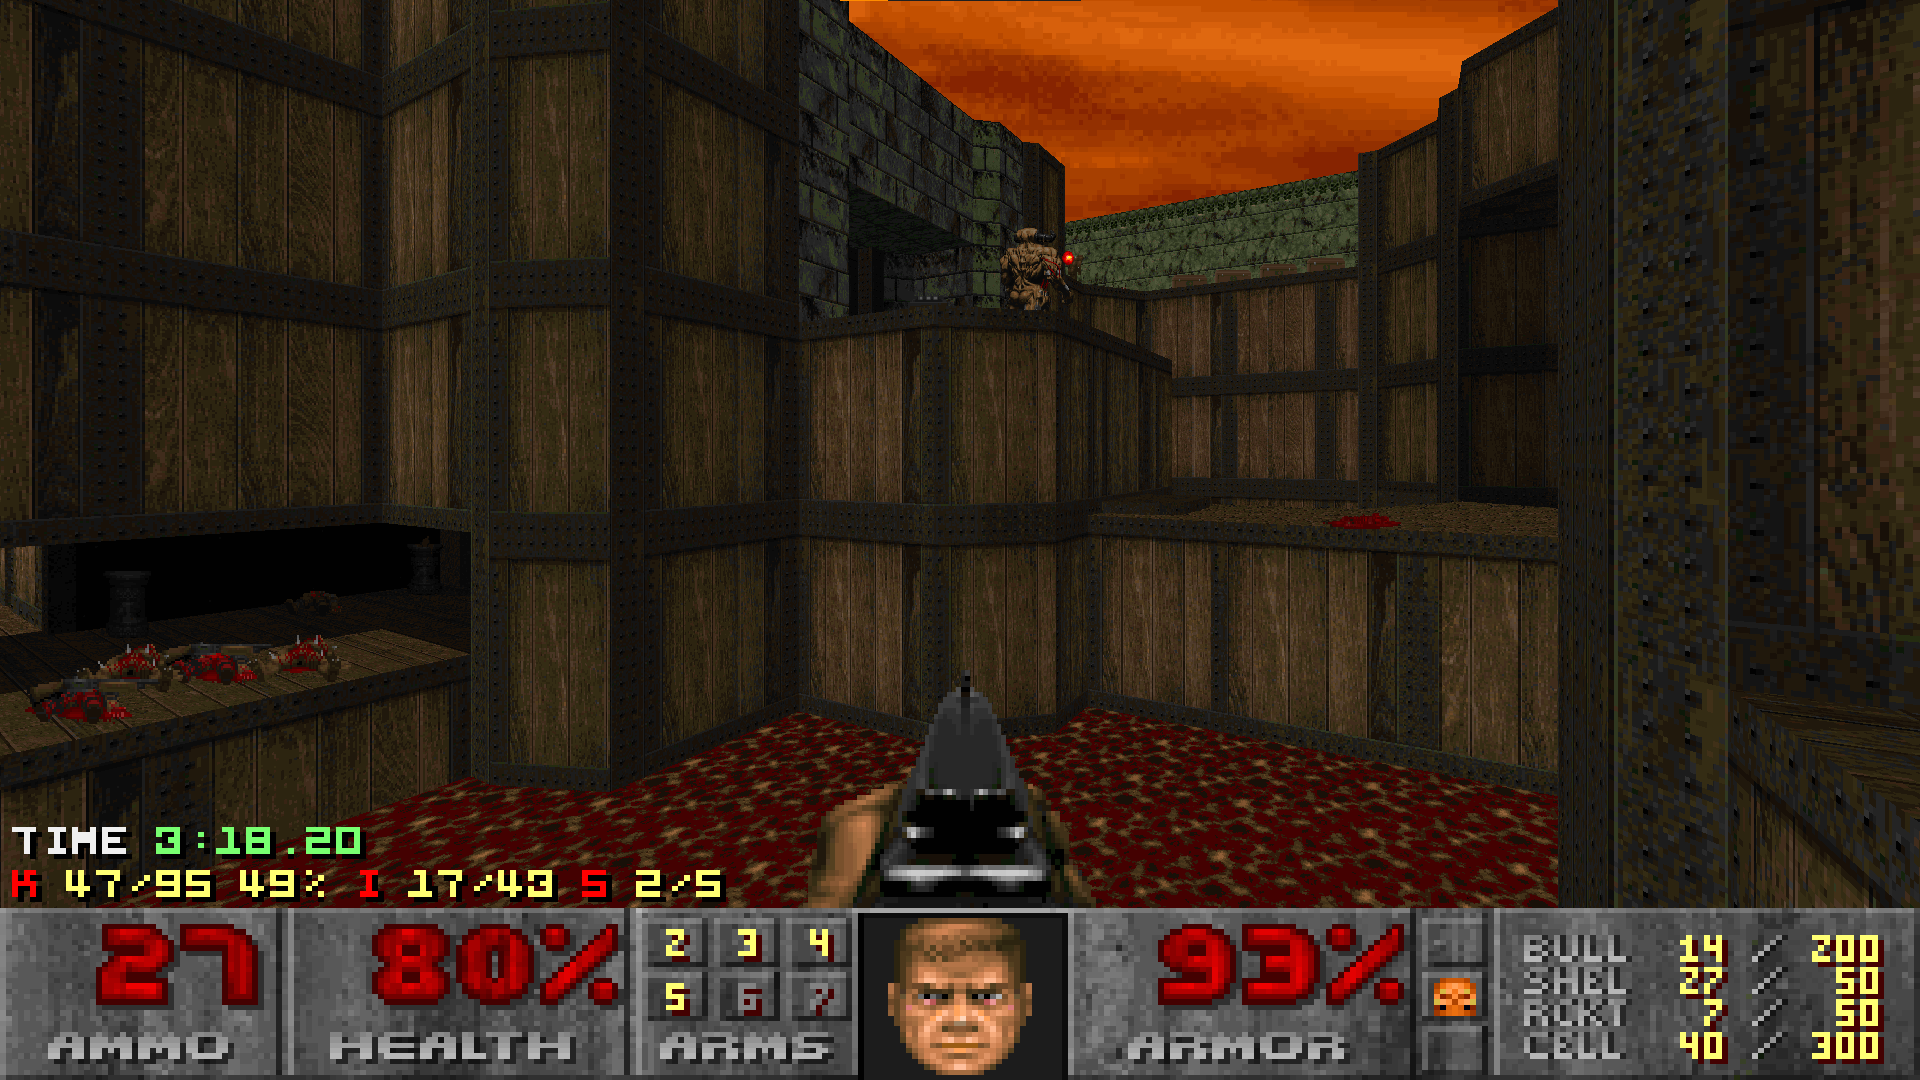
Thought I should mention that I've begun on my map, and since the theme was pretty open and time-travel themed, I decided on making a map set in the far future in some abandoned, dilapidated ruins and bases that have sunk into the sea. I'm about halfway through making it and I'll probably be able to post a v1 by the end of next week at the latest. Here's a couple of pictures, taken in crispy doom (the visuals are still WIP so they're a bit underdone at the moment):


-
E3M2 - City of Corpses by Walter confetti, ellmo: I liked this one overall, I don't think it started particularly well, but after getting outside the map opens up considerably for the better and has some pretty good fights for an Ultimate Doom map. This map felt rather inspired by Mt. Erebus, with it's open layout containing a few buildings set around some lava, this time in a gorge rather than on an island, with a couple of areas seemingly inspired by Slough of Despair (thinking mostly about the yellow key area). I don't think this map looks much like a Sandy map, like most of these levels it's just textured far too well, but I'd say it plays similarly to his Episode 3 maps. The shotgunners outside are pretty brutal on fast monsters, they're so far away that taking damage from them is fairly unavoidable. I really liked the yellow key area, which starts off with a timed section over lava as lost souls appear from monster closets and then ends with a tense fight against cacodemons and spectres in the dark - this area just worked really well. Opening up a FIREBLU bridge to the other island is cool (I wish there was more FIREBLU in this wad), and being able to finally take out the sniping imps is satisfying. I have two gripes with this map, the first being that it's quite tight on ammo - I ended with 4 rockets, and was worried about the prospect of having to non-berserk punch a baron to death, though I hadn't found the plasma gun. The other is that I wish the rocket launcher and plasma gun were placed slightly less far into the level, it would have made killing some of the many cacodemons a bit less slow. Overall though, I think this is a very fun little map.
-
E3M1 - Abyssal Stronghold by ellmo: Definitely a better opener than Hell Keep and my favourite of the three M1's from this set, this map starts off the hell episode strong. For one, I actually have enough shotgun ammo to kill the enemies and don't have to rely on pistolling turbo pinkies, and also I think this map sets up the hell theme much better than the original with a nice combination of red bricks, white rocky caverns and fleshy floors everywhere. The rocket launcher secret is a nice nod to the original, but I managed to actually use it against a cacodemon near the exit, which makes it far more useful than the one in Hell Keep. It definitely looks too nice to be a Sandy map (but that's not really a massive complaint) but I think it's fairly reminiscent of his work in terms of atmosphere and gameplay because it's still pretty weird at the end of the day, and has a couple of mean monster placements. I don't think this map had any zombies in, which is an interesting choice, one that was only explored in E2M2 from Ultimate Doom. I liked this one, it's a good opener to my favourite of the original episodes.
-
E2M7 - Ore Processing by Megalyth: I didn't like this one, it's got some cool ideas - a Romero-inspired Episode 2 map being the main obvious one - but I don't think it executes them very well. For a penultimate map, this map is very stingy with ammo and weaponry - I was stuck with the shotgun only for the first half of the level and the only non-secret rocket launcher was found with 10 enemies left alive, and why would you be so exacting with ammo and then hide the plasma gun behind a random shoot wall? I wouldn't have gotten close to finishing the map without happening on both of these, and I probably wouldn't have bothered looking for them were I not nearly two thirds of the way into the map without any weapon better than the chaingun. It definitely feels textured like a Romero E2 map would be - pretty liberal use of the Shores of Hell textures, but a lot of E1 is in there still, it reminds me of Pandemonium a lot. I thought the layout was very confusing, more so than any other map so far, and that combined with my least favourite Ultimate Doom MIDI definitely contributed heavily to my annoyance with the map. There's loads of damaging floors everywhere and again, nowhere near enough radsuits to traverse them easily. There also seemed to be far more barons of hell in the map than Episode 2 normally had, which made a lot of the later fights feel like a slog. For a map emulating someone who never made an Episode 2 map, it really nails what I dislike about Episode 2 from the original game. E2M8 - Vault by esselfortium: A better episode finale than E1M8, this is probably the only map so far that was easier due to me playing with fast monsters enabled as the cyberdemon never managed to teleport away from it's starting location (I assume it's meant to do this cause the lost souls certainly did). Atmosphere feels like a focus here, and the atmosphere is very well built up but I wish lowering the 3 layers of the Vault didn't take so long, but it definitely builds the suspense. The arena itself worked less well for me than the original, as the mess of lost souls and pillars in Tower of Babel made the cyberdemon a much bigger threat than here where the lack of obstacles everywhere allowed me to circle-strafe him pretty easily. That being said, a one-on-one rocket duel with a cyberdemon is never going to be that hard with an arena as large as this, and the original isn't that challenging either so overall I'd say the two are about on par with each other. These boss maps seem like they'd be the hardest slot to map for (bar E1M1) since it's going to be very hard not to make a rip-off of the original, but this map does pretty well of feeling like it's own thing, and capturing the one-on-one rocket duel that the Episode 2 finale is expected to be. It's not the best map I've ever played, but neither is Tower of Babel. Overall Thoughts on Episode 2: Unlike Episode 1, I think I prefer this to the original - it definitely captures the same feel that Shores of Hell is known for and I think that's an acheivement in itself. Sandy Petersen and Tom Hall's map styles definitely feel harder to emulate than Romero's since, while I like Romero's maps in Ultimate Doom and Doom 2, they do tend to stick to a general formula. Petersen's maps especially have a much greater variety in what's on offer though this tends to result in a much more inconsistent quality. This episode shares that inconsistent quality, with a couple of my favourite levels in the megawad appearing here, but also some I just really disliked. I'm not sure if I liked this as much as the first episode, but I definitely had fun here with the levels I did like, and considering Shores of Hell is my least favourite of the Ultimate Doom episodes, I'd say that overall that makes this episode a success for me. Rankings:
-
E2M6 - Foundry by Alfonzo: I feel incredibly neutral about this map, nothing really wowed me but I can't find that much to complain about. The texturing does feel pretty episode 2-y and while it's definitely more refined than most of Petersen's work, that doesn't detract from the map. The use of damaging floors here is significantly less annoying than the rest of the episode, you're given plenty of rad-suits to cross them when it's necessary. I liked the secrets and how expansive some of them were, though at points I did find them a bit indistinguishable from actual progression - for example, the crusher hiding an invulnerability and yellow key, was something I assumed was mandatory for progression, but I never actually found the yellow door and having killed all the monsters by that point, I didn't fancy trying every wall to find it. I thought the crushers were a bit annoying, being forced (I think, I did try a fair few times) to take damage getting to the invulnerability secret was a bit crap - though having crushers everywhere is pretty accurate to Episode 2 so I won't hold it against this map. I liked the chaingun room, it's a cool little ambush especially since you're probably going to be running there low on health, with just a shotgun. After opening the blue key the map sort of just fizzles out and ends, there's a fun ambush with some imps and a baron but then you have a massive open room with about 30 zombies in, which is really easy to deal with since you have a corner to hide behind and just felt like an odd and unsatisfying end to the map. Again nothing wrong with it, just not the most fun map so far.
-
This project seems pretty cool, can I do map 22?
-
E2M5 - Deimos Command by Use3D: Significantly better than the original E2M5, this map captures some of the classic archetypes of Command Center (a map that this clearly takes heavy inspiration from), but it plays significantly better due to the comparative lack of doors. There are still lots of them here, but they're placed much better so they don't affect the flow of combat so much, which is my main issue with Command Center. I would definitely recommend taking a right at the start of the level to grab the chaingun as you'll otherwise go through the first half of the level shotgun only, which gets tedious quite quickly. I thought the optional trek to find the plasma gun was definitely worth doing as it greatly simplifies the final area making it a breeze, especially if you've not been conserving your bullets - it doesn't remind me of anything from the Shores of Hell, but it does feel like something Petersen would put into a level of his (not sure why). There's a lot of optional stuff here and that helps to capture the mazey feel that Shores of Hell has. I didn't have any issues with the secret exit as I managed to (by what I think is a complete fluke) find all the necessary secrets for it, though having your secret map be fully blocked off is not a design choice I like. Pretty good stuff. E2M9 - Nebulous Origins by iori: I really liked this one, it has been the map that has felt the most like a Sandy Petersen map so far - though it feels, to me, like a hybrid of his work in Shores of Hell and Inferno. This is because while the map has a large looping layout that could be pretty safely set into a large box (excluding the area right at the bottom of the map), the texturing and combat here evoke Inferno to me. The standard episode 2 textures are used, but while Shores of Hell isn't pretty, it's far less insanely textured than Inferno tends to be and this map has some absolutely mad texture combinations and choices. There's also lots of high tier enemies here, and that, combined with the reasonable difficulty, made this map's combat feel more like a mid-Episode 3 level than an Episode 2 secret map. The best example I have for how bizarre and Inferno-like this map felt to me, was one point where I was fairly worried about stepping into some water in case it was inexplicably a damaging floor. The map is a show of force for the plasma gun, the first map to do so in the wad, and this is nice since the higher presence of high health monsters would be a slog to deal with, without it. The crate maze room at the end of the level is a standout example of a really fun fight, and its probably my favourite moment so far in the entire megawad, there's lots going on and while you could probably camp in the corners, playing aggressively allows you to just go nuts and spam plasma everywhere. It's great! This is a really good map by iori, I'm very thankful he decided to make some non-Romero maps as they are just great - this is easily my favourite map in this Episode.
-
E2M4 - Mental Ward by ellmo: I liked this one, it takes on the spoooooky map slot that is E2M4 and while the MIDI "They're Going to Get You" certainly does a lot to create an atmosphere, this map does very well at being slightly unnerving.The low light levels throughout make visibilty very low and this makes some of the combat more interesting, fighting a baron in a thin hallway in the dark is pretty tense - especially without armour. The lack of light worked best near the beginning of the map, waking up 3 turbo spectres and having to pistol them to death in the dark was quite terrifying. I think this map does the best at capturing Petersen's texturing and gameplay style so far, with some odd texture choices and ambushes that aren't mean exactly, but would have been pretty challenging had this been my first time playing the game. There's also some fun little attempts at realism that bring some of Tom Hall's areas to mind - the most obvious being those little rooms with lost souls in, which made me think "ooh, maybe those are some of the patient's cells in this Mental Ward." It definitely feels more intentionally spooky than most of the IWAD Episode 2 maps, and I don't think that's a bad thing. The main thing I didn't like was that I kept finding rockets but never found a rocket launcher which was a bit of a shame. One funny thing that happened to me was that about a third of the way into my playthrough, an imp that I had woken up in the exit area opened the blue key door from the wrong side, meaning I could exit very early. I didn't end up taking advantage of this because I was enjoying myself with the level and I didn't fancy leaving early. Fun map overall.
-
E2M3 - Rec Facility by Captain Toenail: The first map of Episode 2 I can say for certain I actually like, this map exemplifies a lot of the parts I do enjoy about the Shores of Hell - looping non-linear layouts and not enough mid to high tier enemies that they become a slog to deal with. The map feels pretty mazey, but since everything connects to each other eventually, it's not annoying or frustrating to explore, and the map is small enough (and contained in a big square like most Tom Hall maps!) that backtracking is pretty easy. I liked the secrets too, most of them being fairly simple to find but satisfying nonetheless. Combat wise, there's not much to write home about - as always the map is pretty hard while you're stuck with the shotgun but becomes much easier when any other weapon is found. It took me a couple of attempts to find the route to the chaingun visible from the starting room, but after that the map was pretty simple. It's not bad certainly, and some of the more claustrophobic rooms got very close to killing me and I did die once to the spectres guarding the exit - didn't see 'em cause of the fuzz effect in dsda-doom, ah well! Hopefully more of the maps in episode 2 are like this, because I can see myself ranking it above the original if that is the case.