


finnks13
-
Posts
545 -
Joined
-
Last visited
Content Type
Profiles
Forums
Downloads
News
Everything posted by finnks13
-
The DWmegawad Club plays: Community Chest 2
finnks13 replied to dobu gabu maru's topic in WAD Discussion
MAP07 - To Hell and Back by The Flange Peddler: 18:51/1 Death I feel rather conflicted on this one, while it's obvious a ton of work has gone into the map's visual design, with the progression from techbase to hell fortress and back being seemingly intended to be a showstopping event, the map isn't particularly fun to play due to navigation issues and gameplay that feels like an afterthought more than anything else. While every room is very highly detailed with tons of little touches that I imagine must have taken absolutely bloody ages to do, every room in this map looks very similar to one another because the details look the same, even if the main wall texture in each room is completely different. This level of detail is still pretty impressive, and having to do it with 2003/4-era editors must have been a complete pain, so I appreciate the effort put into them, even if it's not really my cup of tea. I found myself getting lost quite a lot, remembering that I'd seen key locked switches earlier in the map, but not where they were, and once I found them they don't do anything obvious - though my main problem this time was finding the progression to get to the red key. I did like that you have to stumble into the blue key as it makes it's way through the base on the conveyors, it's a fun little touch and a really cool use of boom features. There's a couple of decent traps, the claustrophobic red key ambush and the fight spilling out of the hell portal are entertaining enough, but the incidental combat is procedural at best, and laughably tedious at worst. This could be mostly forgiven if the event that the map spends it's whole runtime building to - the bit in hell - was fantastic. But when you get there, you realise you have been duped because this was actually building to Dead Simple all along! This isn't the worst dead simple clone I've ever played, but it feels like a bit of a let-down compared to what could have been here. The "piss filter" (as I apparently decided to call it) that covers the screen in this section is also a very odd choice, because it just makes this part of the map look worse the rest of it. To Hell and Back is almost fantastic, as despite the fact that the visuals are absolutely there, every other aspect of the map feels rather lacking. And that's a shame because I'm impressed by just how much effort must have been put into it, but at the end of the day, I didn't enjoy myself very much. ~~~ I'm pretty sure it'll be using the boom action 242 "Create Fake Floor & Ceiling", which lets you transfer custom colourmaps to sectors along with sector heights. The YELMAP would be a custom COLORMAP lump which would be placed as the upper, mid or lower texture of the line doing the transferring depending on where you want the colourmap to be applied to (upper is above the fake ceiling, mid is between the ceiling & floor, lower is below the fake floor iirc). The reason this isn't used too often is probably because it's a pain in the arse to add since you have to manually add it for every different set of floor & ceiling heights you want to transfer to. -
The DWmegawad Club plays: Community Chest 2
finnks13 replied to dobu gabu maru's topic in WAD Discussion
MAP06 - The View by Lutrov71: 12:46/2 Deaths After the previous map, pretty much anything would be a fun-filled thrill ride, but The View absolutely stands on it's own as genuinely pretty good. I think this mostly comes from, well, The View itself as pretty much every wall in the central structure lets you look out at the large fields and canyons that are beyond them - and the great thing about this map is that you'll eventually get to go outside to all of those places. The sense of exploration would be enough to make this map a standout, but it's actually really fun too. Lutrov71 chucks a lot of enemies at you, but you're normally very well equipped with rockets & plasma for the heavier fights, but the SSG is plenty powerful for the legions of imps & zombies that await you. There are a fair few pop-up monster traps that I wasn't as fond of, but they're relatively rare and you tend to have cover to rush for in these cases so I don't think it's a massive deal. My favourite part of the map comes right at the end, you've got just over 100 monsters left to kill and running down the hills opens up container after container filled with all manner of foes. Now while you can play this carefully and sensibly by opening each one at a time, it's much more fun to just run down the hill, open them all at once and watch the fireworks that follow. Getting to the bottom of the hill will also let some arachnotrons in to join the fun, and eventually you'll be able to deal with the remaining enemies with the rockets that you'll have left over. It's a great spectacle, and a fantastic ending to a fantastic level. The View is an excellent map, with fun combat and great visual design that sells the sense of place that you're in. The fact that Lutrov71 was 11 years old when he made this map, if the doomwiki is to be believed, makes me even more impressed because it does not seem like the work of an amateur at all. -
The DWmegawad Club plays: Community Chest 2
finnks13 replied to dobu gabu maru's topic in WAD Discussion
MAP05 - Elixir by RjY: 20:44/13 Deaths This map is a swift kick in the nuts to anyone who fell asleep from the easy going first four maps, because holy shit is this map completely over-tuned in the polar opposite direction to the point where I'd say that it's pretty much impossible to complete without the foreknowledge of two things: 1. There will be a cyberdemon at the exit of the map that is non-negotiable to kill. 2. You do not have enough ammo to kill said cyberdemon unless you punch nearly every non-hitscanner to death. I knew this was coming, found almost all the secrets, caused infights wherever I could, made sure to preserve as much health as possible and punched two mancubi to death in the final ambush out of sheer desperation and managed to exit with exactly nine bullets to my name. This map does not fuck around if you want to get all the kills, but to be honest, the area reuse, lack of health and ridiculous numbers of hitscanners pretty much force you to kill everything that you come across anyway. There are a couple of mercies in the map, those being the fact that the berserk comes very early on - telling you to start punching from the get-go - and the bars in the factory area are self-referencing sectors so getting everything to infight after you open the exit isn't too difficult since they'll try to attack you but won't be able to get through the fence, but your hitscan attacks will. That's it for mercy though, as doing pretty much anything will set off a tripwire and fill the map to the brim with enemies. The most ridiculous moment comes in the red key room, after a popup group of revenants and hell nobles that you've already had to punch out, trying to pick up the key itself spawns an archvile right in front of you, two barons on the completely unnecessary mid-tex table (that I totally approve of :P), and a bunch of cacodemons and pain elementals in the main factory floor. This fight is just miserable, you've got to kill the pain elementals as soon as possible, because allowing them to spawn in a lost soul horde will force you to either waste all your ammo shooting them, or all of your health punching them. And you have to do this while avoiding an archvile's attacks, and baron projectiles coming from two completely different angles. Great. Elixir is not a very fun map, despite it's first impression of a fun zombie slaughter in a cave, you pretty much need to know what's coming in order to complete it and the lack of resources is just not fun to play around here. It's certainly tense, but that tension comes from the unknown of whether I'll have enough resources left at the end of the map to be allowed to finish it. I don't particularly like resource management of this extreme level to begin with, so I wouldn't have liked this map much anyway, but it's placement in the wad feels like a bad joke. -
I've made what can only been described as a masterpiece probably: Name: "Aw shit I clipped out of reality again" Music: "Background Music #2" from Mario Paint sequenced by Alluro85 Tested Port: dsdadoom -cl 9 (I don't care what sky this gets so whatever SKY1 is works fine I suppose :P) 10lines_finnks.zip
-
The DWmegawad Club plays: Community Chest 2
finnks13 replied to dobu gabu maru's topic in WAD Discussion
MAP04 - Deja Vu by Gene Bird: 13:21/0 Deaths To get the elephant in the room out of the way immediately, Gene Bird's maps in Community Chest 2 are, on the whole, not as good as his maps in Community Chest. He takes on the same role as the first, being the go-to guy to fill the wad up to a full 32 maps, but I definitely prefer the Blind Alley maps that he sent to CC1 to the ones that are here, though I'm not sure if that's just because CC1 as a whole feels much more primitive than CC2 so his style of mapping blends in much more with the rest of the set. His first map in the set is Deja Vu, which is basically fine. It goes through various themes, starting off with a marble castle, before going to bricky ruins, generic techbase, prison and then inexplicable doomcute filled house. Any of these themes on their own, or perhaps a combination of two of the closer themes, would have probably been completely fine, but it feels weird with how often and how sudden these jumps are. That being said, I can excuse bizarre texturing and weird theme choices if the map is fun, and this map is at least pretty enjoyable. I should also mention at this point that I am playing with the Alien Vendetta MIDI pack over any of the unchanged MIDIs, and the excellent Map04 replacement song "Shotgun Shawarma" definitely improves the map, giving it a more propulsive, energetic feel than "Between Levels" ever could. Like most of Gene's other maps, you'll be going room by room, clearing a varied assortment of goons with the super shotgun for the majority of the map. The large amount of fodder enemies keeps the pace up and there are a couple of actually pretty decent fights here, such as the walls lowering to surround you with shotgunners, imps & hell knights when you first enter the rocky section and the arachnotron room at the north of the map which nearly got me. There's a slightly weird section near the start where you have to make a blind jump into a slime pit with an arachnotron stomping around in it already, which isn't the most inviting form of progression I've ever seen, and I'm not sure why the map ends with the death of the Icon of Sin, but these things don't really matter in the grand scheme of things. Deja Vu is fairly rough around the edges, and definitely feels the most aged of the four maps we've played so far, but I don't dislike it at all because Gene's maps tend to be, at worst, uncomplicated fun, and that trend continues with this map. -
The DWmegawad Club plays: Community Chest 2
finnks13 replied to dobu gabu maru's topic in WAD Discussion
MAP03 - Slige Control by The Flange Peddler: 5:58/1 Death Slige Control was the result of a competition to spruce up maps generated by the tool "Slige", where mappers were tasked to keep the layout and monster placement the same, instead detailing them until they looked nothing like the original. This means that Slige Control has a high level of detail that does feel beyond anything a level generation tool would bother with, but plays pretty terribly. While the level of detail in the map is very high (which is a consistent theme between all three of The Flange Peddler's maps in CC2), it does feel rather busy to look at, with each different room blending into one another due to the similarities in the details. I've never been massively fond of this sort of very high detail design, but I can understand why you'd go for as much as possible when trying to differentiate your map from it's generated original form. The start of the map suffers from an extreme lack of ammo (pistoling pinkies & cacodemons is fun right?), and then the map gives you the SSG and becomes incredibly easy. The one interesting fight in the level, the red key fight, is interesting simply because it uses lost souls which is quite a rare occurrence. The rest of the map is symmetrical and boring, with the side passages around the main room feeling almost exactly the same as one another. It's not surprising that Slige Control is a bit of a disappointment, and I expect the map in it's current state is much better than what it was based on, but there's only so much you can do with a level made by a generator. At least it's pretty brief :P -
The DWmegawad Club plays: Community Chest 2
finnks13 replied to dobu gabu maru's topic in WAD Discussion
MAP02 - Coolant Platform by iori: 7:28/0 Deaths I don't say this often about a map, but Coolant Platform is absolutely adorable, showing off Boom features with the enthusiasm of someone who's discovered voodoo scrollers for the first time and wants to use them for everything! This is best exemplified by the start of the map, which has a few mini-scripted sequences of opening and closing various doors, silently teleporting in monsters and keys with all the subtlety of someone excitedly pointing to the screen while saying "Look at how cool this shit is!" The other boom shenanigan highlights are the spinning light before you descend into the main section, which I have to admit is actually pretty neat, and the little hell star that appears in the nukage after grabbing the yellow key along with a sleeping baron. It's definitely a tribute to Knee Deep in the Dead, sharing the same sky, lack of heavy weaponry and being completely trivialised as soon as you pick up the chaingun. It's a little more ambush heavy than you might expect from a KDITD homage, but the ambushes are kept pretty easy and the plentiful amount of health and very generous secrets will keep you topped up. The only moments I'd call "not fun" are the couple of times you have to shotgun a baron to death, and also the cacodemons in the outside area are also a bit of a slog due to weapon #4 being your most powerful one, and the complete lack of rocket launcher. I reckon the map would have been better off had it stuck to the episode 1 monsters exclusively, though I guess they do help differentiate it from the million kditd homages that exist a little. Coolant Platform is mostly memorable for the enthusiasm towards the boom features in it's opening minutes, the rest is a fairly inoffensive KDITD reference that's given a bit more personality from the scripted sequences. -
The DWmegawad Club plays: Community Chest 2
finnks13 replied to dobu gabu maru's topic in WAD Discussion
Hell yeah! While Community Chest and it's sequel are, understandably, not most people's pick for "best wad ever!", Community Chest 1 is easily the most fun I've had writing about maps with the club - probably due to the very inconsistent quality of these levels. I'm hoping Community Chest 2 is equally as fun, especially since I've played this before and actually quite like it. I said in the thread for CC1 that the second entry in the Community Chest quadrilogy was my favourite, so let's see if that statement holds up to a replay! I will be playing with dsdadoom v0.25.0, -cl 9 on Ultra-Violence from a pistol start. While I try to go for 100% kills, I can't be bothered to secret hunt so if I miss a few - so be it. MAP01 - The Furnace by Erik Alm: or should that be Eric Alm :^) 2:09/0 Deaths Exactly what you'd expect from a Map01 with Erik Alm's name on it, The Furnace is a fun, fast-paced sprint through a small techbase that is a bit too short to leave much of an impression on most people beyond "yeah that was pretty good". Visually it reminds me a lot of Map05 of Scythe and Map11 from Scythe 2, being comprised of green bricks and metal with a couple of deviations when you go inside, and in The Furnace itself. You have to play quickly, and are under fire from zombies and imps with the high-ground for the majority of the opening, with a few tiny teleport traps when picking up guns and keys that will lightly test you while not being an actual threat as long as you aren't half-asleep. For all of the "this map is unmemorable" talk, I thought there were two separate moments in the map that do stand out to me, the first being when you jump into The Furnace itself, and emerge into a hell cavern with two hell knights and a berserk pack. Now this is Erik Alm at his cosiest, so this isn't designed to kill the player, as you've got plenty of health around and a chaingun if you're not into punching hell nobles. The other stand out moment is the finale, which puts a wall of shotgunners on one side of you, a wall of imps on the other and two revenants storming out of the exit - the shotgunners being the priority targets, despite the revenants preference for hitting you for 80 damage at a time. The Furnace isn't something that I expect would stand out if we weren't going through and talking about each map individually, but I'm glad we did because I think this is actually a very solidly designed and fun opener to a wad, which presents you with a couple of fun traps and bows out before taking up too much of your time. Honestly, I think a lot of maps in CC2 (and not in CC2 :P) could learn something from this one. -
MAP32 - Amarite Accelerator by Insane_Gazebo: 38:47/34 Deaths What a send off to Fractured Worlds Amarite Accelerator is. The longest, and toughest map in the set for my money, but the different ideas and gimmicks that are on display are truly something to behold. You should hopefully not be surprised to hear that the map looks fantastic, given the author, but all the light effects, use of single-colour textures and scale of everything really make the place feel alive, and as if energy is being passed through this entire machine that we're disrupting by killing all the demons that presumably power it! Insane_Gazebo mentions thanks Bemused in his comments for showing him how to get the light effects working, and I'd also like to thank him as this map would absolutely not look as breathtakingly spectacular as it does without them. So the map looks great, but I wouldn't like it so much if it wasn't also a ton of fun to play through. There's a few of the small-room filled with a bunch of monsters fights that you'd see in Insane_Gazebo's Haste maps or some of the smaller scale areas of Sunder, and they're all entertaining to unpick and figure out, but the highlights are the weird gimmicky fights that feel like an experienced designer discovering boom conveyors for the first time and going completely nuts with them. The first one that involves conveyors introduces the gimmick nicely, but the fight doesn't use it for much other than making 1v1ing a cyberdemon with the plasma gun not a complete slog as it's position will change up constantly from the conveyors. There's a similar fight a bit later on with faster conveyors and a death pit in the middle which expands on the concept very well. My favourite part of the map is the fight in the south-west corner of the map, which contains a massive group of archviles that can be hidden from view by the player shooting a switch. This is made much more difficult by the two mini cybers taking pot shots at you from a moving gangway above, and a small cacocloud coming from behind the viles. You've got to balance rocketing the cacos to not get overwhelmed while making sure to leave a sightline between you and the vile hiding switch as you'll have just enough time to switch over to the SSG and reactivate the barrier before you get zapped, but a cacodemon in an inoppourtune position can make auto-aim screw you over completely. This is such a cool idea for a set-piece, and I think it's probably my single favourite fight in the whole wad. The other gimmicky fights include the fight on the eastern side of the map that has the floor raise to the ceiling to crush anything standing upon it, which I liked despite it being pretty easy to get a hang of, and the floors being prone to breaking if any monsters got stuck, meaning you'd have to very precariously skirt around the edges to escape if that happened in a bad spot. The secret fight is very cool, with a light sequence going back and forth along the otherwise dark arena, though this isn't just for show as when the fight is triggered, the floor will become damaging in a wave, before returning to normal, forcing you to follow the light around to not get taken out by attrition. I must admit I'm not 100% sure how to beat this fight if you don't manage to kill all the archviles before the second hell knight wave spawns in, as there's very little solid cover, and getting targeted by even one can bounce you into a bad spot and killed. With all the crazy gimmicks going on, I was a little disappointed that the finale didn't make use of any of them, but I always like a BFG-fest so I liked it anyway! Overall, Amarite Accelerator is a brilliant map with very creative and unique fight design that manages to encapsulate the whole of Fractured Worlds' design philosophy without overshadowing the rest of it. Overall Thoughts on Fractured Worlds: Why the hell didn't I finish this sooner? I don't know what past me was thinking when I decided to drop this, because Fractured Worlds is simply fantastic. @baja blast rd. said it best - it's as if every part of these levels were built with the intention to be "the coolest part of the wad" and I think that this idea works so incredibly well for a wad like this. You're not left with any fluff on the maps when they're constantly changing things up with more unique fight designs in single maps than most megawads manage to get in their whole lineup, and I would love to see more wads like this. Obviously a highlight is the visuals, which Nirvana excels at - they're grand when they need to be, small and claustrophobic when it'd be appropriate, with lighting effects used for emphasis and covered in a very bright yet unmistakable shade of cyan. The high level of detail in Fractured Worlds also doesn't take away from the readability of fights, as a lot of it is in the background, which helpfully blends into the background in a tense situation. A ton of effort and work has obviously gone into every map, and while I didn't love them all, I don't think there's a bad map in the set with the weaker ones still having cool ideas and atmosphere. Fractured Worlds is definitely something I plan to replay over and over, since I'm sure future playthroughs will allow me to come to appreciate the design of the fights from a perspective other than "Wow, that was cool!". The bonus maps were both great, they fit with the rest of the set perfectly, and if they were part of the main progression, I'm not sure if I'd have noticed. Thanks to Nirvana, Scotty and Insane_Gazebo for creating this absolute masterpiece, it's an incredible work of mapping that I would recommend to anyone who likes getting killed a lot while Doom :P Top 3 Maps: Map03 - On Electric Winds by Nirvana Map32 - Amarite Accelerator by Insane_Gazebo Map06 - The Outermost by Nirvana
-
MAP31 - Dark Matter by Scotty: 17:00/17 Deaths The first secret map is themed around the central gimmick of ensuring barrels only get blown up at the correct time. While the lights under the barrels are red, pain elementals will spawn in if the barrels blocking them are removed, and you will definitely not have enough ammo to kill them. Through some Boom MagicTM, after the lights are turned to cyan, the pain elementals no longer teleport in when the barrels get blown up. I'm very happy that the map actually makes very good use of this gimmick too, it's the central mechanic you have to interact with in a surprising number of fights, and the difficulty is kept pretty reasonable to ensure that having to dodge projectiles while ensuring you stand at the correct angle to direct them away from the barrels, doesn't get frustrating. Visually, the map is a very sinister metal fortress in a black void, and while it's certainly not as breathtaking as a lot of Fractured Worlds, it looks nice, isn't cluttered and keeps vision on the central mechanic very clear so I think it's a success in that department. Some highlights for me were the fight for the blue key, the finale before the regular exit and the secret fight. The blue key ambush involved lots of monsters on small pillars, blocking your way to the switch that deactivates the PE teleporters, but with a smaller barrel set in the middle of the arena too, making it so you have two locations to have to lure projectiles away from. I found the best way to deal with this was to brute-force it by immediately jumping on the pillars and taking out the monsters in the way of the switch, allowing me much more freedom to get the rest of them. The final fight before the regular exit makes very good use of the very few monsters it contains. You've got the BFG at this point, but you have to be incredibly careful when you fire it as just one tracer will explode the barrels and unleash the pain elemental crowd on you. Having to dodge the cyberdemon rockets was also a very fun final challenge for the map. The secret exit arena is definitely the prettiest part of the map, it's always nice to see the purple textures appear in FW just because it's nice to realise you've found the "cool secret fight" for the map. The ambush itself requires quick reactions and aggression to kill all of the hell knights from one of the two spawners with the BFG, and then rocketing the others before they overwhelm you. You should hopefully have enough cells left to 2-shot each cyberdemon in the hallway before it has the chance to escape and blow up the barrels. After they're gone, press all the switches and jump into the evil eye for victory. Dark Matter is a solid addition to the line-up, with a clever gimmick that's used very well and doesn't overstay it's welcome.
-
My apologies if these are more ramble-y and unfocused than normal, it's late here :P ~~~ MAP05 - The Starlit Core in Meltdown: 32:53/26 Deaths The trend of the odd numbered Fractured Worlds maps being fantastic continues with The Starlit Core in Meltdown, which is a great time. Given that the majority of the textures used in this map are cyan, this map looks absolutely gorgeous, with other, darker colours used for great effect as contrast. I'm glad that Nirvana has felt the need to mix-up the visual style of the wad over and over again, as while every map in this set has looked fantastic, it's always nice to see a new setting and you're kept guessing where the next map is going to take place in due to the large variety in themes. The other theme of this map is *cool* fights, from the start the set-pieces feel very varied in their monster compositions and scale with some of the smaller ones being some of my favourite moments in the map, and still feeling like they were supposed to be memorable encounters without taking up much of the monster count. Two of these that I found particularly memorable were the little pinky & archvile encounter near the start, as well as the precarious mini cyber & demon fight that takes place just before you get to the red key. The key fights were great, the cyan key fight reminds me of some of the most fun encounters in Sunlust, where a slightly unusally shaped room gets filled with monsters from increasingly silly monster closets (that seem to function more like clown cars with how much is stuffed in there), and the right amount of aggression and herding is required to make it through without tearing your hair out. The blue key fight is a multi-layered wave ambush where each press of a switch reveals a teal cyber, a few archviles and a different variety of baddies in the outer-ring of the arena to prevent you from just running away too easily - you've also got surprisingly little ammo here, I ran out of rockets & shells at the end because I didn't infight enough. The red key fight is a balancing act of rocketing imps & hell knights over a death pit, with not quite enough space to feel comfortable and I liked the risk that is taking out the perched archviles near the edges of the arena since it takes precious time to kill them, but the safe-ground gained by doing so can make the difference in a pinch. The only part of the map I didn't particularly like was the secret fight, which I feel like I just didn't understand to be honest. At first I thought the challenge would be to dodge rockets for long enough without destroying the barrels, but doing so doesn't do anything (I think, I got bored of doing this after a while) and after a point I just decided to not bother engaging with the gimmick and just letting everything spawn in at once, provoking a small war to start and cleaning up the rest with the BFG while trying not to get immensely frustrated with all the teleporting cyberdemons. Thankfully, the finale makes up for it by being a very entertaining, if pretty easy, infighting and herding puzzle against an absolutely jaw-dropping background. Overall, The Starlit Core in Meltdown is an excellent map that hopefully sets us up for a strong final chapter. MAP06 - The Outermost: 28:01/14 Deaths I thought this was a really cool finale, with the "Fractured Worlds" name being the most relevant here since the map is a mish-mash of various themes that seem to have been smashed together in some sort of horrible time-rift between realities. Seeing a flesh cave with the cyan liquid pouring everywhere feels very odd and out of left-field considering the techy surroundings that comprise most of the other maps, but I think it really worked to create something genuinely quite unsettling. Equally ominous is the void that the starting area looks out upon with just one red tree in the distance showing signs of life. This map is also significantly more red than the rest of the levels, which feels fitting for a finale, but also a bit off-putting as the red clashes quite a lot with the palette of the other maps and I feel like that sensation was completely intended. Weirdly enough for a finale, I found this the easiest of the maps - not that I'm complaining, the combat here is very fun and I will always prefer a map that is fun and perhaps a little too easy over a map that's an overly difficult, miserable slog. At the start you've got to dance with an archvile and a load of revenants with just the SSG and a few carefully placed barrel "bombs" that will take out anything nearby. I really like the ambushes that come afterwards, they all feature archviles quite prominently but don't become "assassinate the archvile to win" which I think is quite an achievement. The flesh cave is my favourite area in the map, the organic environment really lends itself to fun and frantic fights and the timed fight for the red key is tense and absolutely brilliant. After some searching, and a small trip to the wiki, I found both the purple key, which hides a very entertaining little fight, which I brute-forced with rockets and the super secret white key which leads to an incredibly cool secret area. Made with fully black & white textures, this area looks stunning and... alien, even for this wad's standards. You have to go through a small scavenger hunt for a few more white keys, and after picking up them all around 350 "void cacodemons" emerge from the darkness, for a fight that I can only describe as "absolutely bloody terrifying". They are very fast, and fire even faster and blend in perfectly with a lot of the surroundings - thankfully they don't have much health but a horde that large can close in on you fast, surrounding you and cutting you to pieces. It's a spectacular moment, and a highlight of the whole wad for sure. The finale felt a little low-key to me as I was playing it, but reflecting on it now, it feels like the perfect conclusion to the wad. A cross-fire between teal cybers, with the player being forced to balance on very uneven, precarious ground as monsters engage you from all sides. Getting health is quite difficult due to the construction of the arena, and the size of the cacodemon corpses can lead to cyberdemon rockets catching you by surprise. I also think this area looks gorgeous, the arena's made of loads of differently coloured hexagons with a view out into space through the large windows on the sides of the map. Fractured Worlds' main event is just fantastic, and I am so glad it sticks the landing with this incredible finale. Bravo Nirvana! MAP07 - Dreams of a Higher Being: A peaceful yet sinister blocking map, using a spooky MIDI that I've only come across in Community Chest 2. Those eyes staring at you from the darkness are very creepy...
-
MAP04 - Hyperspeed Descent: 23:35/18 Deaths This one didn't really do it for me if I'm being honest, I'm not exactly sure what it is - perhaps the transition from beautiful caves and megastructures to a fairly anonymous (if grand) techbase in the void aesthetic throws me off, or maybe it's because the previous map spoiled me with every fight being a unique, cool idea whereas this map only has one (imagine complaining that a map only has one really cool, unique fight :P). I do think the visuals in this map are fantastic still, and I really like the little insta-teleport gates being represented by the bright cyan light contrasting against the dark, foreboding structures in the distance, but I think I like the more fantastical structures of the first three maps more. Speaking of the insta-teleport gates - why aren't they used for anything beyond a method of transporting you to the cyan key and back? This whole mapset has set up the expectation for cool little mechanics like this to be expanded on in combat, and I was very interested to see how insta-teleporters would be used, but they're not and that made me sad. There are two hard parts in this map that caused 12 of my 18 deaths, and they're both very small areas of the map - the first is the very claustrophobic ambush right at the start of the map where you have a hell knight and baron on each side of you, with a couple of revenants spawning in to murder you as quick as possible. I assume the idea is to get the revs & hell knights to infight, letting you shoot the switch to lower them and press the switch to escape to safety, but there is so little margin for error that I have to assume I'm doing something wrong here. The other very difficult part is the red key fight, which I feel like I had to break in order to succeed - there's archviles behind a wall that raises and lowers on a timer, and a bunch of hell knights teleporting in to fill up the room and disallow you to take cover. The only way I was able to do this was by rushing onto the hell knight spawn point before any spawned and hoping to stun the archvile that targeted me so I could stay on the HK spawn point until the first switch that allows you to exit was revealed, before rushing to the other and leaving the arena. Both of these fights felt a bit too demanding of perfection to be particularly fun to me - I know I'm on UV and should expect to get my arse kicked, but these stood out as unusually punishing relative to their prominence in the map. The rest of the map is much easier, and generally more fun. Some of my favourite moments include the rocket launcher room where four mini cybers and some other enemies emerge and start a massive fight, which gets rudely interrupted by four archviles, ready to resurrect everything if not taken care of quickly as well as the grand finale which is incredibly imposing and also the first time in the wad we're truly let loose with the BFG. The finale is a very entertaining set-piece, with four regular cybers coming at you from the walls and a monument full of hell knights and barons facing them, pelting the whole arena with projectiles and little-by-little, lowering to teleport into the arena itself. I found the best way to deal with this was to hold my fire until the four mini cybers were released from their cubbyholes and then going nuts with BFG shots - there's plenty of ammo to spare if you allow the horde to die down a bit before starting your rampage and this let me complete it without too much trouble. The spectacle of the encounter is something that I think the rest of the map could have benefitted from. Hyperspeed Descent has some excellent moments, and perhaps only stands out as "less good" because the standard is so high from the other levels in Fractured Worlds, but I found the difficulty rather imbalanced between the spectacular "cool" fights that I expect were meant to be the memorable moments of the map, and the small, tight ambushes that actually stayed in my memory due to the length of time I had to spend on them.
-
MAP03 - On Electric Winds: 28:11/25 Deaths This map is absolutely my favourite so far, it's truly something to behold. I think it's to do with the theme of the map being very different, since the majority of the map is set in a cave-system and the structures that have been created within it and I found the scenery enchanting throughout and breathtaking when it was at it's most gargantuan. Now I'm still here for the demon-killing, and this map has some very entertaining combat, but the visual design and atmosphere being so fantastic certainly helps a map along. The pacing of this map is great, I would describe it as a halfway house between Map01's breakneck, no time to catch your breath, and Map02's much more measured style. The map starts with one of it's most tough sections, and while it does get easier for a bit after that, it sets up expectations for the mean parts perfectly. You've just got a shotgun at the start, and are facing down a mini cyberdemon with an archvile overlooking most of the cave, and another spring-loaded for when you dash into a nearby cave that contains the SSG. I found the best strategy was to ignore everything and get the SSG as soon as possible, taking out the vile that's next to it and hoping that the mini cyber and the revenants nearby would get into a fight in the meanwhile. After a little bit of exploring caves, we get to the first key fight which is all about controlling monster movement. There are four pillars with archviles at the top, that enemies can lower, so you've gotta bait the archvile into starting it's attack animation while standing in a direction that's not going to lead it to another pillar. I thought this was a really cool idea for a fight, and it's executed very well. The next "big" fight was similarly gimmicky, though I don't think it worked quite as well. This fight involved pressing a switch that would magically transform a damaging floor into a non-damaging one, temporarily, and is again, a really cool idea for a fight. The problem is that the delay between pushing the switch and the floor becoming non-damaging is very long, to the point where for both waves in the fight, I pretty much ignored it, electing to use the safe area where monsters spawned in as a much smaller, but easier to managed area to fight in. Perhaps this was the intended method though, trigger the safe floor once to gain a foothold, and then use the actual safe-floor for cleanup? The other slightly clunky moment comes in the secret fight, where the indicator that a line was monster blocking fooled me into assuming it was just an impassable line for a while, making the fight much more difficult until I accidentally walked through it with a "wait, what?". Perhaps trapping the demons in small troughs could have been a bit more clear. Some other parts I really want to highlight include the small cyberdemon telefragging fight that again tests the skill of controlling monster movement, though with a much more instantaneous penalty for failure. The finale is also fantastic, involving teleporters between three large platforms - allowing for seemingly small hordes of monsters in the distance to become very close, very quickly. I struggled a little bit to get a foothold, you're limited to rockets with the three BFG shots being saved for getting you out of very bad situations, but eventually I realised that the key was ensuring that the cyberdemons were infighting and that I was on the other side of the arena to them, so they couldn't close in on me too quickly. My successful attempt happened in part because I accidentally telefragged a cyberdemon seconds into the fight! Honestly, the fact that Nirvana bothered to rig up all the separate sectors for the teleporters would have impressed me, but the fight itself is fantastic too and such a cool way to end off a map. On Electric Winds is brilliant, I would be surprised if anything that's still to come can top it because I am blown away by the sheer number of ideas on display and just how many of them work. Top that off with spectacular visuals (I can't state enough how much I love the cyan "veins" of energy that run through the entire megastructure at the eastern side of the map) and "Hey presto!" you've got one of my new favourite maps ever.
-
MAP02 - Midnight Tengu: 30:27/20 Deaths I had a much more mixed experience with Midnight Tengu than I was expecting. There are some excellent moments here, and also some moments that made me question why I was bothering to play this at all. To start with, this map is very long and weirdly paced in terms of difficulty, since there isn't much in the first 15 or so minutes (about up until the room with the yellow switch in) that should trouble most people, and then Nirvana decides to tighten a vice on your nuts for the rest of the map out of nowhere. This type of difficulty flip-flopping felt very off to me, and I'd have preferred if the map had been more challenging from the outset. Once again, the visuals and atmosphere are fantastic, and I think the music is perfectly chosen. The theme of "techbase" is still the same as in Map01, but this map's architecture and use of cyan & grey make it feel completely different while you're in the level. There's also a couple of dojo sections, which break up any potential monotony and look sick. I don't have too much to say about the first bit of the map, the combat is fun and provides a little challenge, but remains very doable if you're paying attention and learning from your inevitable demise the first time you trigger each trap. This slow beginning feels "off" in retrospect, especially compared to the madcap action of Tomahawk, but I enjoyed it in the moment, which is what counts at the end of the day. The fight in the large area with the purple key door were a little annoying, the random cyberdemon rockets were miserable and the cybers and archviles spawning in ~20 seconds after you trigger the fight felt rather cheap, though I will admit I'm unsure how you'd get a similar effect of blocking this area off after some time elapses without it feeling like this. The platforming in the yellow key fight was awful, and this fight in general felt very out of my control, with my successful attempt feeling more like a fluke than anything else (maybe I just suck). The final fight I'd like to highlight is the cyberdemon sandwich in the dojo, and this fight was actually very cool with how you have to get the different cyberdemon colours to infight, however I did find that because all the threats were firing rockets, it often felt like getting hit even once was a death sentence. This made this part pretty frustrating, though unlike a lot of the time when I get frustrated with a fight, I was still happy when I finally conquered it rather than just being relieved I didn't have to restart it for the umpteenth time. The rest of the map mostly involves nuking stuff with the BFG, and despite the complete horseshit that is the initial reveal of the archvile horde which reminds me more of a troll you'd find in a Kaizo Mario hack than a combat set-piece in a doom map, I enjoyed this ending section. Overall, Midnight Tengu made some mis-steps in setting up expectations, and had some frustrating design decisions but the overall experience was still an enjoyable one. ~~~ VOTES: +++ Solar Struggle +++ Community Chest 2 (you know you want to :P) +++ 200 Line Massacre (would prefer just one of the two, because even though the levels in these two wads are very short I'm not sure playing 68 maps in one month for the club sounds particularly fun) Hope everyone had a nice Christmas!
-
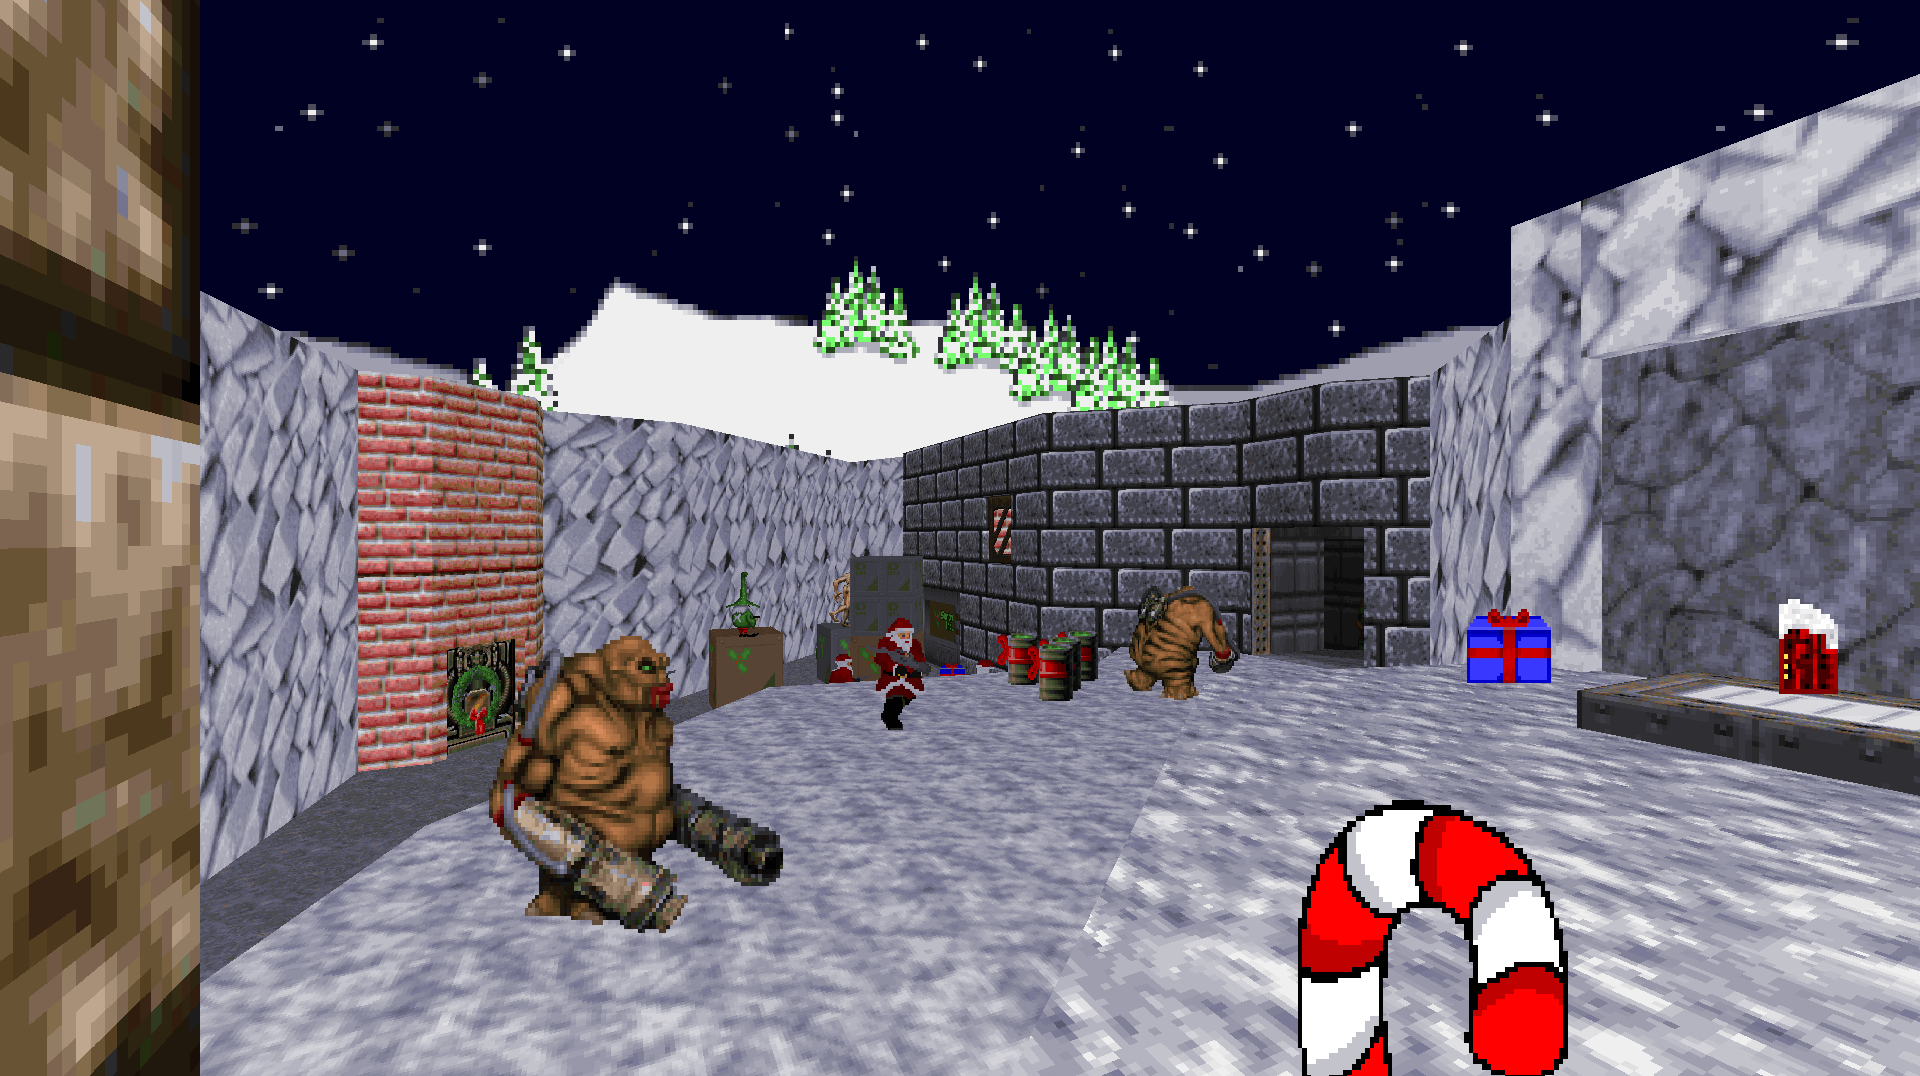
chrismast puss23finnks.zip Map Name: Snow-covered Copse Author: finnks13 Music: Sherbet Land from Mario Kart 64, sequenced by Zagro Gimmicks: I rolled a dice four times and got... "8 Former Humans, 3 Damaging Floors, 1 Bone Closet in a Trick Door and 12 Barrels o' Fun" Difficulty Settings: Nope Build Time: 53 minutes Comments: Is it a bit silly? Probably. Screenshots:
-
Fractured Worlds Just in time for Christmas, we've got a nice, relaxing wad to close out the new year... right? I've played the first three maps of Fractured Worlds before, but I can't remember any specific reason for stopping there so I suppose it was probably a case of death by accidental save overwriting :P Anyway, this time I will be playing on UV (I think I can manage late-game Sunlust), from pistol starts on dsdadoom v0.25.0. I will try for 100% kills, especially since I know that Nirvana likes hiding secret fights, but I am impatient when it comes to secret hunting so I may just give up. MAP01 - Tomahawk: 9:59/10 Deaths A very aggressive opener to the wad, Tomahawk starts you in a staring match with a cyberdemon in the distance, with an archvile being sprung on you immediately as you jump out of the opening corridor. That's pretty much the theme of this map, running around small spaces, and having archviles released near you, or on a bunch of corpses you left in a previous room, you'll need to revisit any moment. I didn't mind this archvile use in this map, I'll take aggressive, mean archvile placement any day over the boring, predictable archvile use that is the norm. You can grab the BFG almost immediately, and I would highly recommend doing so, and not playing half the map without it like me :P The visuals are both very unusual, yet exactly the sort of thing I would expect from this texture theme, but I think they look excellent. The palette has been altered to purge any of the colour green at all costs, and the cyans, blues and purples that make up most of the map's details look great. I am slightly less convinced about the sprite replacements, which range from "genuinely really cool" (primarily thinking of the lost souls & pain elementals here) to "a bit ugly, if I'm honest" (sorry pinky demon, or grey-ey demon I suppose!), however even the sprites that I don't like as much all contribute to the unique visual flair that this wad has so all in all, they're fine! We also have the one(?) new enemy that appears in Fractured Worlds - the cyan cyberdemon (which I will be referring to from now on as the mini cyber), which functions as a regular cyberdemon but with only 1000HP. It's a good idea for a custom enemy, and this map teaches you how to nuke them up close with the BFG before you're allowed to grab the blue key. The hardest part of the map is the small trip into the void to grab the yellow key, I impressed myself by nailing the platforming to this area on the first attempt (which is a fluke, if the six attempts it took to get back are to be believed!) and getting the key itself activates a mean little ambush. The best strategy I had was to kill the mini cybers immediately, since the arena's shape didn't lend itself to getting infighting going very easily, and there's enough health and cells in here that I figured it was easier to kill the hell knights & barons myself. Tomahawk is an excellent opener for the wad, my only real complaint is that the music choice got very repetitive and a bit annoying by the end of the level - it was fantastic other than that.
-
MAP14 - The End: 3:09/0 Deaths Bit of a silly map, this map does it's best to fool you into thinking it's the actual end credits map by hiding it's content behind a fairly tedious switch hunt. Honestly if I hadn't seen the kill count on my first playthrough, I'd have definitely never found the secret maps were it not for the kill count. The fight itself is entertaining enough, rocketing imps is always fun, and the archviles that pop up around a minute in certainly stop the map from being boring. Honestly my favourite thing about this map is the choice of background music :P MAP31 - Heavy Press: 8:24/3 Deaths The first of the secret maps is a bit of an oddball. A lot of people have talked about this map feeling different to the rest of Running Late 2, and I think that is perhaps due to the fact that Heavy Press is made of almost entirely vanilla textures which definitely lend the map a slightly different atmosphere to the cc4-style stuff we've seen in every other map. This map felt notably light on health, and all of my deaths came from trying to brute-force the finale, where pressing what appears to be the exit switch drops you directly onto two archviles ready to fry you, with only 6% health. My fault I suppose. I like the secret exit reusing parts of the map for a small navigational puzzle, but the rest of the map is basically inoffensive and fine. Not the flashiest map, but it does the job. MAP32 - Supply Closet: 13:53/3 Deaths I remember this map kicking my arse on my first playthrough, though I didn't have too much trouble this time through. The basement we found the entrance to in the previous map is full of all kinds of nasties and serves as the final challenge of Running Late 2. It's a worthy challenge, and the main basement area is very fun to fight in, my favourite fight in this area being the massive horde of revenants, both regular and punch-only which are a very fun combo together. The toughest part of the map is the flooded section that opens up after you get the BFG, I definitely could have come up with a better strategy sooner, since trying to do anything but immediately nuke the pain elementals was causing me to face-rocket a high amount later on in the fight, fun stuff though. The "main event", which comprises of nearly 300 of the 700 monsters in this map is set in the gory basement of this already gory basement. This is not a particularly difficult fight, since the main threat is death by chip-damage, since there's enough space to dodge the cyberdemon's rockets without too much trouble, but the only health can be quite hard to get to while they are still alive - the chaingunners are particularly brutal in this fight. The final boss of the wad is 10 archviles, and while you've got a lot of space to take them out, knowing that they're coming and hearing the purring through the walls does a lot to build the tension up to when they're released and I think it's a fitting end for the set. Good stuff! Overall Thoughts on Running Late 2: Since I started keeping track of wads that I really liked and would recommend, Running Late 2 has been very comfortably in my Top 5 after I loved it so much on my first playthrough. It had a very large influence on my own mapmaking, both directly and indirectly, since the fusion of the modern run & gun gameplay with a more slaughtery edge was something I very much wanted to emulate, and my attempts to find more of A2Rob's stuff to play led me to Nova III, who's third episode inspired me to make a lunar-themed wad of my own. It's not a stretch at all to say that a lot of my maps from 2021 would not exist without Running Late 2. So, when it came to replaying it for the megawad club and trying to talk and evaluate it, at least a year or so since I last touched it and after my tastes have certainly changed, I was a little nervous that it wouldn't live up to my memory of it, but I am very pleased to say that I had a ton of fun with it over the last few days! I am struggling to say anything that I haven't already said (especially cause it's currently 2 in the morning as I write this :P), so I'll keep it brief. Running Late 2 is near perfect for what I think a modern doom experience can be: it's got fluid and fast-paced incidental combat, it's got punchy and surprising ambushes, it's got excellently done visuals that look nice and convey a sense of an actual place, it's got some very solid additions to the monster roster that are introduced well and fun to fight, and most importantly, it's very well paced and doesn't outstay it's welcome at all in spite of the fact that it goes on for four more maps after it's finale! It's absolutely fantastic and I think everyone should play it. Top 5 Maps: MAP11 - Break Room MAP13 - Need a Vacation MAP05 - Rooftop Rampage MAP04 - Oil Rigged MAP10 - Overtime (to be honest, I could have made an argument for pretty much every map to be here)
-
MAP12 - Un-Employed: 37:52/6 Deaths aka: Dave's retirement party gets cancelled and doomguy decides to take it out on a city full of hellspawn. Un-Employed is the largest, and grandest level in Running Late 2 and would likely function as the finale in most other mapsets - it certainly feels like one when playing through it, so the fact that Running Late 2 continues on for another four maps afterwards is an interesting choice. It's a massive city map, structured in the best way a large city map can be - open for exploration in almost any order, with the exit locked by all the keys. Now there are non mandatory buildings you can explore, and some buildings are locked behind completing other buildings, but I only found this a problem when trying to unlock the skyscraper that houses the yellow key, since I managed to completely overlook a switch that opens it up for many minutes. The map starts off in a manner that reminds me a lot of Quadrilateral Rampage from Resurgence as you're in a tight series of tunnels exposed to fire from above, with ambushes coming whenever you take a few steps forward - I found these first couple of minutes the hardest part of the map, taking 3 of my 6 deaths before I got out into the city itself. I would highly recommend opening the church that's right in front of you when you exit the tunnels immediately as it houses a BFG that's defended by only a few cacodemons, which will come in very handy for everything else this map has to offer. The blue and red key sections are both great, and themed around the reuse of areas for fights, with walls lowering to reveal new paths for you and the monsters. The blue key area set on the roofs is definitely the highlight of the map for me as I think it uses the reuse of areas gimmick the best, and the silly little worldbuilding touch of seeing a large billboard advertising toothpaste outside the window where you get the BFG made me chuckle. Two other parts of the map I want to highlight are the plasma zombie horde & two cyberdemons that attack when you try to open the yellow key area, and the finale. The plasma horde is a surprisingly tough encounter, even with the BFG since the plasma guys will melt your health in large enough numbers, and there's always the threat of death by random infighting cyberdemon rocket. The finale, set in a underground station, is a fairly easy yet fun BFG extravaganza against a bunch of fodder with some hell knights, revenants, archviles & cyberdemons coming in near the end to make sure you don't get away too easily. Un-Employed is great, perhaps it's a little long, but I think the map has enough interesting moments to earn that length and I had tons of fun in any case. MAP13 - Need a Vacation: 2:19/4 Deaths We arrive back in Chinatown to find some crates have been moved in a basement to lead us to - a big room full of enemies! It should be no surprise that I like this map since I really like BFG spam fights, and that's what this map is - a fun BFG spam fight. I think it's intended to function as a wind-down from the incredible size of the previous map, and after a behemoth, I like nothing more than the catharsis that can only come from BFGing a bunch of revenants. I also think it's really cool that if you're observant enough, you can complete the map without even finding this fight by going through the sewers - and I genuinely didn't know this until I read @Book Lord's writeup, which is either testament to how well it's hidden, or to how bad I am at finding secrets! I knew this map was coming, and from having watched some UV-Max demos of this wad when I was planning on learning it myself (perhaps I should go back to that...), I know that you can play this fight incredibly aggressively and activate everything without hesitation to complete the map very quickly. This strategy is very fun, and I'd recommend anyone who wasn't particularly impressed by how the fight is normally played to give it a go - the music is chill enough that you won't mind throwing yourself against this brick wall much I promise! I enjoyed this map to the point where I went back a couple more times, improving my strategy until I was able to exit in 2:19, a mere 53 seconds behind the record :P
-
MAP11 - Break Room: 21:49/5 Deaths I remember being rather nonplussed by this map on my first playthrough, but it's been an absolute joy to play this time round. Break Room is much more of a standard techbase in look and feel than most of Running Late 2, but I honestly don't care about that since A2Rob is a master at creating this sort of very clean, very nice-looking cc4-style techbase. There's fun little touches sprinkled around too, such as the posters on the wall next to the secret plasma gun and the break room itself being the location for the cruel red key fight. The map starts with the familiar pattern of being equipped with only weapons 3 & 4, and having to fight some fodder with some heavies sprinkled in to get some decent firepower. Progressing further will take you to a flooded section that involves raising the water level to open up new pathways, which was a very cool moment - this made me think that this map was going to be a "sequel" to Map01 at first too. After getting the blue key, and clearing out the break room, you get to the best part of the map - the dark storage room. This area is fantastic, it shows off the power of the melee revenants since they are very good at forcing you to stay on the move with their incredibly high movement speed, and constantly hearing the purring of the archviles hidden in the crates, not knowing when they'll be unleashed on you is very paranoia inducing :P Once you clear out the storage area, you unlock the red key fight which is mean! Despite being given the plasma gun and enough rockets to level a small village beforehand, the combination of being surrounded on all sides and the lack of cover makes for a rather tough encounter, though it's fairly manageable once you take out the archviles. I did get a little frustrated here since it took me an embarrasingly long time to figure out how to actually access the red key, but that's the only part of the map I didn't particularly like. The map ends with a Descent that gets filled with archviles just when you've cleared it out and are hoping to leave the map further unscathed. This is my pick for a sleeper hit in Running Late 2, it's not very flashy compared to other maps in the wad but it's incredibly fun and that's what matters the most.
-
MAP09 - The Crate Temple II: 14:40/3 Deaths Like the previous map, The Crate Temple II is a very successful combination of Running Late 2's driving combat with a sandbox layout. The visuals take a break from the modern cities and techbases that dominate the rest of the wad, to instead present us with a temple in a natural landscape. Obviously, the UAC had to get the mitts on some part of the map, and they appear to have used it as a dumping ground for various crap - hence the crates everywhere. The unique visuals (for the wad) really help this map to stand out from the others and I think they look fantastic. The mysterious and energetic choice of MIDI (that admittedly brings back many bad memories from the map it's sourced from) really brings the map together and was a fantastic pick. The main gameplay "gimmick" that's being used here are morphing environments that are reused and altered for different fights. The yellow key area & fight is a highlight in this regard, as the gaps you've been jumping across are filled in with bridges, locking you in the arena in a very natural way as monsters mob you from all angles - it's excellent. A surprising thing is the lack of plasma gun, which I only realised when going back over the level - the pace is certainly kept up enough that I didn't mind this at all. This is definitely the point where Running Late 2 starts to actively try to kill the player, the fight in the south-east building where four archviles emerge from a lowering pillar where you have very little cover available is a memorable "oh shit!" moment, as is the incredibly claustrophobic red key fight. Fantastic map. MAP10 - Overtime: 20:10/5 Deaths Overtime is the culmination of Running Late 2's obsession with turning abstract combat arenas into realistic locations, being set on a large dam and the reservoir & desert surrounding it. It's another very unique setting, and the map uses the setting to create some interesting gameplay scenarios that make sense in the surroundings - such as the bridge over the dam being incredibly claustrophobic and impossible to escape. The cyberdemon on the other dam has a very good view over most of the map, and I would highly recommend SSGing him to oblivion when you get up close to him in the red key fight, as he can really ruin your day in the later parts of the map. We also get the best usage of the melee revenants yet, with the small horde that attacks you in a canyon - the are genuinely terrifying in this large a number because of how quick they are, and it is very easy to get overwhelmed at first unless you're being very aggressive with the rocket launcher. I'm sure the secret BFG would have been helpful for the reservoir section and the finale, but thankfully it's more of a case of "nice to have" than "mandatory for progression" with the difficulty of finding it being rewarded by the player having a much easier time in the final parts of the map. The final fight on the dam is very fun, a bunch of hell knights teleport in behind you, forcing you outside onto the dam, where around 50 pinkies, spectres & melee revenants await to block you in, bite you to death and allow the two cyberdemons to get free pot-shots on you. If you're able to push past the cyberdemons and let a spider mastermind distract one of the cybers by reenacting Gotcha! for the umpteenth time, then it's not too difficult to take out the other cyberdemon and the winner of the intense battle for the ages - besides, I always enjoy sitting back and watching a mastermind & cyberdemon have a brawl. While I'm not sure if Overtime is the best map in the wad (I've not made up my mind on that yet), if someone wanted to play one map in Running Late 2 and no other, it should absolutely be this one.
-
MAP08 - Graveyard Shift: 16:14/1 Death A slower-paced, more exploration & atmosphere focused map than really anything that's come before, I quite like Graveyard Shift as it's a nice break from the chaos of the previous maps. You can go nearly everywhere in the level from the beginning, though certain areas are more helpful to explore early than others. Jumping down into the water immediately nets you an SSG, but you'll be without a chaingun for a while, and the high density of imps & zombies make the SSG feel a bit overkill, whereas going to the crate room first will allow you to get a chaingun very early from a chaingunner, but will require clearing most of the area to get the high-up SSG. I like how your choice of where to go at the start of the level very obviously and meaningfully changes how you play the map, even if it only lasts for the first couple of minutes. Eventually, you'll make it outside which I really wasn't expecting, and was a nice change in scenery from the dark techbase interior. There's a fun little area where the water is painful due to exposed wires giving you an electric shock through it (or something lol) and I like how this is suggested to the player with more than just the "DANGER" textures on the wall. My main problem with this map is it's progression, the way to get the keys isn't very obvious and the blue door, which you have to go through is tucked away in a corner that is very easy to overlook. The finale loads you up with rockets and sets a small horde on you which is very fun to take out. Overall, this is a different experience to most of Running Late 2, but that definitely works in it's favour.
-
MAP06 - Rough Commute: 12:22/1 Death A small arena map set in a underground railway station, Rough Commute has a lot of fun to offer for it's size. The highlights are the main fights across the railway tracks, as you scramble between train cars, occasionally diving into one for cover and to resupply. As has been said before, something I really like about Running Late 2 is it's ability to use just enough doomcute to create the feeling that the map is actually set in a realistic location without that becoming a crutch and the gameplay suffering as a result. Admittedly, this does tend to mean that the doomcute in RL2 is less adorably primitive than the sort I normally really like, but it works very well in the context of the wad. If I had one complaint about the map, is that the space you have to play in is so large and open, it feels like the waves could have been a bit bigger - especially the final wave in the main train station area, which is very easy & mostly consists of pinkies - though I can understand that this is map 6 and A2Rob probably didn't want to start punishing the player too badly yet. The finale takes place in a flooded area below the train tracks and starts off fairly easily, until the archviles spawn at the back of the area and start resurrecting everything, guarded by the hell knight and imps that are in the way - it's a very fun fight and a good way to end off the first section of Running Late 2. MAP07 - Dead on Arrival: 7:52/0 Deaths The only map in RL2 that I didn't particularly like on my first playthrough and that feeling was pretty much the same today, Dead on Arrival is just kinda boring. It's set in a very symmetrical, generic techbase, with small changes in texturing to try to hide that, with the main differences being the rooms with the plasma gun & SSG in are differently shaped. After you kill the firing squad of hitscanners that's present in the central area and the raised corridors overlooking all sides of the map, the map becomes very easy with plenty of health, armour & rockets to deal with anything that's thrown at you. The thing that kills the map for me is the painfully dull use of the Dead Simple tags, which aren't used to change the arena in any meaningful way and feel very tacked on. It's not a bad map, and I'm only being harsh on it because the rest of the wad is so good that this one blip stands out to me, but I felt almost nothing when completing this which is a shame. Oh, and Into the Beast's Belly is annoying and I don't know why you'd use it instead of literally any other TNT midi :P
-
MAP05 - Rooftop Rampage: 21:57/1 Death Rooftop Rampage is also great. It's fast-paced gameplay starts to introduce the more slaughtery elements that will make their presence known as we go deeper into the wad, and it's use of custom textures to create the rooftop visuals are superb. The custom sky texture has a large orange area at the bottom which the custom textures fade into creating a really cool effect of the lower parts of these structures fading into the clouds - I remember that Ozonia did this too (and A2Rob has a guest map in that) so perhaps that's where that idea came from originally. The rooftop visuals aren't just for show either, parts of the map will take place on top of air vents, between buildings and on very precarious sections of concrete. The opening area of the map reminds me a lot of the opening area of Free Parking from Vanguard, they're both very small and mazey arenas filled with zombies, imps & tripwires to surprise you. I took my only death to the final wave in this area - should not have tried to punch chaingunners in hindsight. Going up to the roof itself brings you to the central courtyard, which you'll be spending a fair amount of time in, as each area brings you back here and refills it with baddies. You can get the red and yellow keys in any order, though the yellow key path also lets you grab the BFG, which is absolutely overkill for the fights in this map, but it's quite fun anyway. The red key path is very claustrophobic, with the challenge being to clear the areas quick enough to give you space to rocket archviles before they resurrect everything, and there's also a the wad's first cyberdemon, and I'm very happy to report that he appears alongside some other monsters making this already more interesting than a lot of first cyberdemons in wads. The yellow key path is much wider open, and more slaughtery. When you've cleared out the small rooftops with airvents, you drop into a corridor which spawns hell knights & imps on one side of you and mancubi on the other, with revenants firing at you from the next building over - this is a great fight and while I didn't have the BFG yet, it's not too difficult to rocket everything once you've got a little space. You then teleport over to the other building to deal with those pesky revenants up close. The final area is a little bit tame compared to this, and three archviles when you've got the BFG isn't particularly threatening, but that doesn't spoil the rest of the map at all! ~~~ One thing to remember for the times I post (can't speak for anyone else) is that they're the in game timer on the intermission screen, so any deaths are basically not included in my final time since I'll just reload before them! My own playstyle is fairly aggressive too, especially for mapsets like Running Late 2 that I know fairly well, since I find playing in a way that's not particularly concerned with my own survival is more fun for me - in the same way, I don't tend to bother searching for secrets anymore since I don't find that very enjoyable. I know not everyone plays this way, and that's fine because part of the fun of reading write-ups for me is seeing how people who play in a very different way to me experience maps, and they often spot things my short attention span forces me to miss :P
-
MAP03 - Under Construction: 8:31/2 Deaths Under Construction takes us back into a more technological setting, but with a twist. As you could probably guess from the name, the map we're fighting through is still Under Construction wahey. There's scaffolding and rebar everywhere, cracks in the walls, unfinished and broken doors and these details do a fantastic job of spicing up what could have been a fairly generic CC4-style techbase into something very memorable. The various broken walls and switches make the layout feel rather dynamic and I like how you initially get the rocket launcher in a wide-open street before being forced to use it in some very tight spaces later on in the map. Plasma gunners have basically joined the regular zombie rotation now, and I approve since I think they are an excellent addition to the game. While you can go pretty much anywhere at the start of the map, you'll want to go to the blue key area first since it gives you both a berserk pack, and an SSG (along with hosting the easiest of the three key fights). The yellow key area is a bit annoying with the perched hitscanners and plasma guys but it's nothing compared to the red key ambush. I was very low on health going into this, and the pre-key ambush of some zombies & imps made sure to soften me up before the main event, which is by far the hardest part of the wad so far. You're given tons of rockets to slow down the flow of heavies, but the rocket launcher becomes a much less enticing option when you're on 20% health and in close quarters. The final little area gives you a choice of left or right door, and I'd recommend picking the right door because it takes you to the high ground, rather than a shotgunner firing squad. Go through the little security office to unlock the exit and you'll finish a very fun map. MAP04 - Oil Rigged: 8:49/2 Deaths This is the first truly excellent map in Running Late 2 in my mind, with a unique and great idea for a setting, unorthodox vertical-focused gameplay and a banging MIDI to go along with it. While the oil rig itself is a bit low-poly, like most facsimiles of real things in the Doom engine tend to be, it gets the idea across perfectly well to me and the small details of using small towers with crushers in to represent drills extracting oil, and the quaint cargo ship that we board in the last part of the map really come together to create a setting that feels very unlike anything else I've played. The combat is very fun too, since the majority of the time you'll be fighting your way up the oil rig which is filled with fodder and a few nasty surprises the further up you get. The chaingunners on the bottom layer gave me the most trouble because it's hard to get in close to them because of the arachnotrons & cacodemons in the water, and while I'm trying to bully my way through them, I'm getting peppered with bullets. We get the plasma gun for the first time, and it's protected by a claustrophobic trap involving a crusher and a bunch of imps firing at you from the sidelines, and two surprise skeletons that scared the hell out of me before beating me to a pulp. The two key paths are fun too, and I like the series of fights on the ship, especially the wave of cacodemons, revenants & chaingunners that spawn in after grabbing the yellow key. I think this map is great!
-
Running Late 2 I've been looking forward to this, Running Late 2 is one of my favourite wads and a very big influence on my own maps. I revisited it a little earlier this year, trying to learn the UV-Max speedrun though I never actually ended up doing attempts (perhaps this will spur me on to do that again!) As before, I'm playing with DSDA-Doom v0.24.3, complevel 9, pistol starts, UV. Going for 100% kills, but I'm not too worried if I miss a couple here and there. MAP01 - Drip: 6:08/1 Death In classic Map01 fashion, Drip introduces us to a microcosm of Running Late 2 - clean, nicely textured maps with good lighting, flowing, easy to navigate layouts and gameplay that I would describe as a combination of skillsaw's "more bark than bite" take on run-and-gun combat with Erik Alm's fondness for traps and ambushes everywhere. I really enjoy the combat in this wad, it's satisfying to play and clear each ambush that is thrown at you and is the main reason why I like it so much. Drip plays around a lot with lowering floors, it's two main areas being revealed by the lowering water level in a central structure and I like that this is done in a way that feels like it makes sense in context of the map. I played pretty poorly in my runthrough, and took one death to a caco fireball as I was cornered by pinkies, but this map shouldn't give people too much trouble, even on UV it takes it very easy on the player, and despite the occasional "surprise!" you're never thrown into a situation that will kill you with no hesitation. We are also introduced to the first of Running Late 2's custom enemies, a melee only revenant that looks incredibly goofy. They're a decent addition to the monster roster, being a slightly more scary pinky that you can still use the timing of revenant punches to deal with, though (from memory) they will appear in large hordes later on and be absolutely terrifying. I think this is an excellent opening statement for the wad. MAP02 - Chinatown Beatdown: 7:38/0 Deaths We exit the water treatment plant, and enter a Chinatown filled to the brim with Shadow Warrior textures that surprisingly don't look very out of place. Fitting for the name, this is a tyson map and of the two categories that tyson maps tend to fall into, them being "absurdly fucked up" or "pretty doable, if I'm being honest", this falls into the latter which is a nice change from some of the painful tyson maps I have played recently. There's a couple of harsh moments, but most of the monsters are very easily punchable (the only ones in the entirely map that aren't are two cacodemons) so those who aren't familiar with punching out the bulkier foes won't have a miserable time. Entering Lo Wang's Dojo of Death starts a wave-by-wave ambush which I think is the hardest part of the map, the zombies will whittle away your health, the imps & pinkies will likely get a couple of hits in, but those shotgunners that are *slightly* out of punching range are downright mean. The ending of the map introduces the other custom monster, which is a plasma guy that fires plasma in bursts of two. They will be used a lot in the wad, and I really like them. I thought Duke 3D's In Hiding was an odd choice of MIDI when I first played the map, but I quite like how understated it is and combined with the red sky, the map has a lot of foreboding atmosphere for a map that is entirely based around punching stuff :P