-
Posts
24 -
Joined
-
Last visited
About Ankha
-
Rank
Warming Up

Recent Profile Visitors
The recent visitors block is disabled and is not being shown to other users.
-
I was intrigued by a playthrough I've seen on Youtube, and hopefully I stopped watching it rapidly to play it myself. OMFG. It's probably the best WAD I've ever played (in its category, we're not talking about slaughtermaps here). Every 5 minutes I was like "WTF? No way that... ohhhhhhh that's so cool" Then the whole dimension of the wad changes and leaves you mindboggled. I ultimately read some spoilers and it expended the game even more. A true masterpiece, full of meaningful details and a kind of true story with a unique atmosphere. Wow.
-

What are your memorable moments from playing DooM for the first time?
Ankha replied to IHave10Shells's topic in Doom General
I was fascinated by the blue potions and the glowing supercharge, and the map in the intermission screen. I also remember collecting the items awarding points, but I wonder if it's not a fake memory as it was only in an early version of doom. -
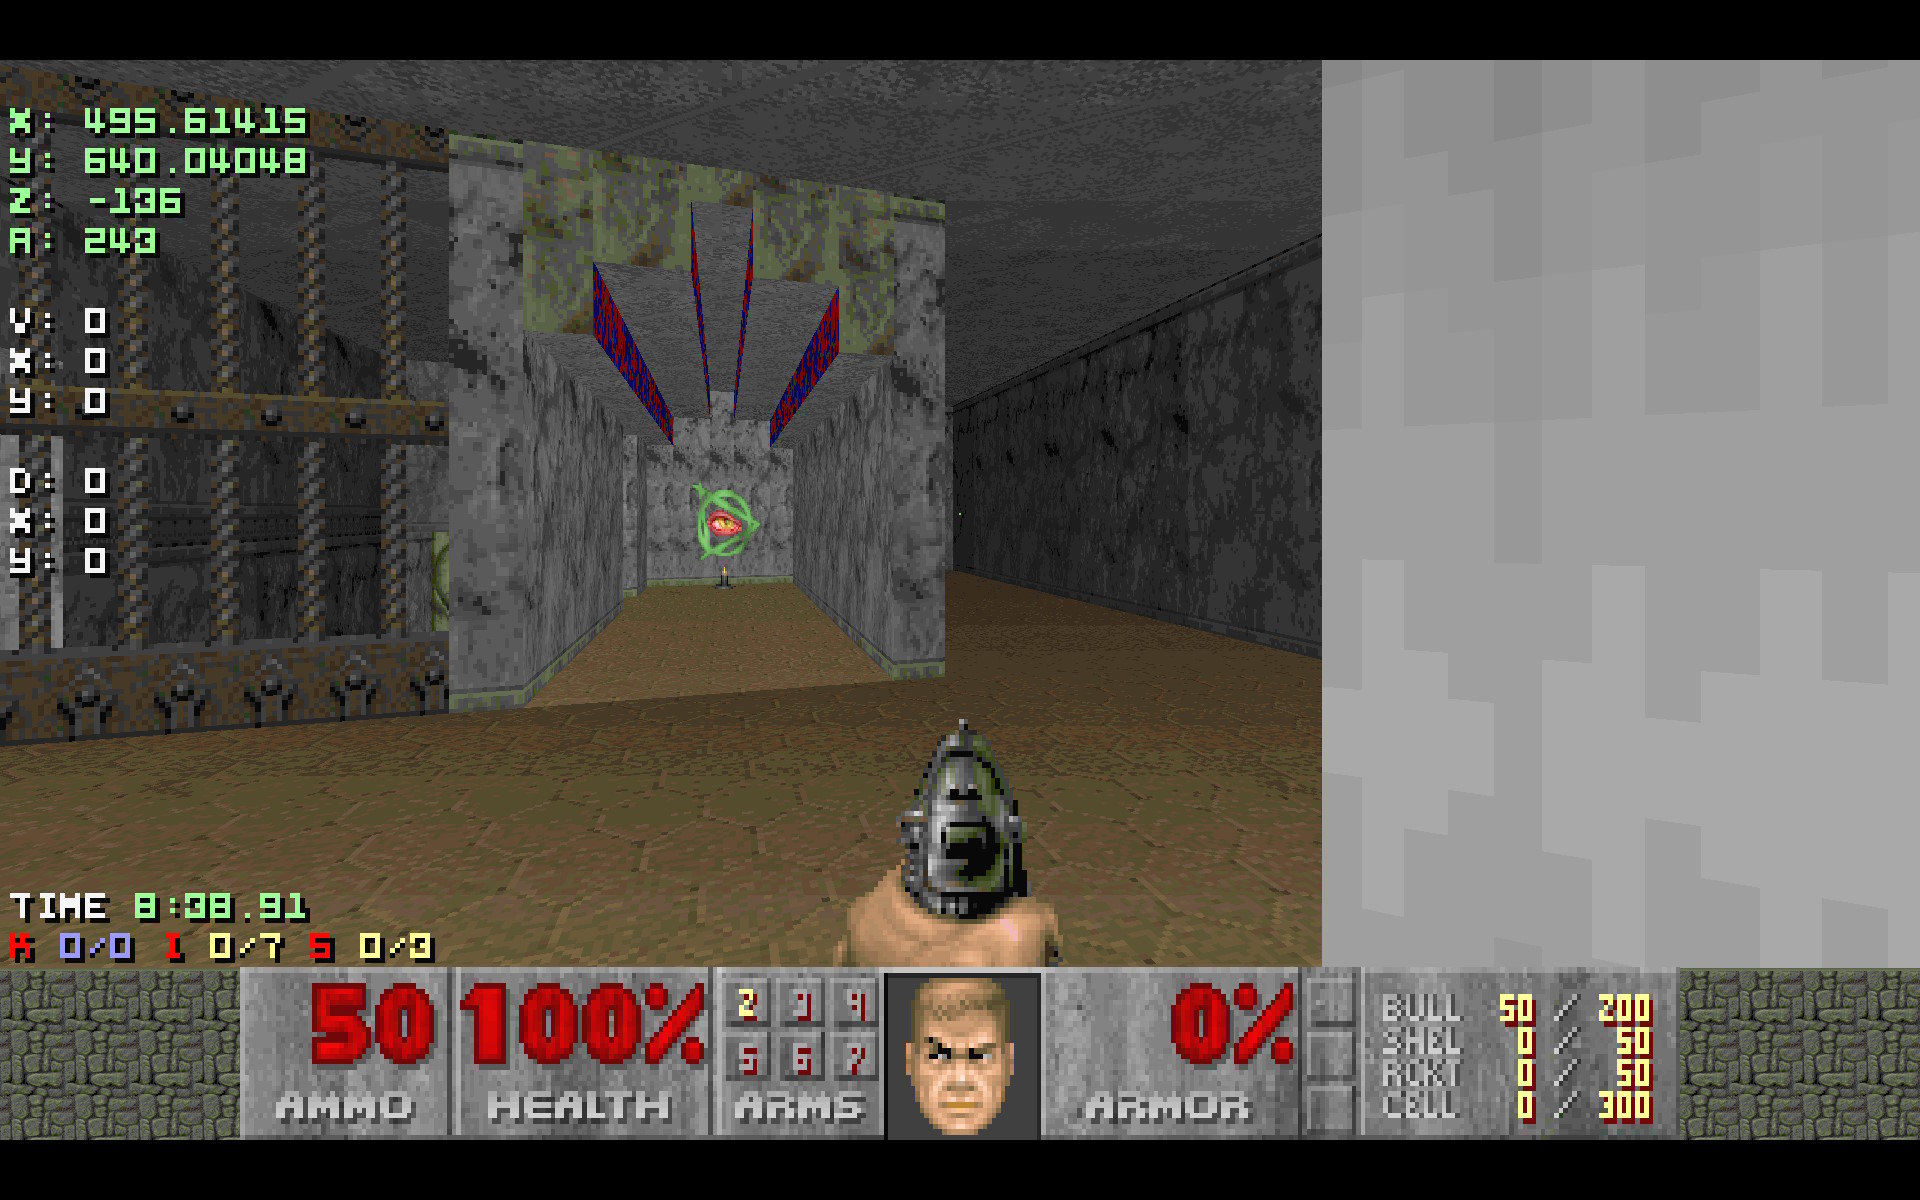
Well, since I couldn't find a detailed explanation about how to perform the glide properly 100% of the time, here we are! First, see my other post https://www.doomworld.com/forum/post/2611019 about the settings. Now, position yourself in the middle gap, and aim for the far corner on the right, the closest angle to the passageway right wall near you. That's angle 243 for those who want to practice (see picture) Now that you're comfy and well stuck between the bars, simply press forward. Multiple things can happen now: your weapon is trembling a lot => try again your weapon is trembling a little but regularily and smoothly => try again your weapon is trembling jaggily and jumps from time to time => you're good, just keep moving for a little more than 2 seconds you're so lucky you get right through => perfect To try again, just quickly hit the strafe left button then forward to position yourself again. I hope this will help (it will certainly help me since I forget from times to times the technique).
-

Is there any video tutorial of the "zero press" trick?
Ankha replied to El Juancho's topic in Other Demos & Discussion
And I didn't find it when looking for hints or tutorials about the subject. -

Is there any video tutorial of the "zero press" trick?
Ankha replied to El Juancho's topic in Other Demos & Discussion
Having difficulty finding explanations and tutorials myself, I looked into the subject to see if one could easily reproduce the zero press. I don't like Doom2 Map 7 (because I haven't mastered the rocket jump in Doom2 yet), so I was looking for a lazy way to end the level. In fact, it's quite easy to reproduce once you know how to do it! I will also give my configuration, as it is difficult to find a post that clearly states which bindings/port etc. to use. I've discovered dsda-doom, I recommand it. It's a fork of prboom which is pretty close to vanilla doom for the rendering. dsda-doom's default setup is a little different however (textured minimap) but there are a lot of cool features such as autorename of the demos, and the possibility to display the doomguy's coordinates. We won't use them, but it was helpful when I was trying to understand what was going on, and how to reproduce consistently the zero press. There's also a useful setting in dsda which is the "Mouse strafe divisor" (in Options > General). I set it to 256. Basically, it will decrease the mouse sensity when strafing with it, allowing to adjust the position precisely. It has no impact on SR50, which is important. Once last thing: set "movement_shorttics" to 1 in the config file. This is the default when recording demos, but if you want to practice otherwise, you'll need to set it. It reduces the angle step to 1, meaning you can face only 256 directions and it's much easier to set the player at the right angle. My bindings are: WASD, mouse right click for strafe (makes SR50 easy to achieve). The rest is not important. Also, I use the dot crosshair, once again to adjust position. Now, the zero press in MAP07: Press the switch and move forward until you reach the pedestal with the rocket launcher. Stay close to it, and face south. If you display the angle, it should be 192. There's also a visual hint: your crosshair should be a little left to the rocket in front of you (if you turn right a little, with the shorttick your crosshair would be right to it). Now, keep your mouse button pressed to lock the angle and move towards the central pedestal. Your goal will be to have your crosshair on the right edge of the exit cube (the one with an eye). To achieve this, strafe with the keys and do the final adjustment with the mouse strafe. The "Mouse strafe divisor" allows you to fine-tune it. It works better if you aim just a little to the right of the edge. Now press forward. Since you're heading south, you shouldn't move at all, but the small fractional errors make you move to the left very slowly. Keep hitting the use button until you press the exit button (in fact, its right side due to a fractional rounding bug). If you move to far on the left, readjust your position with a right strafe with the mouse. If you display your coordinates, the trick works when the X is between -640 and -640.01545 (roughly). Y doesn't really matter as long as you stand the closest to the pedestal (it should be betwen -47.62000 and -48). I've attached a small demo file to illustrate this. Enjoy! zeropress-map07.zip -

[MBF] 𝚃𝚑𝚎 𝙼𝚊𝚐𝚎𝚗𝚝𝚊 𝚂𝚙𝚒𝚛𝚎 - Now on idGames !!
Ankha replied to thelamp's topic in WAD Releases & Development
I warped to the following level (the last of the first episode), and got an error on the end screen ("The end.") => --------------------------- PrBoom-Plus --------------------------- W_GetNumForName: HELP2 not found --------------------------- OK --------------------------- -

[MBF] 𝚃𝚑𝚎 𝙼𝚊𝚐𝚎𝚗𝚝𝚊 𝚂𝚙𝚒𝚛𝚎 - Now on idGames !!
Ankha replied to thelamp's topic in WAD Releases & Development
Well, maybe the poor experience I have is because I don't play on the expected complevel. I always read the readme.txt, but I didn't make the connection between "Advanced engine needed : MBF" and a required complevel (it could be made clearer I suppose). I wonder if it's the reason I got attacked by the "friendly marines" :D -

[MBF] 𝚃𝚑𝚎 𝙼𝚊𝚐𝚎𝚗𝚝𝚊 𝚂𝚙𝚒𝚛𝚎 - Now on idGames !!
Ankha replied to thelamp's topic in WAD Releases & Development
Ok, I suppose the save state contains the compatibility level. So I saved the game playing with the default compatibility level 3, and it can't be changed (even when prboom is launched with another complevel). If I restart the level with complevel 11, it seems to work. However, it's very weird that a switch doesn't work due to a different complevel. What's special with that switch? -

[MBF] 𝚃𝚑𝚎 𝙼𝚊𝚐𝚎𝚗𝚝𝚊 𝚂𝚙𝚒𝚛𝚎 - Now on idGames !!
Ankha replied to thelamp's topic in WAD Releases & Development
It doesn't work for me, even when setting complevel to 11. :/ I even restarted the level to be sure. -

[MBF] 𝚃𝚑𝚎 𝙼𝚊𝚐𝚎𝚗𝚝𝚊 𝚂𝚙𝚒𝚛𝚎 - Now on idGames !!
Ankha replied to thelamp's topic in WAD Releases & Development
Yes, this switch doesn't do anything when activated or shooted at (prboom-plus-2.61-um). EDIT: I have added the save file. prboom-plus-savegame0.zip -

[MBF] 𝚃𝚑𝚎 𝙼𝚊𝚐𝚎𝚗𝚝𝚊 𝚂𝚙𝚒𝚛𝚎 - Now on idGames !!
Ankha replied to thelamp's topic in WAD Releases & Development
Ok, I gave up looking for the hidden switch after spending more than one hour total on the map. I found a hidden switch for the megaarmor, and inactive eye switch but I'm tired looking for a hidden switch to progress on the main track (hidden switches should be used only for secrets). Unless the yellow key is a secret, but I can't find a way to progress anyway. Maybe there's a bug in the level. I'll move to the next cacoward WAD, sorry :) -

[MBF] 𝚃𝚑𝚎 𝙼𝚊𝚐𝚎𝚗𝚝𝚊 𝚂𝚙𝚒𝚛𝚎 - Now on idGames !!
Ankha replied to thelamp's topic in WAD Releases & Development
Well well, I've started playing the WAD a few days ago but I'm not thrilled so far. The atmosphere is nice, but I don't like the level design. Visibility is poor most of the time (too many half-transparent non-solid walls), damaging sectors are random (for instance in the large room on E1M2) at the point you start wondering if there are not hidden snipers, some monsters are terrible (stuttering flying imps in E1M5; I also got locked by falling somewhere in the map between two walls), secrets are not very consistent. Being glad to find the exit is usually not a good sign as I love to explore levels thoroughly. Now I'm stuck on E1M6 looking for a yellow key or any way to move forward but boy I'm getting bored. I was expecting something better from the winner of the #1 Cacoward 2022. -
Since I can't find any demo submissions related to Tarnsman's Projectile Hell, here it goes (my first submission). The wad is compatible gzdoom and Eternity. Unfortunately, gzdoom has its own demo format apparently, so I had to make to run twice. The worst thing is I dislike both gzdoom and eternity (I prefer prboom). Also, there is no summary page at the end of the E1M8 level, so I had to measure time using a chronometer... Did I tell you it was my first submission? The time can be improved, I think there's a way to pass the red room's archviles without killing them all and save a lot of time. If I did anything wrong (including invalid complevel), I'd be pleased to know. UV Speed: tph_e1m8.zip
-
Very cool map. Man, it's huge! Gosh, the details! I played it on UV (probably a mistake, I had to perform a "few" saves during fights), and man I hate the Draugrs. The map is a nice balance between exploration and slaughtermap (which I'm not a big fan because it's sometimes repetitive and frustrating, but they are short and intense in AL, so that's great), and has a ton a cool features. It has its share of unfair encounters (the hell pit with the Draugrs, the Spider Mastermind with the Draugrs... yeah, I really don't like them), and sometimes it's hard to know whether you need to save ammo for later (like heavy slugs) or not. The thing I don't like is the platforming. It's not very interesting in a game where you can't jump (IMHO). That's why I really don't like the final fight: repetitive, unfair, and frustrating to navigate. Pro: - visually gorgeous - plenty of places to visit with different moods - some epic fights - clever level design with areas connecting to each other throughout the game Cons: - some unfair fights - easy to get lost and don't know what to do next (especially when looking for the green skull key) - some platforming adding nothing interesting 9/10 A well-deserved cacoward


